
В State of Decay 2 транспорт является очень важной частью игры. Бродить везде на своих двоих очень утомительно – нужные места разделяют между собой большие расстояния, по пути встречается огромное количество зомби, а нести на себе вы сможете не очень много. Именно поэтому вам всегда нужен транспорт. К сожалению, автомобили в игре не очень крепкие. Их очень легко сломать, если вы не будете избегать столкновений с ордами. Поэтому очень важно знать, где можно найти новый. В этом гайде мы покажем вам все места в State of Decay 2, где можно найти машину.
Местоположение автомобилей в Каскадных холмах
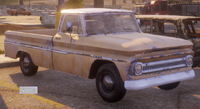
В этой локации машины, в основном, расположены недалеко от дорог. Здесь находится несколько военных пикапов. Один из них брошен около начальной базы. В начале игры вам придется сделать выбор между быстрой машиной (которая расходует меньше топлива) и автомобилем с вместительным багажником. И тот, и другой вариант вы сможете найти недалеко от начальной базы, поэтому мы рекомендуем вам в качестве начальной зоны выбирать именно эту область.

Местоположение машин в округе Дракера
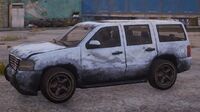
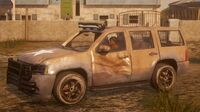
В округе Дракера сосредоточено множество автомобилей, большинство из которых находится вблизи поселений. Мы советуем остановить свой выбор военный пикап или пикап со скребком для чистки снега – они здесь самые стоящие. К тому же в этой области таких автомобилей несколько. Они не такие быстрые, как некоторые другие более спортивные модели, но зато обладают хорошей вместительностью и улучшениями, которые прекрасно подходят для борьбы с зомби.
Транспорт в долине Мигера
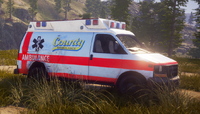
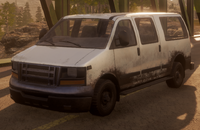
Базовый транспорт в долине – это карета скорой помощи. Вполне неплохой вариант. Он может похвастаться внушительным багажником, но в остальном у него нет значительных преимуществ. Если вы захотите заменить его на другое авто, то большинство из них сможете обнаружить к северо-востоку от города. В других областях тоже есть несколько машин, но не в таких количествах.

Источник: www.gosunoob.com
Vehicles are an important part of State of Decay 2. Going everywhere on foot is tedious – places are far apart, there’s a lot of zombies by the wayside, and you can’t carry as much. That’s why you’ll need a vehicle at all times. Sadly, cars and trucks in the game aren’t really sturdy – it’s easy to get them to break down if you don’t avoid collision with the hordes. That’s why it’s important to know where to find a new one. In this guide, we’re going to show you all State of Decay 2 vehicle locations.

Cascade Hills vehicle locations
The vehicles in this area are mostly close to roads. There are several military trucks in the area – one of them is near the starting home base. In the early game, you’ll have to make a choice between a fast car (which uses up less fuel), or one with a big trunk. You can find both near the starting base here, so we’d recommend you pick this area as your starting zone.

Drucker County car locations
Drucker county has a bunch of vehicles, and most of them are clustered around settlements. We’d recommend either a utility truck, or a military truck – they’re the most durable ones, and there are a few of each in the area. They’re not as fast as some of the more sports-oriented models, but they have quite a bit of storage space, and enhancements that make them great for running down zombies.

Meager Valley vehicles
The starting vehicle in Meager Valley is the ambulance truck, which is a pretty decent ride. It boasts a sizeable trunk, but not much else. If you want a replacement, you’ll find most in the city in the northeast. Other areas also have some, but not in those quantities.


Want to find the fastest vehicles or highest capacity vehicles on any map in State of Decay 2? This State Of Decay 2 Vehicle Guide – All Maps will tell you what vehicles you can find on each of the maps, where you can find them and information on various statistics such as speed, seats, carrying capacity and where you can find each vehicle location.
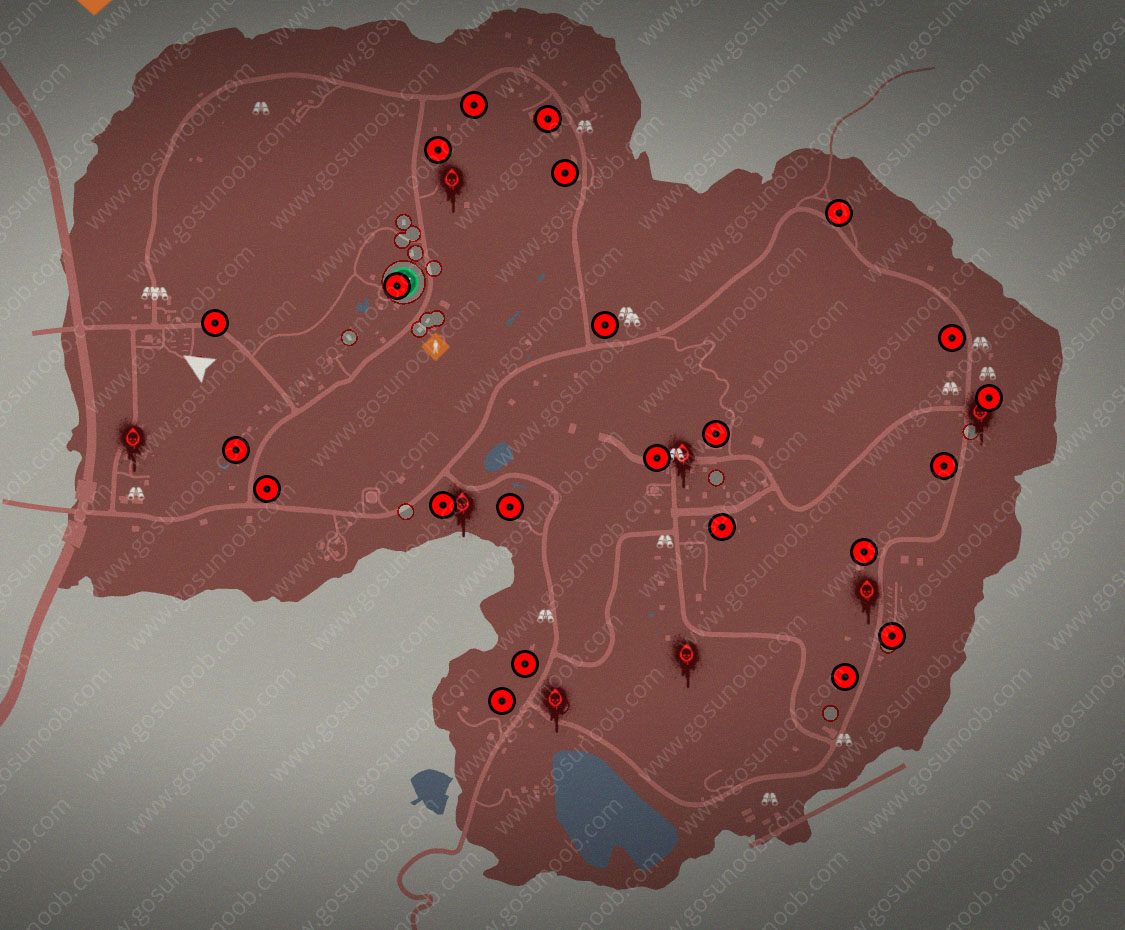
While some of the vehicles are present across multiple maps, the vast majority are exclusive to one of the three large maps with the game. Whilst each area has certain random elements, most of the vehicle spawns are in the same or a very nearby location. Using your map you can zoom in a little and you will notice vehicles displayed as a small car icon. Highlighting the icon will tell you the name of the vehicle.
Below are lists of all vehicles in State of Decay 2 on a map by map basis.
State Of Decay 2 Vehicle Guide – Drucker County
State Of Decay 2 Vehicle Guide – Meagher Valley
State Of Decay 2 Vehicle Guide – Cascade Hills
We are updating this State Of Decay 2 Vehicle Location Guide – All Maps guide as we progress through the game.
State Of Decay 2 Guides

Posted
May 18, 2018
in
State Of Decay 2 Guides
State Of Decay 2 Legacy Boon Guide
Once you complete State of Decay 2 you get special rewards in the form of Legacy Boons. This State Of Decay 2 Legacy Boon Guide will explain the basics of the Legacy rewards system including details surrounding each of the Legacy Boon’s you receive when completing the game.

10 Things You NEED To Know Before Playing State Of Decay 2
With State of Decay 2 just hours away from its official release, we’ve got a list of 10 Things You NEED To Know Before Playing State Of Decay 2. Whether you’re a post-apocalyptic zombie veteran or venturing into the world of the undead for the first time, you won’t want to miss these vital tips.

How To Get Influence Points Fast In State Of Decay 2
Influence Points are the money currency in State of Decay 2. This guide will tell you various techniques for How To Get Influence Points Fast In State Of Decay 2 so you can unlock that brand new base, pickup some incredible weapons and use your radio for various requests to other communities.

5 Best Weapons In State Of Decay 2
Finding and looting the most powerful weapons is fun as hell in State of Decay 2. As such we’ve put together a list of the 5 Best Weapons In State Of Decay 2 including a variety of weapon types that make dispatching of the endless hordes of undead that more satisfying.
Blaine Smith
Blaine «Captain Camper» Smith is one of the original founders of Gamers Heroes. Now operating under the guise of Editor-in-Chief (purely because we felt the position was needed for public relations purposes), he’s tasked with a lot of the kind of jobs that would put you to sleep at your desk.
When he’s not catching some Zs, you’ll likely find him arguing points he knows nothing about, playing the latest rogue-like he’ll never complete, or breaking something on the website that never needed fixing.
You can best reach him on Twitter
Back to top button
Автомобили, логично, единственное транспортное средство в игре. Мы поделимся советами и хитростями, как не слишком сильно повреждать автомобили и продлевать им жизнь, насколько это возможно.
Типы автомобилей
Для простоты понимания разделим на категории лёгкие, средние и тяжёлые.
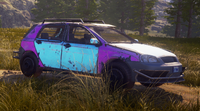
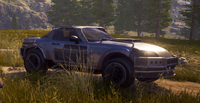
Лёгкие
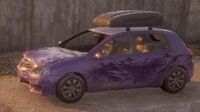
Быстрые и юркие. Но из-за этого быстрее ломаются. Ломаться автомобили в State Of Decay 2 могут только от повреждений. Повреждениями считаются сбивания зомби, столбов и так далее. Иными словами всё, что несёт в себе физический урон. Кататься на таких автомобилях весело, в основном из-за их скорости и возможности потрясающе эффектного заноса. Это весело. Но вместе с этим они быстро приходят в негодность. К тому же, лёгкие автомобили ограничены количеством посадочных мест для пассажиров и багажника. От 2 до 4 мест в легковом автомобиле и до 4 слотов в багажнике. Поверьте, это мало. С учётом того, что всегда хочется забрать с собой побольше и принести всё на базу за один заход.
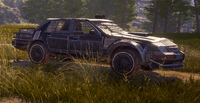
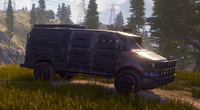
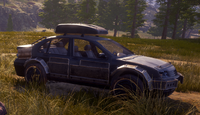
Средние
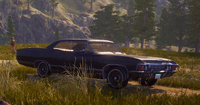
В основном седаны и небольшие фургоны. Мы рекомендуем использовать их как ваш основной транспорт. Их сломать уже труднее, да и вмещают от 4 пассажиров и от 5 слотов в багажнике. Крепкие, достаточно быстрые.
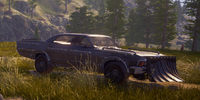
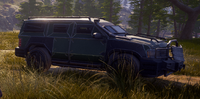
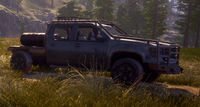
Тяжёлые
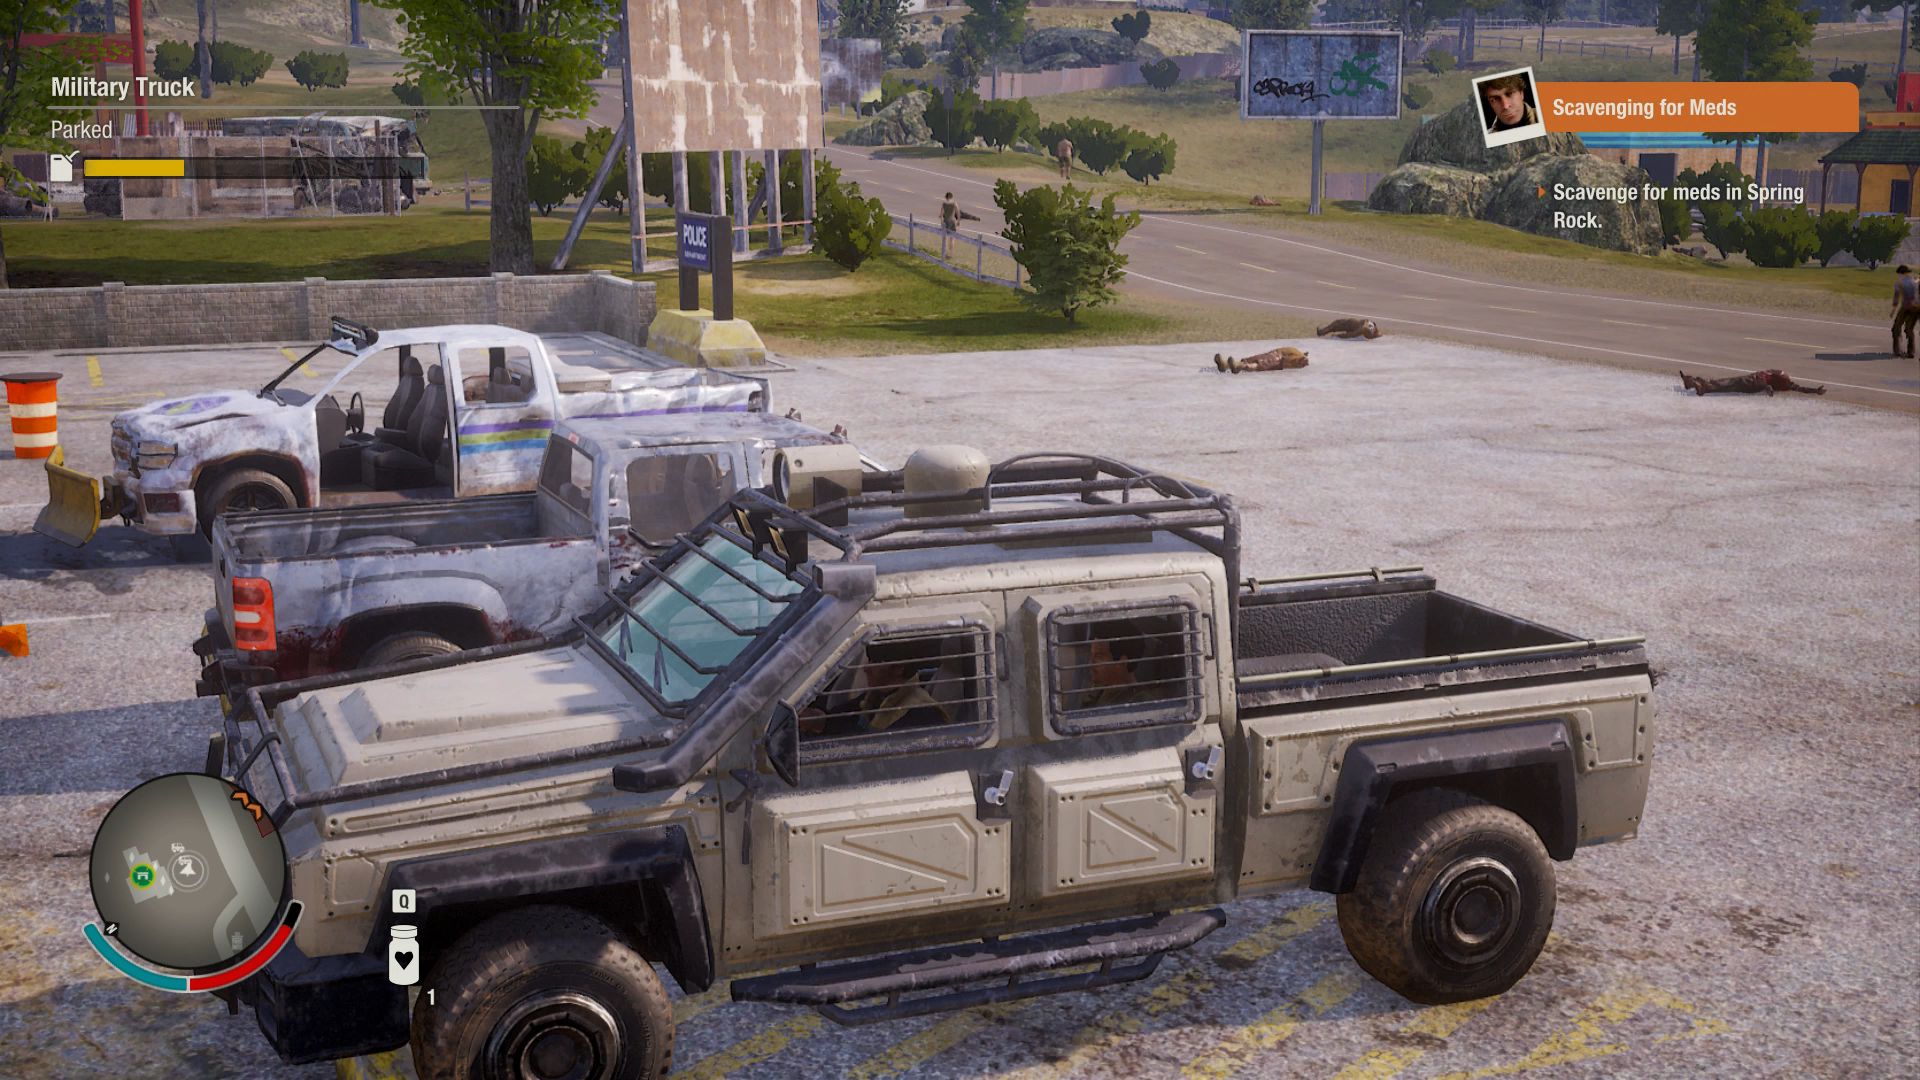
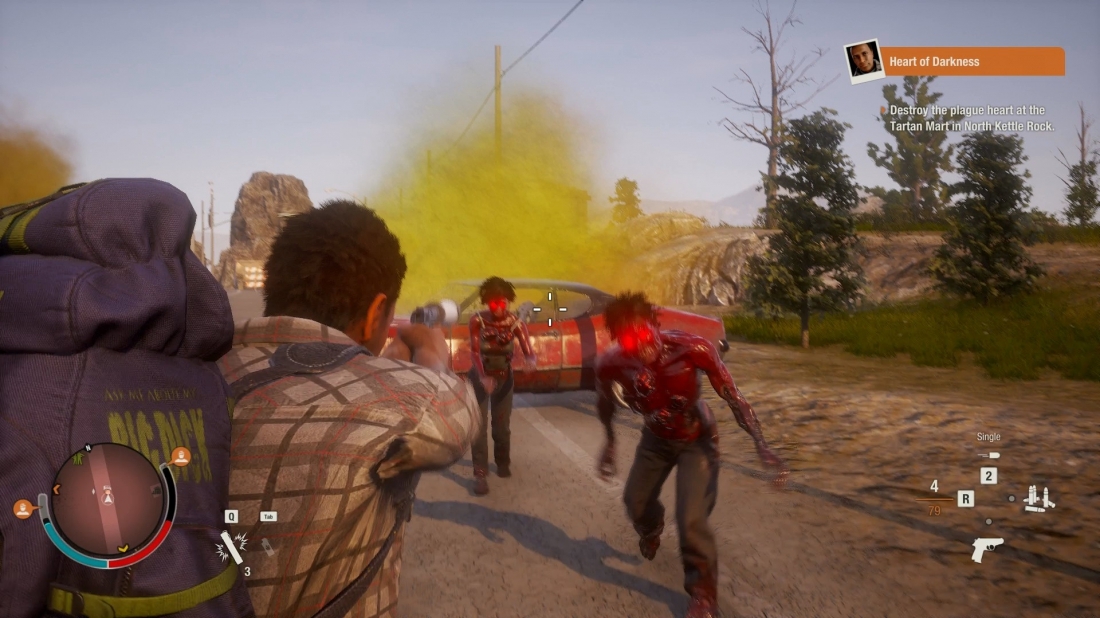
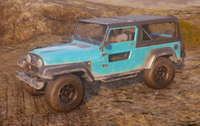
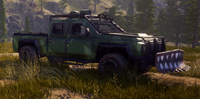
Исключительно внедорожники. Тот что вы видите впереди на скриншоте — военный внедорожник, редчайший экземпляр в игре. Также он является самой крепкой машиной из тех, что можно найти. Внедорожники вмещают также от 4 пассажиров и от 5 слотов в багажнике.
Что объединяет автомобили
Объединяет их, ясное дело, урон. Но ещё — расход топлива. В отличие от первого SOD, во второй игре бензин в автомобилях может исчерпаться. Вы всегда можете посмотреть количество толпива в автомбиле, просто сев в него. Если вы играете без читов, обязательно храните в багажинке одну канистру с бензином! Если под рукой такой нет, а вы собрались в долгую поездку, то зайдите на базу и посетите склад. Там через меню базы вы можете воспользоваться 1 единицей ресурса топлива, чтобы превратить его в одну полную канистру.
А теперь к урону. Автомобили можно уничтожить случайно, или из-за зомби. Если, допустим, вы что-то лутаете, но вдруг поднялся шум и за вами бежит толпа зомби, будет разумным быстрее прыгнуть в автомобиль. Но если вы будете менее расторопным, то зомби накинуться на машину. Они могут запрыгнуть на копот или зацепиться за двери. Шкрябая по капоту, зомби могут повредить двигатель. Ударясь об двери, вы рискуете эти двери потерять. Из-за чего ходячим мертвецам будет легко вас достать из машины даже на ходу.
Поэтому если уж зомби запрыгнули на вашего железного коня, как можно скорее сборсьте их. Достаточно будет проехать впритык мимо какой-нибудь стены или забора, или резко затормозить на полном ходу.
Важный момент: уникальный зомби дикарь (бешенный) выламывает дверь с двух ударов! А толстяк (джаггернаут) способен перевернуть ваш автомобиль.
Но есть ещё кое-что. Если вдруг уникальный зомби гниляк (он взрывается газом рядом с вами или после попадения в него чем угодно) взорвётся рядом с машиной, в которой вы находитесь, вы рискуете погибнуть. Газ очень быстро вас отравляет, поэтому автомобиль на протяжении как минимум 15 секунд будет просто непригодным для езды. И вам, если захочется спасти персонажа, придётся выпрыгнуть из авто. Но закончится это может также, мягко говоря, не весело. На шум могут сбежаться ходячие. А ввиду полученного урона от гниляка, сражение даже с несколькими обычными зомби будет весьма проблематичным:
Вот так выглядит эффект взрыва гниляка рядом с автомобилем. Приятного мало.
Следующий общий пункт всех автомобилей это шумность. Рёв двигателя привлекает ходячих. К слову, вы можете воспользоваться клаксоном чтобы нашуметь ещё больше. Это полезно если вам нужно отогнать куда-нибудь орду.
И наконец, последний пункт:
Автомастерская

Автомастерскую можно сделать путём улучшения обычной мастерской до 3 уровня и выбора специализации мастерской. Либо, куда проще, поставить сразу автомастерскую. Но под неё всегда необходим большой слот, а не маленький. К тому же, для автомастерской нужен персонаж с навыком механики.
Чем полезна автомастерская?
Во-первых, вы сможете крафтить инструменты для починки автомобилей. А во-вторых ставить улучшения! Под улучшениями подразумевается подавление шума и укрепление брони. Такие улучшения позволят увеличить жизненный цикл автомобиля на куда более долгий срок.
Но помните главное — автомобилей на карте немало. Плюс, если у вас полное издание (сюда относится и Jaggernaut Edition), вы сможете по рации «вызывать» нужные автомобили. Так что не беспокойтесь, если ваш любимый железный конь сломался окончательно.
Взяв в руки инструмент для починки, вы сможете отремонтировать автомобиль в любом состоянии. Даже если он был взорван гранатами.
Vehicles are the most important means of transportation.
About Vehicles
Using a vehicle is the best way of transportation: They’re fast, safe, and have a trunk allowing you to extend your carrying capacity. Well, as long as you can refuel it and keep it roadworthy of course. Some vehicles are better than others, but you can never go wrong with having any of them.
Fuel Economy
The following values have been derived from the game’s asset definitions.
Every car has a couple classifications that determine it’s fuel economy: what size of fuel tank it has and its consumption rate. There are four fuel tank sizes (small, basic, big, and massive) and two fuel consumption rates (low and high). Each fuel can contains 1.8 units of fuel.
Low and high fuel consumption rates are given at a rate of 0.60 and 0.75 units per minute of runtime. There is mention of RPMs, implying the consumption rate may vary with vehicle speed. Meaning, an idle vehicle may have a slower consumption rate than one at top speed. Lastly, the apocalypse variations often have different tank sizes and consumption rates than their stock counterparts, so keep that in mind when upgrading vehicles.
| Fuel Tank Size | Fuel Capacity (Units) |
No. of Fuel Cans | Milage in minutes (Low Consumption) |
Milage in minutes (High Consumption) |
|---|---|---|---|---|
| Small | 2.80 | 1.56 | 4.67 | 3.73 |
| Basic | 3.36 | 1.87 | 5.6 | 4.48 |
| Big | 4.20 | 2.33 | 7 | 5.6 |
| Massive | 5.04 | 2.80 | 8.4 | 6.72 |
Stock Vehicles
| Name | Picture | Description | Trunk | Seats | Tank Size | Fuel Usage | Upgrades into (Upgrade Kit) |
|---|---|---|---|---|---|---|---|
| Ambulance |
|
2-Door Van | 9 Slots | 2 Seats | Big | High | Vandito (Heavy) |
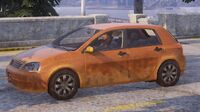
| Brogan Rapscallion |
|
4-Door Hatchback | 5 Slots | 4 Seats | Basic | Low | Hellion (Light) |
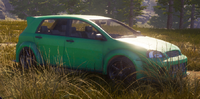
| Brogan Sport |
|
4-Door Hatchback | 5 Slots | 4 Seats | Basic | High | Hellion (Light) |
| Brogan Trekker |
|
4-Door Hatchback | 8 Slots | 4 Seats | Basic | Low | Hellion (Light) |
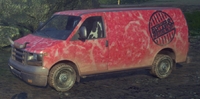
| Cargo Van |
|
2-Door Van | 15 Slots | 2 Seats | Big | High | Vandito (Heavy) |
| Desperado |
|
2-Door Jeep | 8 Slots | 2 Seats | Big | High | Trail Beast (Light) |
| Legendre |
|
4-Door Muscle Car | 4 Slots | 4 Seats | Big | High | Impaler (Medium) |
| Maximilian |
|
2-Door Muscle Car | 4 Slots | 2 Seats | Basic | High | Mega Max (Medium) |
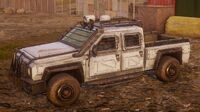
| Military Truck |
|
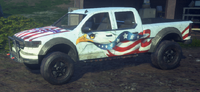
4-Door Armored Pickup | 8 Slots | 6 Seats | Big | High | The Big Boss (Heavy) |
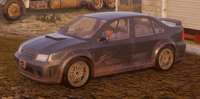
| Miragra |
|
4-Door Sedan | 4 Slots | 4 Seats | Basic | Low | Wichita ES (Medium) |
| Miragra NT |
|
4-Door Sedan | 4 Slots | 4 Seats | Basic | High | Wichita ES (Medium) |
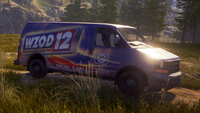
| News Van |
|
2-Door Van | 8 Slots | 2 Seats | Big | High | Vandito (Heavy) |
| Norma |
|
2-Door Pickup | 7 Slots | 4 Seats | Big | High | Zedbuster (Light) |
| Passenger Van |
|
4-Door Van | 9 Slots | 4 Seats | Big | High | Vandito (Heavy) |
| Pilato |
|
4-Door SUV | 8 Slots | 4 Seats | Big | Low | Smashwagon (Heavy) |
| Pilato CR |
|
4-Door SUV | 9 Slots | 4 Seats | Big | High | Smashwagon (Heavy) |
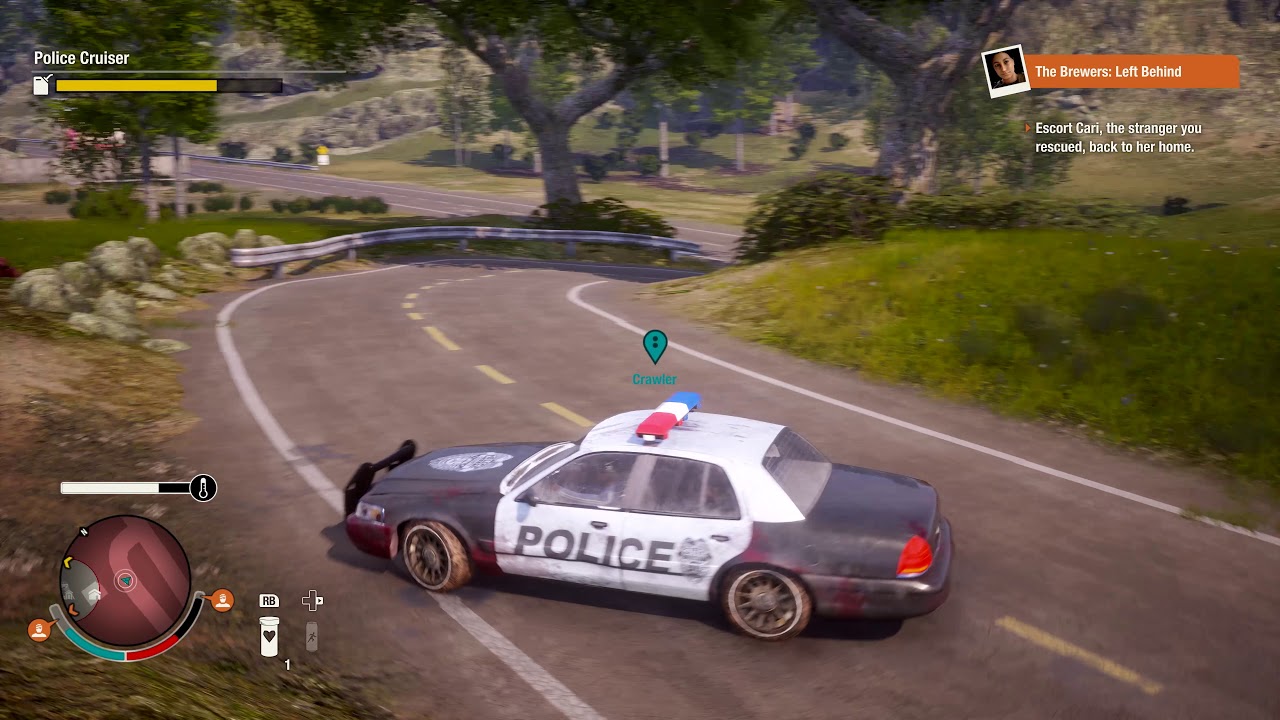
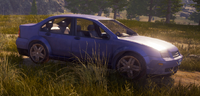
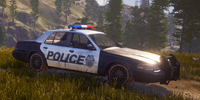
| Police Cruiser |
|
4-Door Sedan | 4 Slots | 4 Seats | Basic | High | Kaiser (Heavy) |
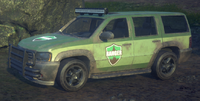
| Ranger SUV |
|
4-Door SUV | 8 Slots | 4 Seats | Big | High | Smashwagon (Heavy) |
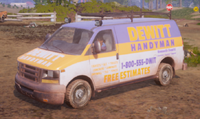
| Repair Van |
|
2-Door Van | 12 Slots | 2 Seats | Big | High | Vandito (Heavy) |
| Rhames V |
|
4-Door Pickup | 7 Slots | 6 Seats | Big | High | Viking (Medium) |
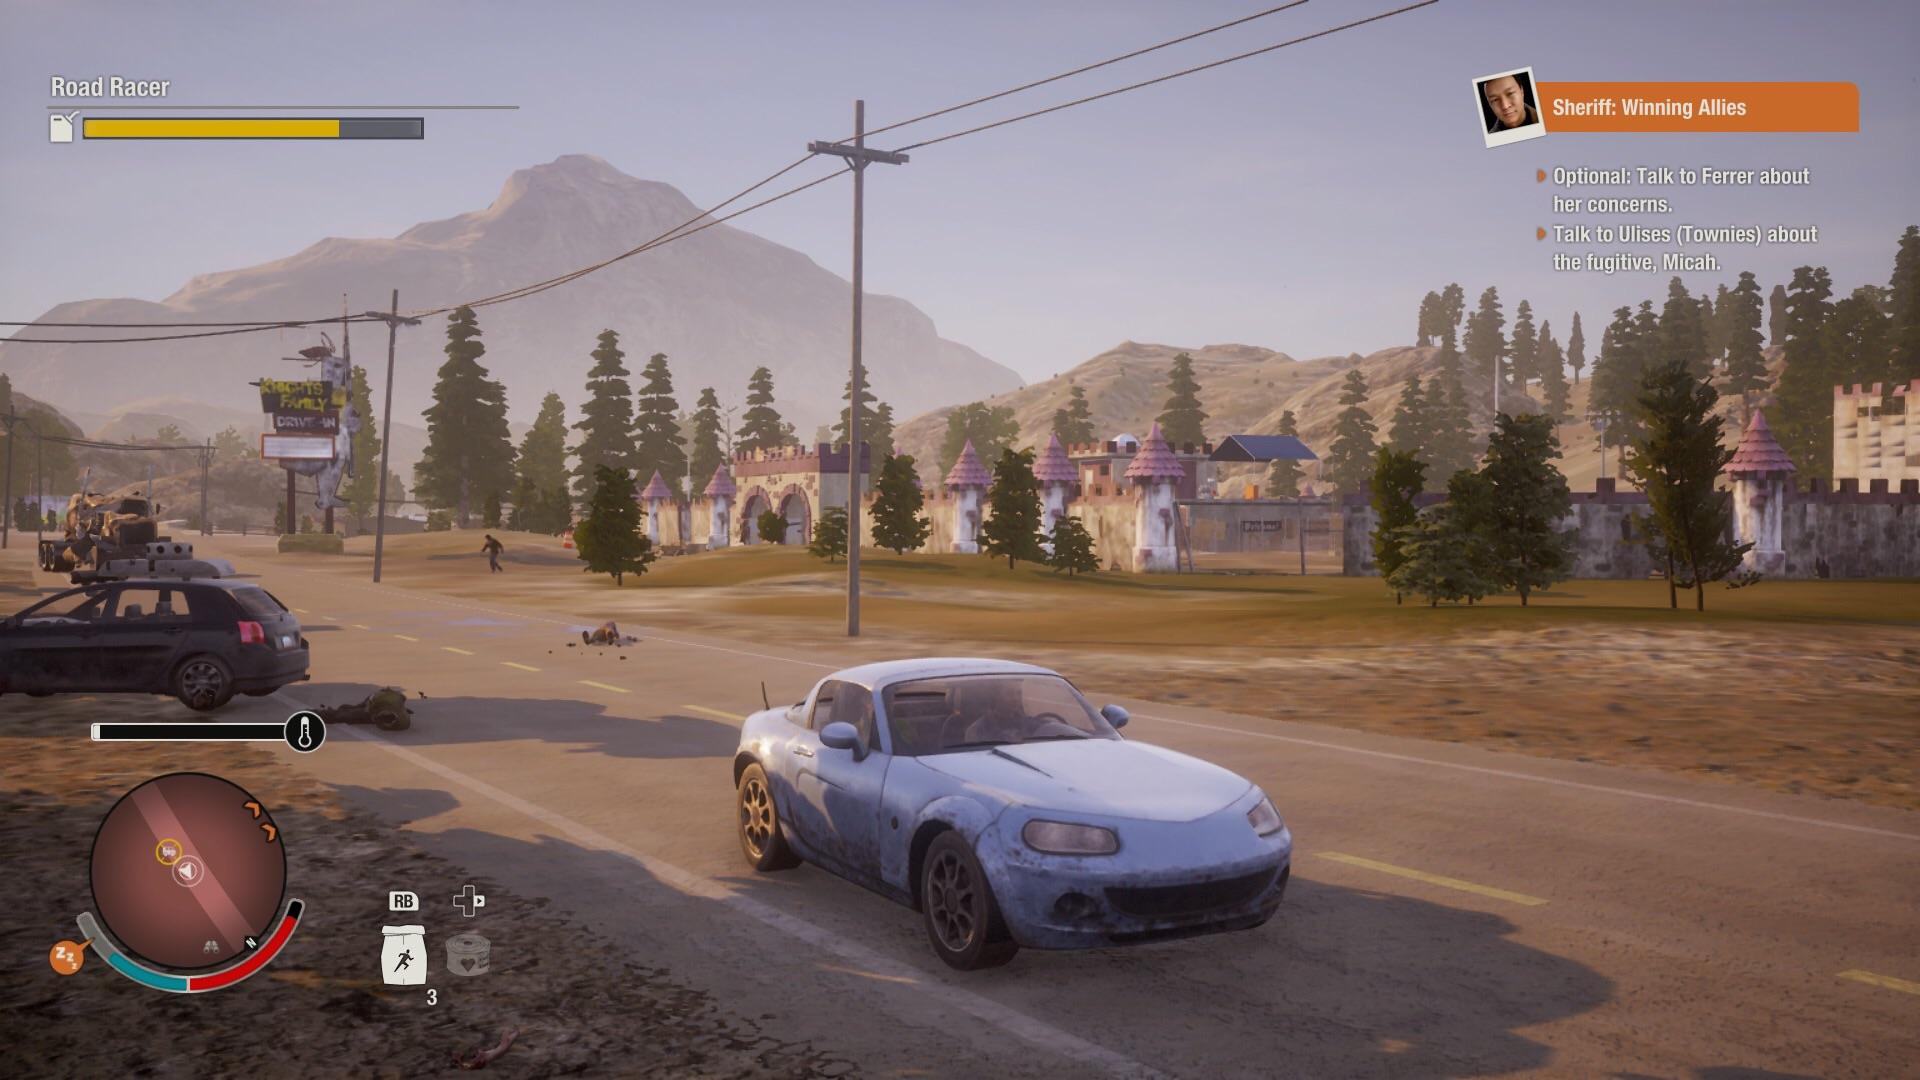
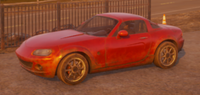
| Road Racer |
|
2-Door Sports Car | 3 Slots | 2 Seats | Small | Low | Road Mangler (Light) |
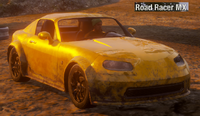
| Road Racer MX |
|
2-Door Sports Car | 3 Slots | 2 Seats | Small | High | Road Mangler (Light) |
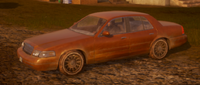
| Royale |
|
4-Door Sedan | 4 Slots | 4 Seats | Basic | Low | Kaiser (Heavy) |
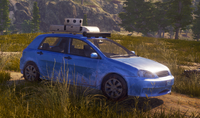
| Survey Car |
|
4-Door Hatchback | 5 Slots | 4 Seats | Basic | Low | Hellion (Light) |
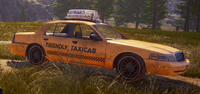
| Taxi |
|
4-Door Sedan | 4 Slots | 4 Seats | Basic | Low | Kaiser (Heavy) |
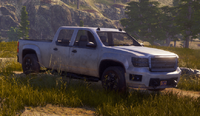
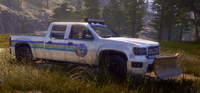
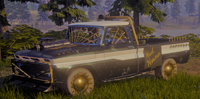
| Utility Truck |
|
4-Door Pickup | 8 Slots | 6 Seats | Big | High | Viking (Medium) |
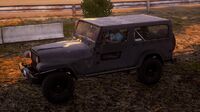
| Vagabond |
|
2-Door Jeep | 7 Slots | 2 Seats | Basic | Low | Trail Beast (Light) |

Apocalypse Vehicles
| Name | Picture | Description | Trunk | Seats | Tank Size | Fuel Usage |
|---|---|---|---|---|---|---|
| Big Boss |
|
4-Door Upgraded Armored Pickup | 9 Slots | 6 Seats | Big | High |
| Hellion |
|
4-Door Upgraded Hatchback | 6 Slots | 4 Seats | Small | High |
| Impaler |
|
4-Door Upgraded Muscle Car | 4 Slots | 4 Seats | Basic | High |
| Kaiser |
|
4-Door Upgraded Sedan | 4 Slots | 4 Seats | Basic | High |
| Mega Max |
|
2-Door Upgraded Muscle Car | 4 Slots | 2 Seats | Massive | High |
| Road Mangler |
|
2-Door Upgraded Sports Car | 3 Slots | 2 Seats | Small | High |
| Smashwagon |
|
4-Door Upgraded SUV | 10 Slots | 4 Seats | Basic | High |
| Trail Beast |
|
2-Door Upgraded Jeep | 7 Slots | 2 Seats | Massive | Low |
| Vandito |
|
4-Door Upgraded Van | 15 Slots | 4 Seats | Basic | High |
| Viking |
|
4-Door Upgraded Pickup | 8 Slots | 4 Seats | Big | Low |
| Wichita ES |
|
4-Door Upgraded Sedan | 7 Slots | 4 Seats | Basic | High |
| Zedbuster |
|
2-Door Upgraded Pickup | 9 Slots | 4 Seats | Basic | High |
Other Vehicles
| Name | Picture | Description | Trunk | Seats |
|---|---|---|---|---|
| Bloodmobile |
|
|
9 Slots | 2 Seats |
| Burninator |
|
|
6 Slots | 6 Seats |
| Mad Norma |
|
|
9 Slots | 4 Seats |
| Meatwagon |
|
|
15 Slots | 2 Seats |
| Megalodon |
|
|
4 Slots | 2 Seats |
| Pyrohawk |
|
|
5 Slots | 4 Seats |
| Trumbull 4×4 |
|
|
6 Slots | 6 Seats |
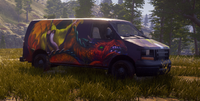
| Wizard Van |
|
|
12 Slots | 2 Seats |

Notes & Trivia
- The Ambulance, the Police Cruiser, and the Ranger SUV have working sirens you can use to lure zeds to your location.
- The Burninator can shoot flames around its doors to burn off any zombies jumping on them.
- The Meatwagon can drop a huge chunk of meat which lures zombies.
- The Pyrohawk can shoot fireworks on every side to clear off any zombies jumping on it.
- The Survey Car can actually survey! Driving it will reveal nearby locations on your map.
- Upgrading a car usually results in losing the utility it had (sirens, etc.).
- The Trumbull 4×4, Mad Norma, and Megalodon can only be obtained through the Bounty Broker.
- The spikes of the Impaler and Zedbuster will sometimes kill zombies who come in contact with the vehicle.
- If your Home Site has a Trade Depot, you can summon Parts Traders, who sometimes have Vehicle Upgrade Kits to trade.
- Vehicles that take enough damage will catch fire and then explode, destroying the vehicle and burning the occupants inside.
- A vehicle that has been damaged and destroyed can be repaired using a Toolkit.
- License plates on in-game vehicles change each time you load the game.
- Apocalypse vehicles might take more toolkits to get fully repaired. It’s due to having more health, not because toolkits are less efficient on them.