На чтение 27 мин Просмотров 10.4к. Опубликовано 31.12.2021
На данной странице представлено прохождение миссий «Самый разыскиваемый», объект Загадочник в игре Batman: Arkham Knight.
Содержание
- Часть 1 – Ментальная блокировка
- Часть 2 – Балансирующий акт
- Часть 3 – Счет 101
- Часть 4 – Дробилка
- Часть 5 – Летная школа
- Часть 6 – Введение в физику
- Часть 7 – Боль
- Часть 8 – Смертельные ловушки
- Часть 9 – Осужденный
- Часть 10 – Последний экзамен
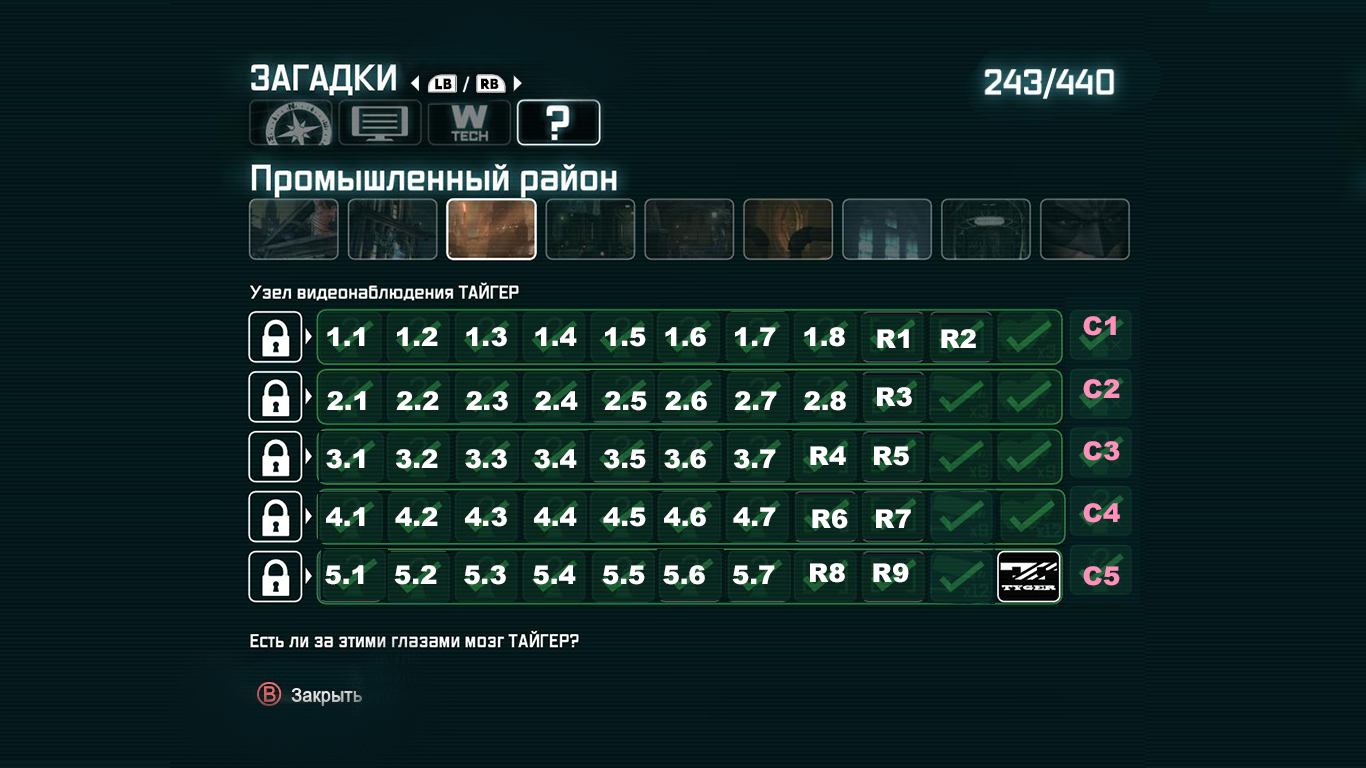
- Головоломка 1
- Головоломка 2
- Головоломка 3
- Часть 11 – Лицом к лицу с Загадочником
- Босс: Загадочник
- Фаза 1: Роботы Загадочника
- Фаза 2: Больше роботов и Загадочник
Часть 1 – Ментальная блокировка
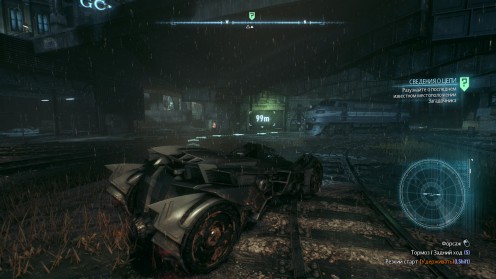
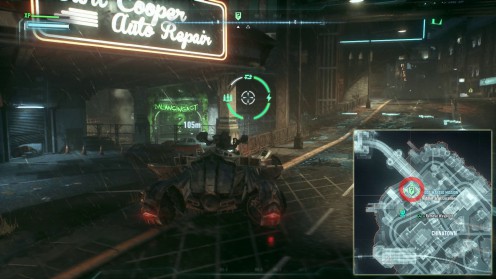
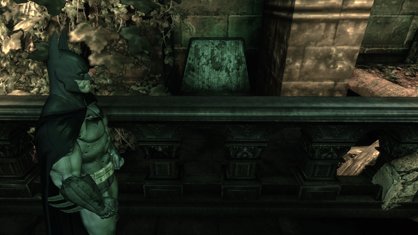
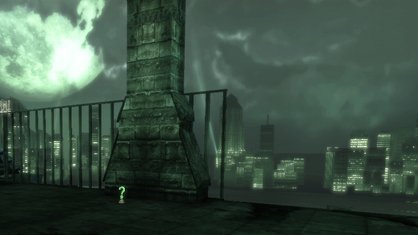
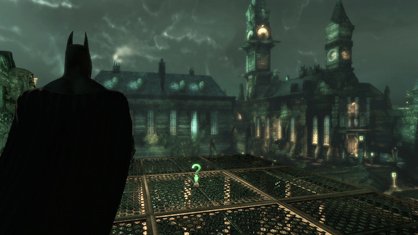
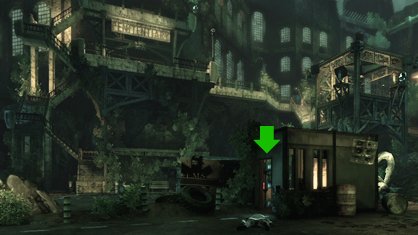
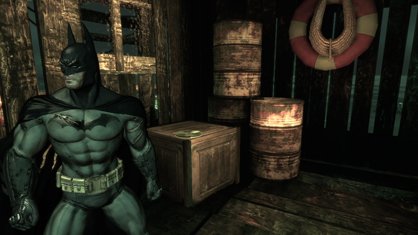
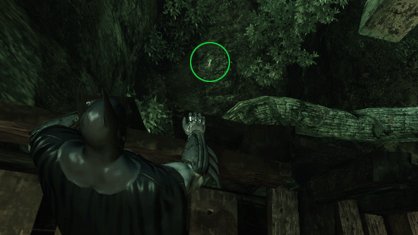
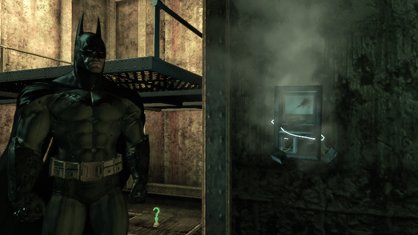
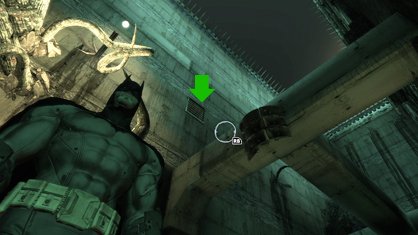
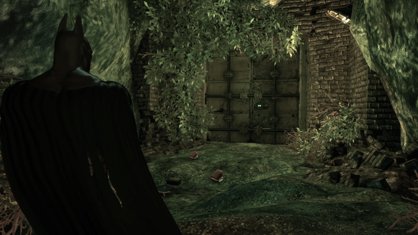
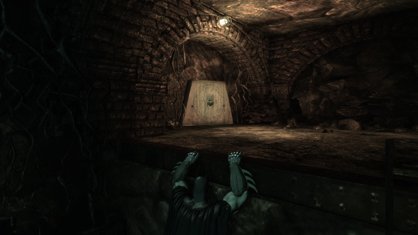
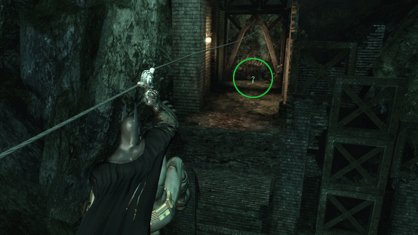
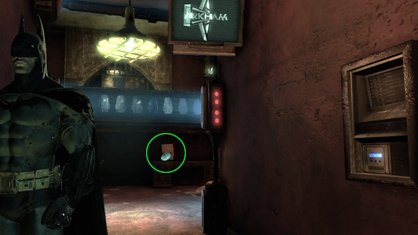
Первую часть Самый разыскиваемый Месть Загадочника можно найти в гараже Загадочника (именно в нем есть все вопросительные знаки – очень трудно пропустить!) расположен на железнодорожной станции к востоку от здания штаб-квартиры GCPD на острове Блик.
Войдите в дверь гаража со всеми зелеными вопросительными знаками у значка карты на карте. Это будет действовать как лифт и доставит вас вниз к задаче ниже. Как только вы сможете выйти из лифта, двигайтесь вперед и припаркуйтесь перед столбами, преграждающими путь. Загадочник появится здесь на экранах и в конечном итоге даст вам код доступа к Загадочнику, который мы сможем использовать, чтобы открыть дверь впереди, хотя сидение на месте в течение нескольких минут вознаградит вас довольно забавным монологом.
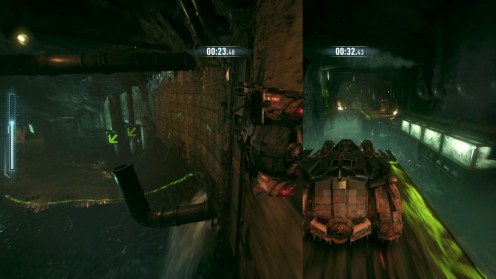
Когда вы будете готовы идти, пройдите в дверь, и вы найдете стартовую линию. Да, вам нужно будет устроить что-то вроде гонки. Вам нужно будет пройти три круга трассы, завершив каждый за определенное время. По мере прохождения трассы вам нужно будет использовать код доступа Загадочника, который мы получили ранее, чтобы добавлять/удалять/перемещать препятствия, пандусы и платформы на гоночной трассе и за ее пределами.

В этой гонке вы сможете управлять большими белыми и красными дверями/платформами с помощью кода доступа. Каждый из трех кругов немного отличается, с добавлением/удалением дополнительных препятствий / платформ, которые усложняют задачу. К счастью, эта гонка довольно проста, и, помимо необходимости ехать вдоль стены, когда пол уступает в первом туннеле на последнем круге, требуется всего пара сложных прыжков, и если вы застряли, попробуйте поиграть с кодом доступа Загадочника, чтобы найти путь.
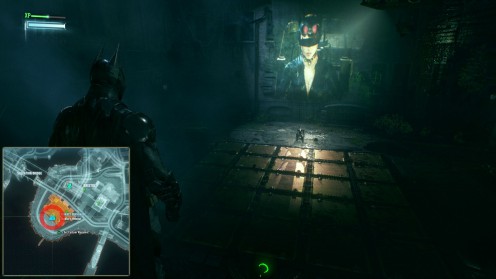
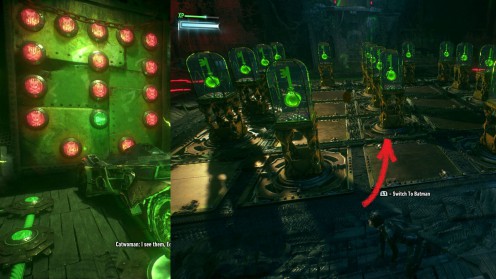
Как только вы успешно пройдете третий круг, Загадочник похвалит вас и активирует нажимную пластину рядом со стартовой линией в качестве награды. Наступите на нажимную пластину Бэтменом и обратите внимание на огни на стене – зеленый свет наиболее важен. Если вы переключитесь на Женщину-кошку в этот момент, вы заметите, что светильники на стене расположены в том же порядке, что и ряд подставок с ключами. Пьедесталы красного света – это плохо! Убедитесь, что вы нашли зеленый пьедестал и взаимодействуете с ним, чтобы продолжить.

Не волнуйтесь, если вы не сможете сразу понять это, так как вы сможете переключаться между двумя символами столько раз, сколько захотите, чтобы убедиться, что вы получили правильный ключ. Поднимите голову и взаимодействуйте с пьедесталом, который соответствует зеленому свету, чтобы продолжить.
Часть 2 – Балансирующий акт
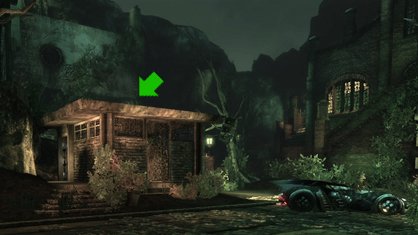
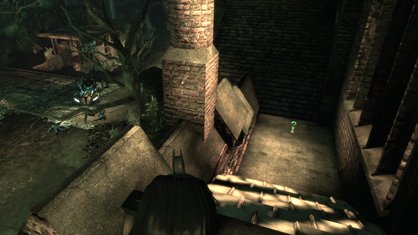
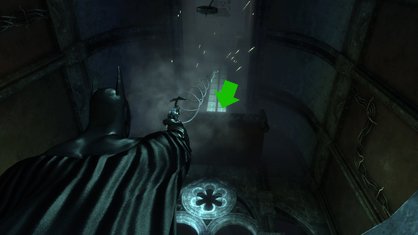
Эту головоломку можно найти в гараже Загадочника за зданием ACE Chemicals в Чайнатауне на острове Блик. Войдите в дверь гаража со всеми зелеными вопросительными знаками у значка карты на карте. Это будет действовать как лифт и доставит вас вниз к задаче ниже.
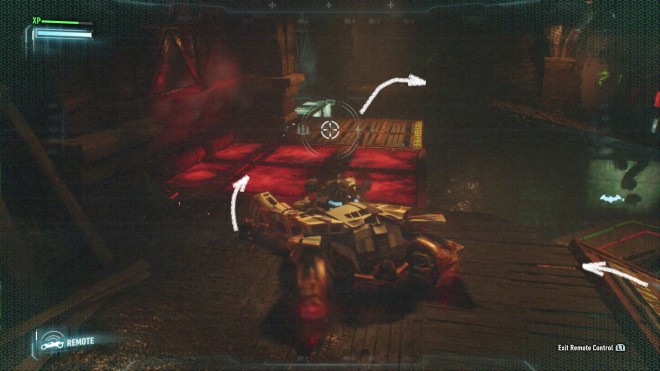
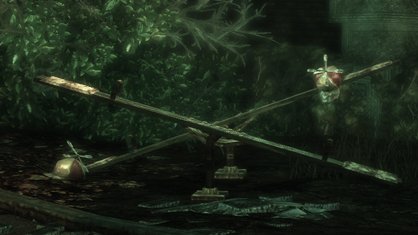
С самого начала вы увидите, что эта комната представляет собой одну большую головоломку. Ваша конечная цель – вывести Бэтмобиль на приподнятую платформу с правой стороны комнаты, откуда вы входите, и для этого вам нужно будет использовать код доступа Загадочника, который вам дали ранее, чтобы манипулировать красными и белыми платформами вокруг комнаты.
Для начала вам нужно подняться по грунтовому пандусу слева от нажимной пластины и продолжить движение по деревянной дорожке до платформы с другой нажимной пластиной (пока игнорируйте это). На дальней стороне этого находится пандус с белой платформой на вершине. Подъезжайте к противоположному концу качелей и нажмите код доступа Загадочника, чтобы наклонить платформу вверх, а затем нажмите еще раз, чтобы зафиксировать платформу на месте.

Поднимитесь по пандусу на платформу выше, и вы увидите ряд платформ впереди. Первая и третья – это платформы, которые мы можем активировать/деактивировать с помощью кода доступа Загадочника. Средняя платформа здесь управляется нажимной пластиной на предыдущей платформе. Выйдите из автомобиля и попросите Бэтмена встать на нажимную пластину.
Пока Бэтмен стоит там, переключитесь на дистанционное управление Бэтмобилем и используйте код доступа Загадочника, чтобы активировать ближайшую к Бэтмобилю платформу. Подъезжайте к центральной платформе и снова используйте код доступа Загадочника, чтобы открыть белую платформу. Переезжайте на противоположную сторону и спускайтесь к пандусу справа.
Это еще одна головоломка, и под ней есть пара платформ, которые вы можете использовать с помощью кода доступа Загадочника. Поиграйте с ними, удерживая бэтмобиль на ближайшей стороне платформы, чтобы он наклонялся, и зафиксируйте рампу на месте, когда она находится в самой высокой точке.
В этот момент вы можете подбежать и использовать форсаж на рампе, чтобы запустить Бэтмобиль в дальний конец комнаты. Как только вы окажетесь в воздухе, используйте код доступа Загадочника, чтобы расширить платформу впереди, чтобы вы могли приземлиться на целевой выступ.
Теперь, когда мы переправились, просто направляйтесь к точке привязки, расположенной поблизости, прикрепите силовую лебедку и завершите мини-игру, чтобы разгадать загадку.

Как только вы успешно завершите мини-игру с вращением, нажимная пластина у входа станет активной.
Как и в предыдущем задании, вам нужно наступить на нажимную пластину с Бэтменом и обратить внимание на огни на стене – зеленый свет наиболее важен. Теперь переключитесь на поиск Женщины-кошки и взаимодействуйте с пьедесталом, который соответствует зеленому свету, чтобы продолжить. Не забывайте, что при необходимости вы можете переключаться между двумя персонажами в любое время!
Часть 3 – Счет 101
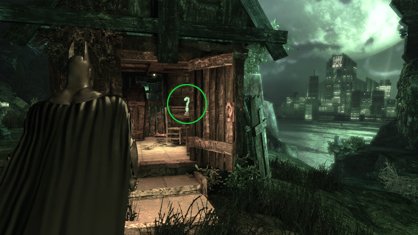
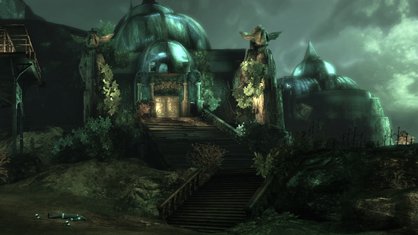
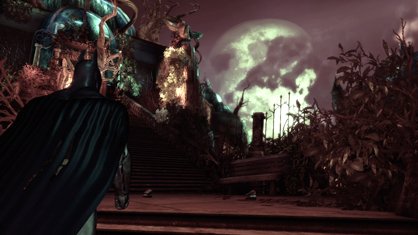
Следующая часть миссии «Самый разыскиваемый» снова разворачивается в детском доме Пинкни. Войдите в дверь и двигайтесь по площади, пока не окажетесь в запертой комнате, где вам предстоит разгадать загадку.
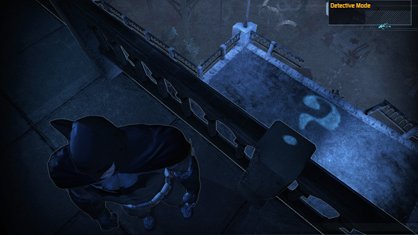
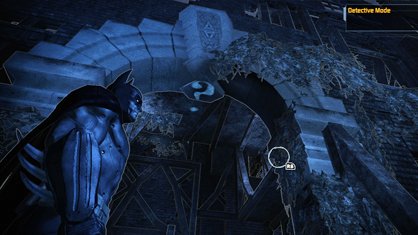
Если вы посмотрите на запертые ворота, вы должны заметить, что на них есть три знака «?». На полу перед воротами находится круглая головоломка, состоящая из трех кольцевых сегментов и внешнего кольца, которое действует как зеркало. Три знака «?’ связаны с тремя кольцами головоломки.
Чтобы разгадать загадку, вам нужно нажать на каждый из трех знаков «?» с помощью Бетранга, пока рисунок на кольцах на полу не выровняется в форме вопросительного знака, а верхняя часть символа будет обращена к двери. Теперь вам просто нужно найти место, где прожектор над дверью появляется на зеркальном полу в месте расположения точки внизу символа вопросительного знака, и отсканировать заполненное «?».

Это откроет дверь. Прыгайте вниз. Здесь вы воссоединитесь с Женщиной-кошкой, и вам будет поручено исследовать теперь освещенную зеленую дверь. В следующей комнате вы увидите ряд перекладин по центру, разделяющих пару прижимных пластин на полу. Пусть Бэтмен встанет на синюю нажимную пластину, а Женщина-кошка встанет на красную нажимную пластину. Это позволит изолировать комнаты друг от друга.
С любой нажимной пластины посмотрите на разделительную стену в центре комнаты. Здесь вы увидите группу из пяти вопросительных знаков (давайте посчитаем их 1-5 слева направо). Над ними вы также увидите экран, на котором будет отображаться ряд чисел – они связаны с порядком, в котором вам нужно нажимать на вопросительные знаки (Бэтмен с Батарангами, Женщина-кошка с хлыстом). Загвоздка здесь в том, что номера в комнате одного персонажа соответствуют шаблону, которому должен следовать другой персонаж.

Для меня порядок, в котором нужно было ставить вопросительные знаки, был:
- Женщина-кошка 1, 3, 5, 2, 4.
- Бэтмен 3, 1, 4, 5, 2.
- Как только оба персонажа завершат свою часть головоломки, стены опустятся, и вы окажетесь в ситуации двойного боя против 10 роботов.
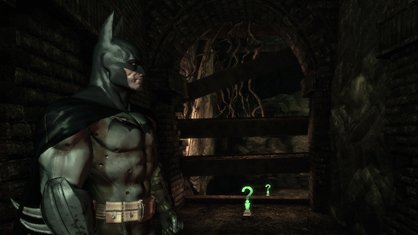
После боя вы сможете подойти к ближайшему пьедесталу за вторым ключом.
Часть 4 – Дробилка
Следующая часть миссии «Самый разыскиваемый» проходит в мемориальном госпитале Эллиота на острове Миагани. В зависимости от вашего прогресса в игре, у входа может быть или не быть контрольно-пропускного пункта милиции, который вам нужно будет очистить, прежде чем вы сможете попасть внутрь. В любом случае, как только у вас будет доступ к гаражу Загадочника, войдите в дверь, спуститесь на лифте и найдите стартовую линию. Пришло время для еще одной гонки!
Как и в последней гонке, вам придется пройти три круга трассы, завершая каждый круг в течение определенного времени. Несоблюдение установленного срока не приведет к завершению миссии, но побудит вас продолжать пробовать один и тот же круг снова и снова, пока вы не пройдете его за требуемое время.
По мере прохождения трассы вам нужно будет использовать код доступа Загадочника, который мы получили ранее, чтобы добавлять/удалять/перемещать препятствия, пандусы и платформы на гоночной трассе и за ее пределами. На этом треке есть большие участки пола, покрытые цветными блоками, которыми можно манипулировать, однако в 90% случаев активация кода доступа Загадочника на цветных плитках раздавит Бэтмобиль и отправит вас обратно в предыдущую комнату. Таким образом, вы захотите использовать промежутки обычной земли между наборами потенциальных блоков дробления, чтобы использовать код доступа Загадочника.

В этой гонке представлены зеленые элементы, которые похожи на красные и белые блоки (в этой гонке это означает способность сокрушить вас), но их нельзя контролировать, поэтому вам придется избегать их.
Каждый из трех кругов немного отличается: красные и белые раздавливающие этажи увеличиваются в размерах между кругами, оставляя меньше безопасных зон на полу, где мы можем использовать код доступа Загадочника. Последовательные круги также увеличат скорость и распространенность дополнительных зеленых дробильных блоков, которых следует избегать по мере продвижения. К счастью, игра дает вам достаточно времени для каждого круга, и по большей части трасса немного сложная, но понятная. Самое сложное – избегать зеленых участков!
Как только вы успешно пройдете третий круг, Загадочник похвалит вас и активирует нажимную пластину рядом со стартовой линией в качестве награды.

Вы уже должны знать, как это делается! Наступите на нажимную пластину с Бэтменом и обратите внимание на огни на стене – зеленый свет наиболее важен. Переключитесь на управление Женщиной-кошкой и взаимодействуйте с пьедесталом, который соответствует зеленому свету, чтобы продолжить.
Часть 5 – Летная школа
Следующая часть «Самый разыскиваемый» Загадочник – это головоломка, которую можно найти в гараже Загадочника в казино Gotham на острове Миагани.
Спускайтесь на лифте внутри гаража вниз, пока не выйдете в другую комнату-головоломку.
Эта головоломка чрезвычайно короткая, но может быть довольно сложной, если вы немного затрудняетесь с точным контролем способности Бэтмена к скольжению, так как, к сожалению, для решения этой головоломки требуется немного фантазии и точного скольжения.
По сути, чтобы завершить эту головоломку, вам нужно влететь в три большие светящиеся панели, которые можно найти на стенах по всей комнате. Чтобы сделать это с достаточной скоростью, чтобы поразить их давлением, вам нужно разбежаться на бэтмобиле по небольшой прямой дороге и катапультироваться в скольжение.
Первая нажимная пластина расположена непосредственно поперек зазора в конце короткой дороги.

После запуска первой панели мы теперь сможем получить доступ ко второй. Чтобы достичь этого, вам нужно будет катапультироваться из бэтмобиля со скоростью, как если бы вы направлялись к первой панели, но как только вы окажетесь в воздухе, повернитесь направо на 180 градусов, чтобы найти нажимную пластину в конце короткого прохода за стеной.
Наконец, третья панель требует, чтобы мы сделали то же самое, что и вторая, но на этот раз вам нужно влететь в узкий круглый туннель на стене справа от второй панели. Обратите внимание, что прикосновение к стенам здесь – мгновенная смерть, поэтому обязательно сохраняйте свое положение по направлению к центру и не расстраивайтесь, если вы не сможете сделать это сразу, вам определенно придется повторить попытку (это действительно сложно!). Выйдите из круглого туннеля и поверните направо, чтобы найти последнюю нажимную пластину на стене поблизости. Нажмите на это, чтобы решить головоломку.

Нажатие на три настенные пластины приведет к активации прижимной пластины вблизи старта. Вернитесь назад и наступите на нажимную пластину вместе с Бэтменом – зеленый свет, как всегда, самый важный. Переключитесь на управление Женщиной-кошкой и взаимодействуйте с пьедесталом, который соответствует зеленому свету, чтобы продолжить.
Часть 6 – Введение в физику
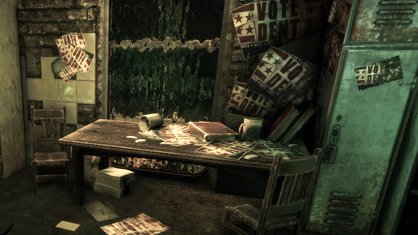
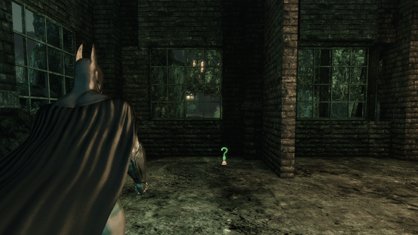
Шестая часть миссии «Самый разыскиваемый» снова разворачивается в детском доме Пинкни. Войдите в дверь и двигайтесь по площади, пока не воссоединитесь с Женщиной-кошкой. Идите дальше и войдите в теперь подсвеченную зеленую дверь.
Эта комната состоит из двух уровней, на нижнем уровне находится шкаф с ключом, а на верхнем этаже есть головоломка с электричеством. Поднимитесь на верхний уровень, чтобы провести расследование.
На задней стене вы увидите похожую на лабиринт сеть труб и три зоны в клетках между секциями прохода с отсутствующими трубами. Цель этой головоломки состоит в том, чтобы направить электрический заряд по всем трубам здесь, пока он не достигнет конца.

Здесь на полу есть три прижимные пластины, и каждая из них контролирует уровень труб в закрытых помещениях напротив. В зависимости от того, как активирована каждая пластина, трубы будут подниматься на разные уровни: Женщина-кошка сама поднимет трубу на самый низкий уровень, Бэтмен поднимет ее на среднюю высоту, и когда оба персонажа встанут на нажимную пластину вместе, труба будет поднята до высокой ориентации.
Чтобы начать головоломку, вам нужно нажать на светящийся знак вопроса на левой стене. Чтобы решить головоломку, вам нужно будет выполнить следующие действия, когда электрический заряд перемещается по трубам, чтобы доставить его по назначению:
- Попросите Бэтмена наступить на прижимную пластину с левой стороны.
- Переместите Женщину-кошку на среднюю нажимную пластину.
- Заставьте Бэтмена и Женщину-кошку встать на правую нажимную пластину.
- Оставьте Женщину-кошку на правой нажимной пластине, а бэтмена переместите на центральную нажимную пластину.
- Заставьте Бэтмена и Женщину-кошку встать на прижимную пластину слева.
- Как только электричество достигнет конца туннелей, разыграется короткая сцена, завершающая головоломку. Это также покажет, что нижний уровень комнаты внезапно становится наэлектризованным. К счастью, с этим достаточно легко справиться – просто запрыгните на нажимную пластину, которая поднимается из пола.

Спрыгните на пол и подойдите к пьедесталу с ключом, и вы попадете в засаду группы роботов.
Эти роботы немного отличаются от тех, с которыми вы сражались раньше, тем, что они будут окрашены в синий или красный цвет, а не в зеленый. Цвет очень важен при сражении с этими парнями отныне – только Бэтмен может безопасно поражать синих роботов, а Женщина-кошка – красных. Попытка атаковать другого цвета приведет к электрическому выстрелу, аналогичному удару охранника электрошоковой палкой – нехорошо! Однако вы все равно можете поразить любой цвет двойным выпадом, так что не бойтесь использовать их, когда они будут готовы к работе.
После боя вы сможете подойти к ближайшему пьедесталу за шестым ключом.
Часть 7 – Боль
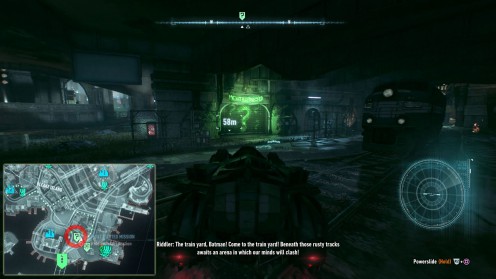
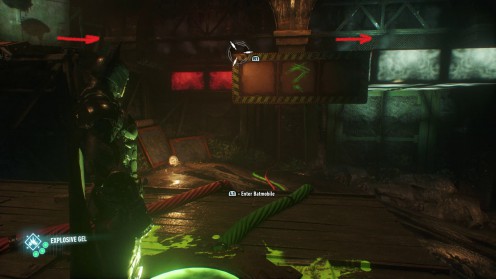
Следующая часть Самой разыскиваемой миссии Загадочника – это головоломка, которую можно найти в гараже Загадочника на улице ниже конца моста Покаяния на острове Основателей.
Спускайтесь на лифте внутри гаража вниз, пока не выйдете в другую комнату-головоломку.
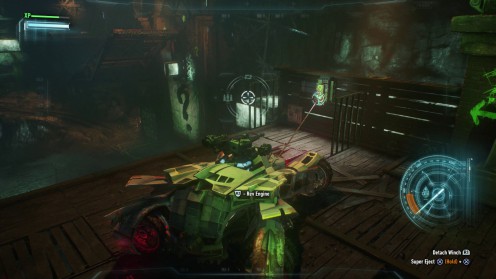
Эта головоломка представляет собой задачу, ориентированную на бэтмобиль и силовую лебедку, которая на самом деле довольно короткая, когда вы понимаете, что должно произойти, но ее может быть сложно выполнить из-за множества опасностей и небольшого количества точного скольжения.
Войдя в комнату, вы увидите большой слив в центре с тремя опорными точками снаружи, пронумерованными 1-3. Напротив опорных точек расположены пандусы, позволяющие бэтмобилю съехать в канализацию. Внутри ямы находятся три уровня вращающихся платформ, покрытых ловушками для пилы, которые повредят или уничтожат бэтмобиль, если они соприкоснутся.
Для начала вам нужно прикрепить силовую лебедку к точке крепления 1, а затем опустить бэтмобиль в канализацию как можно дальше. Поверните платформу здесь так, чтобы Бэтмобиль оказался на участке пола с зеленым символом летучей мыши. Когда вы на месте, если вы посмотрите прямо через слив, вы увидите, что зеленое кольцо здесь теперь совпадает с отверстием сзади.

Катапультируйся из бэтмобиля и пролети через кольцо. Внутри этой комнаты найдите нажимную пластину и наступите на нее, чтобы понизить уровень воды. Возвращайтесь к Бэтмобилю.
Пусть Бэтмобиль поднимется обратно и вылезет из канализации. На этот раз вам нужно будет прикрепить силовую лебедку к точке крепления 2, а затем опустить бэтмобиль в канализацию как можно дальше. Поверните платформу здесь так, чтобы Бэтмобиль оказался на участке пола с зеленым символом летучей мыши. Опять же, как только вы окажетесь на зеленом символе, посмотрите напротив и выстрелите в слабую стену из-за зеленого кольца.
Катапультируйся из бэтмобиля и пролети через кольцо. Наступи на прижимную подушку здесь. Это снова понизит уровень воды, но также вызовет драку с группой из четырех роботов, которые появятся. Уничтожьте их всех, прежде чем вернуться к Бэтмобилю.
Все еще прикрепленный к точке привязки 2, поворачивайте платформы нижнего уровня до тех пор, пока плитка с символом зеленой летучей мыши не окажется прямо под выступом, ведущим к точке привязки 3. На этом этапе попросите Бэтмобиль подняться обратно на вершину.

На этот раз вам нужно будет прикрепить силовую лебедку к точке крепления 3 и спуститься в канализацию вместе с бэтмобилем как можно дальше. Опять же, вам нужно будет повернуть нижний уровень так, чтобы бэтмобиль оказался на зеленом символе летучей мыши. Затем мы можем катапультироваться и пролететь через зеленое кольцо напротив.
В этой области поверните за угол и активируйте нажимную пластину, чтобы в последний раз понизить уровень воды. Перед выходом переключитесь на дистанционное управление бэтмобилем и используйте его, чтобы стрелять в сторожевые башни, которые появились в коридоре позади вас.
Когда туннель очистится, вернитесь ко входу и скользите к небольшой платформе у основания водостока. Наступите на нажимную пластину здесь и обратите внимание на лампочки на стене вверху. Переключайтесь между Женщиной-кошкой и Бэтменом, чтобы определить правильный пьедестал (на конце Бэтмена все еще горит зеленый свет). Поднимите голову и взаимодействуйте с правильным пьедесталом в роли Женщины-кошки.
Часть 8 – Смертельные ловушки
Восьмая часть миссии «Самый разыскиваемый» снова разворачивается в детском доме Пинкни. Войдите в дверь и двигайтесь по площади, пока не воссоединитесь с Женщиной-кошкой. Идите дальше и войдите в недавно освещенную зеленую дверь.
После краткого монолога Загадочника нажимная пластина на полу здесь станет активной. Займись этим вместе с Бэтменом. Это позволит опустить решетку у потолка. Переключитесь на Женщину-кошку и попросите ее проползти по потолку, через новое отверстие и спуститься с другой стороны. Наступите на вторую нажимную пластину здесь, чтобы начать следующую головоломку.
Теперь в обеих комнатах будет электрифицированный пол, и вам нужно будет пройти по нему безопасным путем, чтобы добраться до нажимной площадки в дальнем конце. Эта головоломка очень похожа на первую головоломку, которую мы решили в приюте, поскольку решение для безопасного прохождения другого персонажа по электрифицированному полу будет представлено на большом экране в задней части комнаты с горящими огнями, указывающими безопасный маршрут.

Безопасными маршрутами являются следующие:
Женщина-кошка:
- Начните с крайнего левого края и продвиньтесь на три плитки вперед.
- Идите прямо на две плитки.
- Вернитесь ко входу на одну плитку.
- Пройдите по двум плиткам к правой стене.
- Переместите четыре плитки вверх к задней стене.
- Пройдите две плитки влево.
- Идите к задней стене еще на одну плитку.
- Идите налево на одну плитку.

Бэтмен:
- Начните с центра и продвиньтесь на две плитки вперед.
- Идите влево на две плитки, пока не упретесь в стену.
- Переместите вперед две плитки.
- Пройдите три плитки вправо.
- Переместите вперед одну плитку.
- Переместитесь на одну плитку вправо.
- Переместите вперед одну плитку.
- Как только оба персонажа завершат свою часть головоломки, стены опустятся, и вы окажетесь в ситуации двойного боя против 10 роботов. Помните, что Бэтмен сможет атаковать только синих роботов, а Женщина-кошка – красных.
После боя вы сможете подойти к ближайшему пьедесталу за восьмым ключом.
Часть 9 – Осужденный
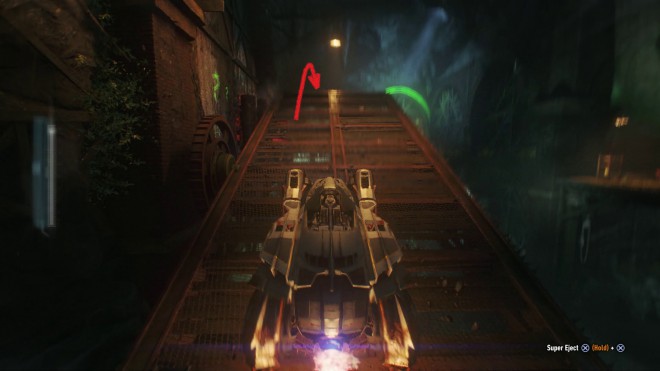
Следующая часть миссии «Самый разыскиваемый» проходит на паромном терминале Ранелаг на острове Миагани. Найдите гараж Загадочника, войдите в дверь, спуститесь на лифте и найдите стартовую линию. Пришло время для еще одной (и, к счастью, финальной) гонки!
Как и в последней гонке, вам придется пройти три круга трассы, завершая каждый круг в течение определенного времени. Несоблюдение установленного срока не приведет к завершению миссии, но побудит вас продолжать пробовать один и тот же круг снова и снова, пока вы не пройдете его за требуемое время.
По мере прохождения трассы вам нужно будет использовать код доступа Загадочника, который мы получили ранее, чтобы добавлять / удалять / перемещать препятствия, пандусы и платформы на гоночной трассе и за ее пределами. На этой трассе есть комбинация объектов из первых двух гонок, которыми мы можем управлять, и они включают стены, дверные проемы / ворота и разрушающиеся полы. У нас также будет доступ к активации / деактивации определенных ловушек с вращающимися шипами.

Помните, что мы можем использовать код доступа Загадочника только на красных или белых объектах. Как и во второй гонке, на этом курсе также будут широко использоваться зеленые элементы, которые невозможно контролировать, поэтому вам придется избегать их.
Каждый из трех кругов немного отличается, причем первый круг почти полностью состоит из красно-белых препятствий, по которым достаточно легко перемещаться. На втором круге появится ряд зеленых препятствий, которых вам нужно будет избегать, а также увеличивающиеся в размерах плитки для дробления пола между кругами, оставляя меньше безопасных зон на полу, где мы можем использовать код доступа Загадочника. Хотя 2-й круг в то время кажется сложным, вы понятия не имеете, что это по сравнению с последним кругом.
Последний круг, по сути, выбрасывает код доступа Загадочника в окно, заставляя вас прокладывать себе путь через смехотворное количество ловушек с зелеными шипами и многочисленных быстро движущихся автоматизированных зеленых дробильных полов. На этом круге нет простого пути, и ничто из того, что я могу сказать, не облегчит его – он очень сложный, и вам, скорее всего, придется повторить его несколько раз, прежде чем пройти весь путь до конца за отведенное время. Если вам не повезет или вы не обладаете высокой квалификацией, этот круг действительно является примером практики, практики и еще раз практики, пока вы не узнаете препятствия задом наперед.

Как только вы успешно пройдете третий круг, Загадочник похвалит вас и активирует нажимную пластину рядом со стартовой линией в качестве награды.
Вы уже должны знать, как это делается! Наступите на нажимную пластину вместе с Бэтменом и обратите внимание на огни на стене. Однако на этот раз будьте осторожны, так как, хотя при первоначальном осмотре огни выглядят в форме буквы «Z», одна сторона короче другой – не обманывайтесь, беря не тот ключ! Переключитесь на управление Женщиной-кошкой и взаимодействуйте с пьедесталом, который соответствует зеленому свету, чтобы продолжить.
Часть 10 – Последний экзамен
Десятая часть миссии «Самый разыскиваемый» разворачивается в детском доме Пинкни (снова!). Согласно норме, двигайтесь по району, пока не воссоединитесь с Женщиной-кошкой. Идите дальше и войдите в недавно освещенную зеленую дверь.
Для завершения этой головоломки вам потребуется устройство для дистанционного электрического заряда. В зависимости от того, как далеко вы продвинулись в игре, вам может быть предложено захватить ее, а может и нет. К счастью, мы можем схватить его в любое время – он находится в «Комнате для улик» в штаб-квартире GCPD внутри стеклянного ящика, который мы можем разбить.
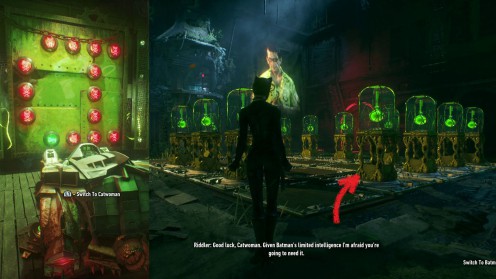
Во второй комнате вы найдете большую напольную головоломку, покрытую зелеными плитками «?». На этом полу головоломки вы увидите пару отверстий и лазер. Вокруг внешней части плиток головоломки вы сможете разглядеть серию генераторов, которые мы можем активировать с помощью устройства дистанционного электрического заряда. Мы можем использовать первичный огонь для привлечения плиток к активированному генератору или вторичный огонь для отражения плиток.
К сожалению, Бэтмен не может приблизиться к этому району, но может использовать устройство дистанционного электрического заряда на расстоянии. Женщина-кошка, с другой стороны, может подняться на крышу и спуститься в область головоломки, где она может стоять на плитках здесь, чтобы удерживать определенные плитки / ряды плиток на месте по мере необходимости.
Цель головоломок здесь состоит в том, чтобы перемещать плитки с помощью дистанционного электрического заряда таким образом, чтобы лазер мог выстрелить в одно из отверстий в полу головоломки.

Поскольку эта комната может быть запутанной для объяснения из-за перспективы, я буду давать указания, основываясь на взгляде Бэтмена на пол головоломки со стороны входной двери комнаты, как на картинке выше. Генераторы на противоположной стене будут помечены слева направо как от A до E, а генераторы вдоль правой стены будут пронумерованы от 1 до 5 (при этом 1 будет самым дальним, а 5 – ближайшим).
Есть три различные головоломки, которые вам нужно будет решить. Между каждой головоломкой, как Женщине-кошке, вам нужно будет уклоняться от серии пильных полотен, которые будут перемещаться взад и вперед по комнате, или просто слезать с пола головоломки и карабкаться обратно на крышу, пока они не остановятся. Решения вы найдете ниже.
Головоломка 1
Головоломка номер один имеет лазер на плитке в точке D2. Вам нужно маневрировать плитками так, чтобы они попадали в отверстие в полу головоломки.
- Попросите Женщину-кошку встать на плитку E1 и использовать функцию дистанционного отражения электрического заряда на генераторе E.
- Переместите Женщину-кошку на плитку C2 и используйте функцию дистанционного притяжения электрического заряда на генераторе 2.
Головоломка 2
Во второй головоломке есть пара лазеров, что означает двойное удовольствие! Они расположены на плитках E1 и B3. Вам нужно маневрировать плитками так, чтобы лазеры стреляли в каждое из отверстий в полу головоломки.
- Используйте функцию дистанционного отражения электрического заряда на генераторе 1.
- Переместите Женщину-кошку на плитку А 2 и используйте функцию дистанционного притяжения электрического заряда на генераторе 2.
- Переместите Женщину-кошку на плитку B4 и используйте функцию дистанционного притяжения электрического заряда на генераторе D.
Головоломка 3
В финальной головоломке снова нужно разобраться с парой лазеров. Они расположены на плитках A5 и C5. Как и в случае с другими головоломками, вам нужно перемещать плитки так, чтобы лазеры стреляли в каждое из отверстий в полу головоломки.
- Используйте функцию дистанционного притяжения электрического заряда на генераторе 1.
- Переместите Женщину-кошку на плитку D3 и используйте функцию дистанционного отражения электрического заряда на генераторе 3.
- Используйте функцию дистанционного притяжения электрического заряда на генераторе C.
- Используйте функцию дистанционного притяжения электрического заряда на генераторе A.
Как только головоломка будет завершена, вам захочется сразу же покинуть этаж головоломки. Вернитесь в предыдущую комнату, и вы сможете подойти к ближайшему пьедесталу за десятым ключом.
Часть 11 – Лицом к лицу с Загадочником
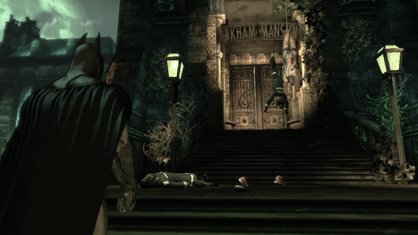
Как только вы пройдете испытание «Заключительный экзамен», соберете десятый ключ и освободите Женщину-кошку, попробуйте покинуть приют Пинкни, и вы столкнетесь с самим Загадочником. Это неизбежно вызовет сценарий боя с боссом.
Босс: Загадочник
Битва с боссом-загадочником проходит в два этапа, и, к сожалению, если вы не найдете и не решите все загадки в игре, вы сможете завершить только первую фазу боя, прежде чем он отступит. Но все это хорошо, как только вы вернетесь со всеми загадками в сумке, вы сможете продолжить с того места, на котором остановились!
Фаза 1: Роботы Загадочника
Во время первой фазы Загадочник окутан зеленым щитом, который делает его практически непобедимым, так что даже не пытайтесь атаковать его. У него есть несколько атак, включая удар по земле, если вы находитесь слишком близко к нему, и зеленый лазер смерти, которым он выстрелит в любого игрового персонажа, который нанесет большой урон, если попадет.
Загадочник также выпустит небольшую армию роботов, чтобы напасть на вас. Это основные угрозы на первом этапе, и вам нужно будет уничтожить их всех, избегая атак Загадочника, чтобы прогрессировать. Помните, что Бэтмен может атаковать только синие цели, а Женщина-кошка может атаковать только красные цели. Плохая новость заключается в том, что Загадочник также может нацеливаться и изменять цвет любого из роботов во время этой фазы, поэтому будьте особенно осторожны, переключаясь между персонажами и атакуя правильные цели!
Как только вы уничтожите всех роботов, начнется вторая фаза.
Если вы еще не выполнили все загадки в игре, в этот момент Загадочник убежит.

Фаза 2: Больше роботов и Загадочник
Когда вы вернетесь в детский дом, разгадав все загадки в игре, Загадочник поднимется с пола и снова начнет атаковать. У него те же движения, что и в первой фазе, с зеленым смертельным лазером, атакой в ближнем бою и возможностью менять цвета своих приспешников-робото. Как и на первом этапе, босс вызовет еще одну большую группу роботов, чтобы напасть на вас.
Чтобы начать бой на этот раз, у вас будет доступ только к Бэтмену. В этом случае вам нужно будет атаковать и уничтожать только синих роботов. Загадочник будет использовать свой лазер, чтобы сменить некоторых роботов на красные версии, поэтому старайтесь не попадать в них, убирая врагов, которых вы можете уничтожить.
Через короткий промежуток времени Женщина-кошка также присоединится к битве, и вы снова сможете переключаться между обоими персонажами. Как всегда, мы можем использовать Женщину-кошку, чтобы уничтожить красных роботов.

Как только вы победите всех врагов, щит Загадочника временно опустится, подойдите поближе и атакуйте его, чтобы вызвать сцену, которая уменьшит его здоровье на треть.
Получив урон, босс вызовет еще одну волну роботов. Опять же, вам нужно будет использовать обоих персонажей, чтобы уничтожить их всех, чтобы мы могли сбросить щит Загадочника. Когда он все-таки упадет, бегите и снова атакуйте босса, чтобы забрать больше здоровья. По сути, вам нужно повторять этот цикл до тех пор, пока бой не подойдет к концу.
После завершения боя возвращайтесь в GCPD со своим новым заключенным, чтобы завершить миссии с Загадочником.
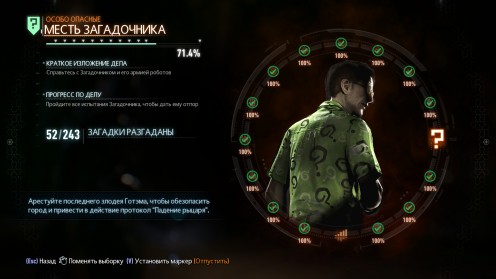
Месть Загадочника является самым сложным и длинным испытанием для Тёмного Рыцаря. Эта миссия относится к большинству второстепенных из Особо Опасных в Batman: Arkham Knight. Для того, чтобы справиться с миссиями, вы должны выполнить ряд задач по всему Готэму. Однако, с самого начала выполнять все задачи Риддлера у вас не получится, так, как разные миссии открываются на разных этапах прохождения основного сюжета. В новинку вам покажутся, заковыристые трассы и головоломки в которых непосредственное участие будет принимать — Бэтмобиль. Цель Риддлера как и всегда, заставить вас решить ряд загадок, поучаствовать в ряде испытаний, чтобы собрать все трофеи. Эдвар Нигма ака Риддлера — это большая заноза в заднице Брюса Уэйна ака Бэтмена.
P.S. Обратите внимание, что все загадки и их решения мы получили в обычном режиме, это может отличаться от Новой Игры +
Рекомендуем вам ознакомиться с Решениями всех Загадок и Поиском трофеев в Готэм-сити:
- Загадки Риддлера на Острове Миагани
- Загадки Риддлера на Острове Блик
- Загадки Риддлера на Острове Основателей
- Загадки Риддлера на Дирижаблях Стегга
- Загадки Риддлера на Студии Панесса
- Загадки Риддлера на Штаб-Квартире Рыцаря Аркхема
- Трофеи Риддлера на Острове Блик
- Трофеи Риддлера на Острове Миагани
- Трофеи Риддлера на Острове Основателей
- Трофеи Риддлера на Дирижаблях Стегга
- Трофеи Риддлера на Студии Панесса
- Трофеи Риддлера на Штаб-Квартире Рыцаря Аркхема
- Разрушаемые Объекты на Острове Блик
- Разрушаемые Объекты на Острове Миагани
- Разрушаемые Объекты на Острове Основателей
- Разрушаемые Объекты на Дирижаблях Стэгга
- Разрушаемые Объекты в Штаб-Квартире Рыцаря Аркхема
- Разрушаемые Объекты в Паннеса Студиос
- Жертвы Риддлера на Острове Блик
- Жертвы Риддлера на Острове Миагани
Общая информация «Месть Загадочника»
- Даже после прохождения всех испытаний Риддлера, вы не сможете засадить его за решётку. Для того, чтобы отправить его к комиссару Гордону в участок вам понадобится решение и поиск всех его трофеев и загадок.
- Цель справиться со всеми испытаниями Эдварда Нигмы, которые состоят из ряда головоломок решаемые, как при помощи Бэтмобиля, так и без него.
- На шее Женщины-Кошки находится бомба с 9 зарядами, чтобы её спасти вам потребуется 9 ключей. Ключи вы получите только в том случае, если выполните все условия в заданиях Риддлера.
- По ходу выполнения миссий вы сможете управлять двумя персонажами: Бэтменом и Женщиной-Кошкой
- Испытания Загадочника делятся на две части:
- 1. Головоломки с участием Бэтмобиля, после завершения которых вы подскажите Женщине-Кошке где находится нужный ключ.
- 2. Испытания с Женщиной-Кошкой, здесь под ваше управления попадает Селина Кайл, с которой вам придётся взаимодействовать для решения ряда головоломок. В конце каждого испытания вы получите ключ.
- При каждом успешном выполнении испытания, вы получите награду в размере 2-ух очков WayneTech, а также одно достижение.
Награда за прохождение «Месть Загадочника»
- 25 очков WayneTech.
- «Дорога в ад», «Фрагмент головоломки», «Кошки-мышки», «Загадочник разбушевался», «Больной вопрос», «Вечный вопрос», «Фабрика загадок», «Опасные занятия», «Девять жизней» — достижение.
- Женщина Кошка, Эдвард Нигма — фигурки и биографии персонажей.
- Несколько испытаний
- Доступ к последней загадке Риддлера на острове Миагани, которую вы получите на «Последнем Экзамене».
Первая встреча с Риддлером на острове Блик
Первая встреча с Нигмой произойдёт на острове Блик в рамках небольшого брифинга, что ещё ожидать от закрытых Гонок Риддлера. Там вас обучат азам поведения Бэтмобиля на специализированных трассах Загадочника.
После успешного прохождения, вас попросят удалиться, намекая на дальнейшее продолжение.
Месть загадочника — первое испытание Женщина-Кошка.
После прохождения обучающей миссий и знакомства с новым, открытым миром, вы окажетесь перед мостом на острове Миагани. Доступ к нему станет доступным во время прохождения. Попав на остров, вы получите сообщение Риддлера о том, что он может предложить вам что-то интересное в Приюте Пинкни. Отправляемся на место и обнаруживаем связанную Женщину-Кошку, освобождаем её и вступаем в драку с несколькими роботами. Во время битвы вы можете переключать персонажей в едином комбо, выглядит это эффектно и даёт возможность поиграть за Женщину-Кошку. Узнаём, что на кошке заминированный ошейник, который нужно открывать определёнными ключами. Риддлер уведомит вас о новом испытании, которое «ждёт не дождётся» вашего приезда на указанное место.
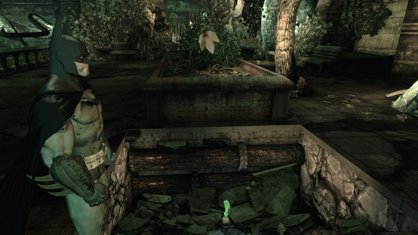
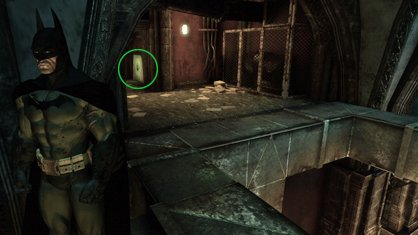
Второе испытание Риддлера проходит в заброшенном здании под землёй к востоку от Приюта Пинкни. Здесь вам предложат пройти гонку, на манер задания с Брифингом, переключаем платформы, убираем ловушки и так 3 круга. После этого Риддлер откроет доступ к кнопке, которая активирует головоломку и позволит Женщине-Кошке взять ключ, применив его на ошейнике. На скриншотах показано где именно, должен находится ключ.
Сбалансированный закон — второе испытание Риддлера
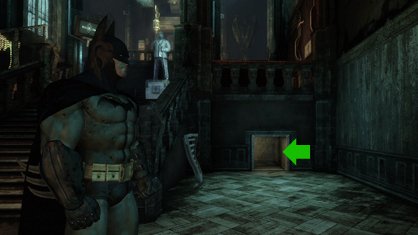
Испытание пройдёт в Китайском квартале в северо-западной части острова Блик. Здесь достаточно всё просто и быстро. Чтобы пройти испытание вам нужно выйти из машины и нажать на кнопку, затем, при помощи пульта дистанционного управления Бэтмобилем пройдите небольшое испытание с платформами. Важно: на последнем трамплине хорошенько разгонитесь при помощи форсажа, иначе вам придётся проделать весь путь снова. Второй частью задания будет подача электричества при помощи лебёдки Бэтмобиля, загорится панель и вы вновь сможете помочь Кошке взять следующий ключ.
Продолжение следует…
Overview
Гайд по свем трофеям Загадочника включая физические испытания.
Содержание
Это руководство целиком и полностью состоит из карт, видео-роликов и скриншотов, дабы наглядно показать что и где находится. Так же сюда включены и физические испытания как за Темного рыцаря, так и за Женщину Кошку (они представлены в видео-гайдах). Все разложено по полочкам, так что даже особо одаренные дожны все понять.
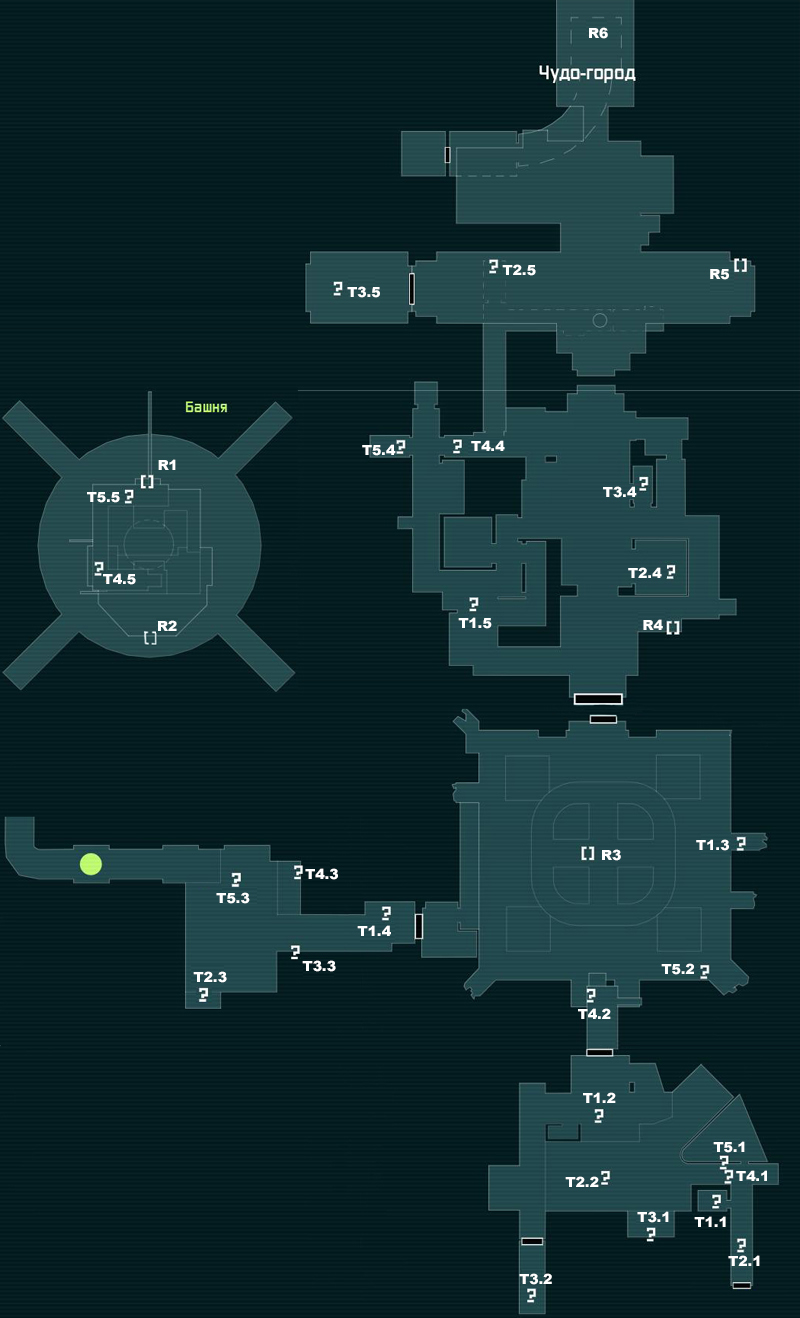
Музей (Museum)
Общая карта трофеев и загадок
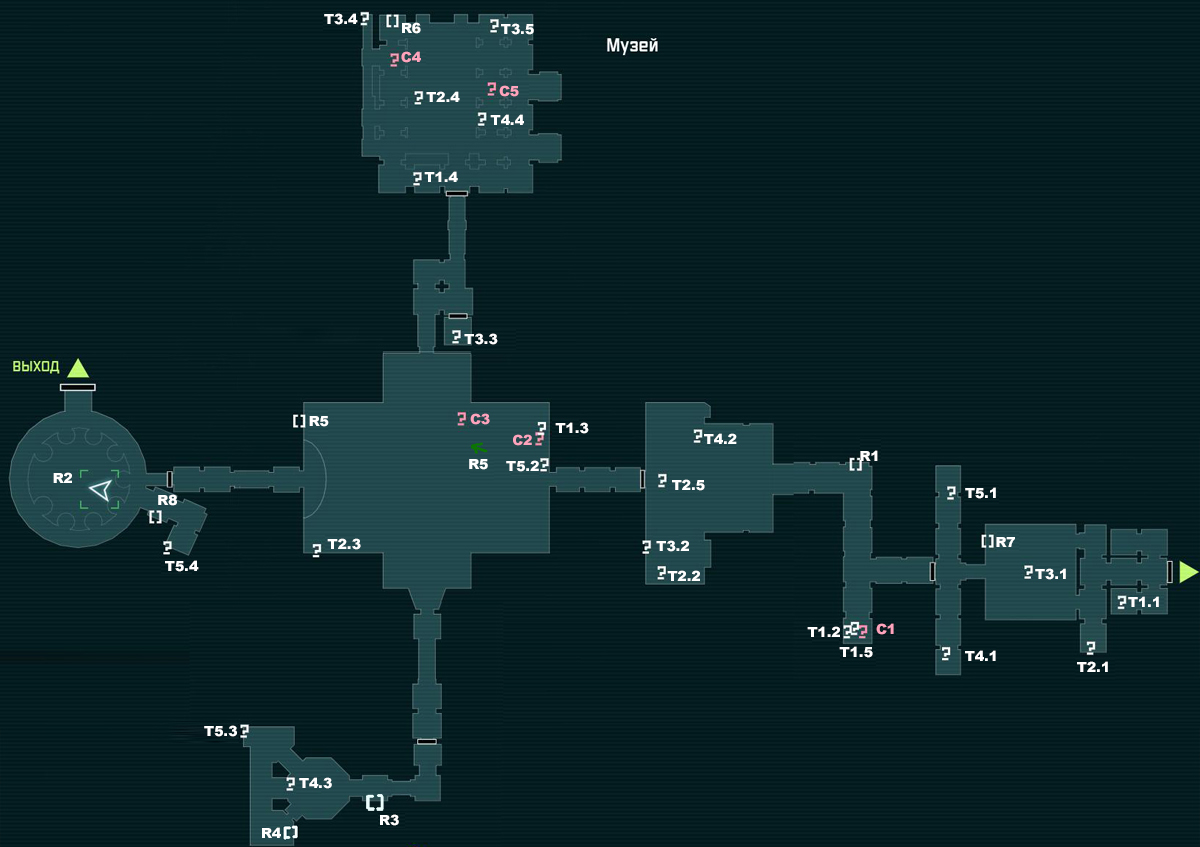
Трофеи
T1.1 – Быстрыми бэтарангами гасим все три вопросика. T1.2 – С помощью тросомёта добираемся до загадок. T1.3 – Используем тросомёт от правой развилки. T1.4 – В канале под решётками. T1.5 – Элементарно, Ватсон.
T2.1 – Снимаем бэткогтем с ящиков. T2.2 – Незаметная разрушаемая стенка за лифтом. T2.3 – Снимаем, стоя на льдинке. T2.4 – Открываем незаметную ловушку шифровальным секвенсором. T2.5 – Управляемым бэтарангом, зацепив электричества, перегружаем распределительную коробку.
T3.1 – Взлетаем на самый верх и подбираем. T3.2 – Открываем люк бэткогтем. T3.3 – Вскрываем ловушку быстрыми бэтарангами. T3.4 – Замораживаем струю ледяным ударом. T3.5 – Открываем решетку шифровальным секвенсором.
T4.1 – Открываем решетку шифровальным секвенсором. T4.2 – Перегружаем коробку электроразрядником. T4.3 – Отыскиваем загадку в сундучке. T4.4 – Подбираем без проблем.
T5.1 – Отключить деструктором пушку. Вход в помещение через вентиляцию неподалеку. T5.2 – Открываем бэткогтем лючок. T5.3 – Замораживаем струю ледяным ударом. T5.4 – Уничтожаем обе мины деструктором.
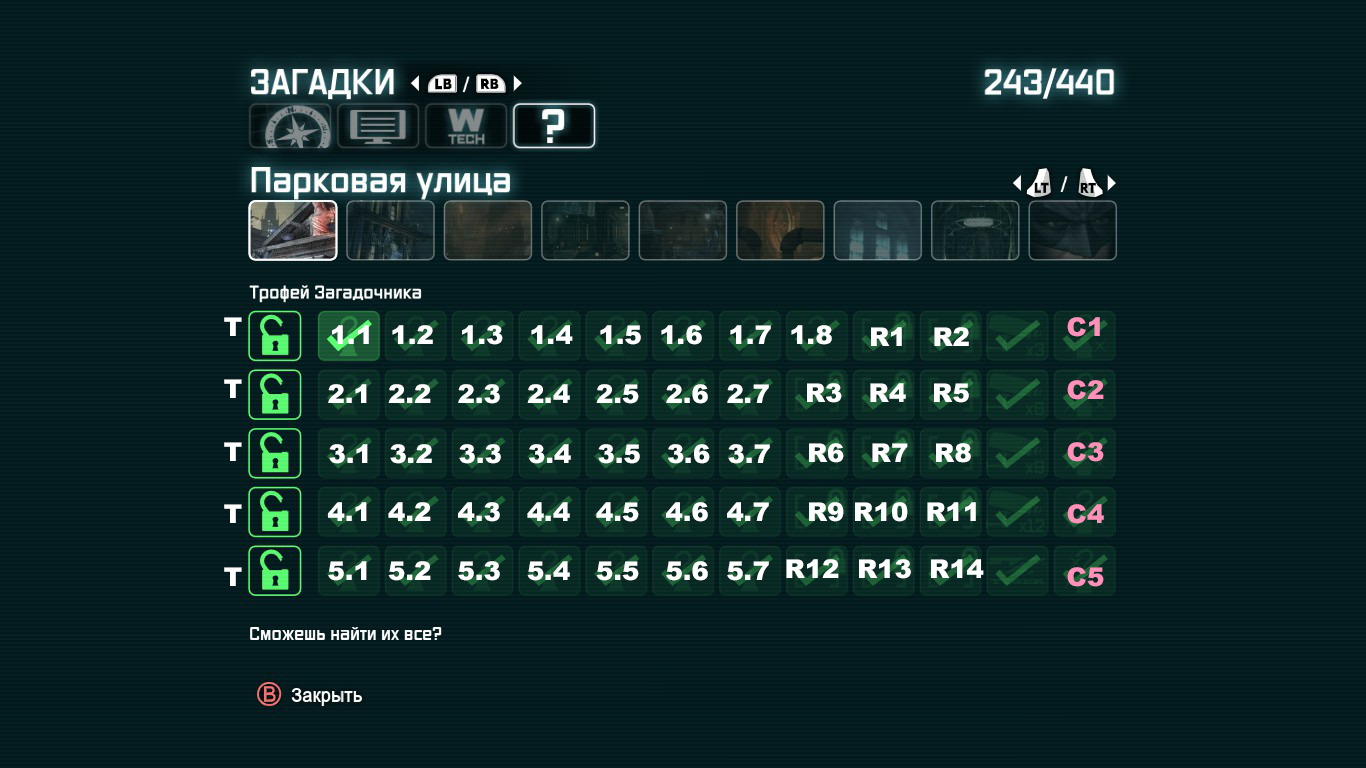
ТЗагадки
R1  R2
R2  R3
R3  R4
R4  R5
R5  R6
R6  R7
R7  R8
R8 
Метро (Subway)
Общая карта трофеев и загадок
Трофеи
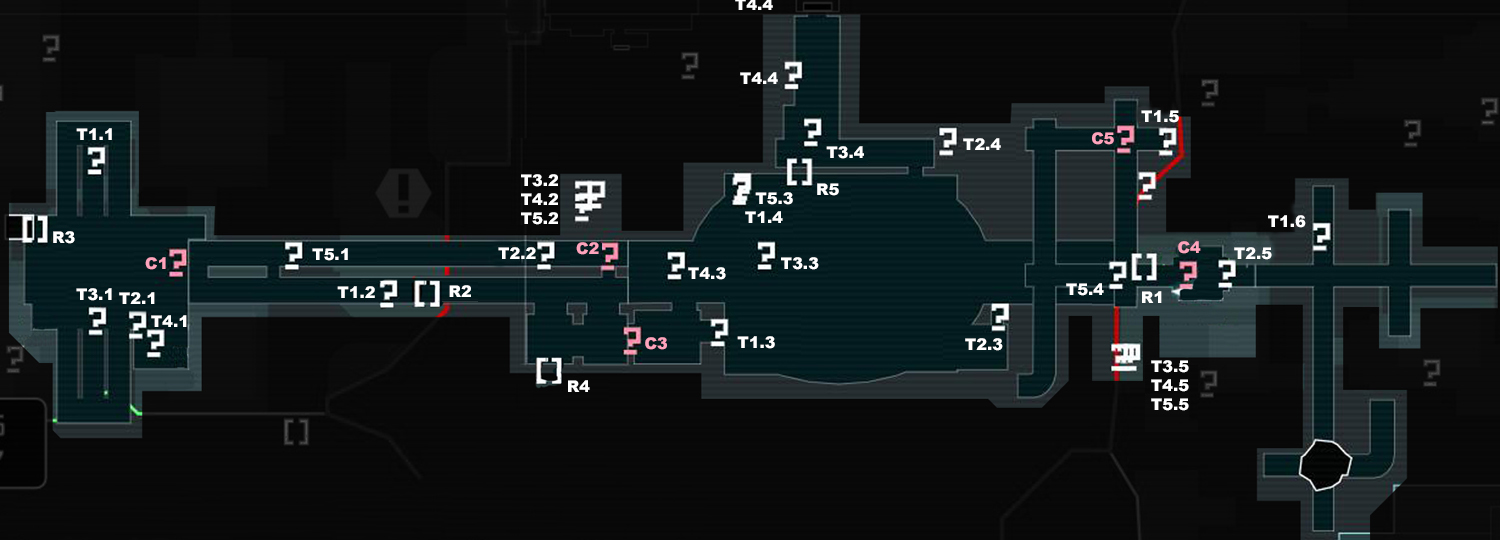
T1.1 – Ломаем решётку под лестницей и ныряем внутрь. T1.2 – Забираем с пола между вагонов. T1.3 – В полете ломаем стенку. T1.4 – Через узорную решётку перегружаем распределительную коробку электроразрядником. T1.5 – Перебираемся к загадке с помощью тросомёта. T1.6 – Перегружаем распределительную коробку заряженым управляемым бэтарангом.
T2.1 – Открываем дверь шифровальным секвенсором. T2.2 – Встаем на плиту и гасим знаки вопроса, начиная с дальнего. T2.3 – Через решётки в полу лезем к вопросику. T2.4 – За закрытой дверью с помощью электроразрядника. T2.5 – Кидаем льдинку под мост и с нее снимаем вопрос.
T3.1 – Продбираем вопросик каналах в полу. T3.2 – Активируем ловушку шифровальным секвенсором, стреляем тросомётом и забираемся на трос. T3.3 – Снимаем с потолка вагона. T3.4 – Кидаем льдинку и с нее забираем вопрос. T3.5 – Затыкаем газ ледяным ударом по мере его открывания.
T4.1 – Выбиваем решётку и идем в канал. T4.2 – Активируем ловушку шифровальным секвенсором, стреляем тросомётом и забираемся на трос. T4.3 – Открываем ловушку шифровальным секвенсором. T4.4 – Взламываем шифровальным секвенсором ловушку и забираем бэткогтем вопросик. T4.5 – Затыкаем газ ледяным ударом по мере его открывания.
T5.1 – Открываем дверь к загадке шифровальным секвенсором. T5.2 – Активируем ловушку шифровальным секвенсором, стреляем тросомётом и забираемся на трос. T5.3 – пролезаем в проход. T5.4 – Просто подбираем. T4.5 – Затыкаем газ ледяным ударом по мере его открывания.
Загадки
R1 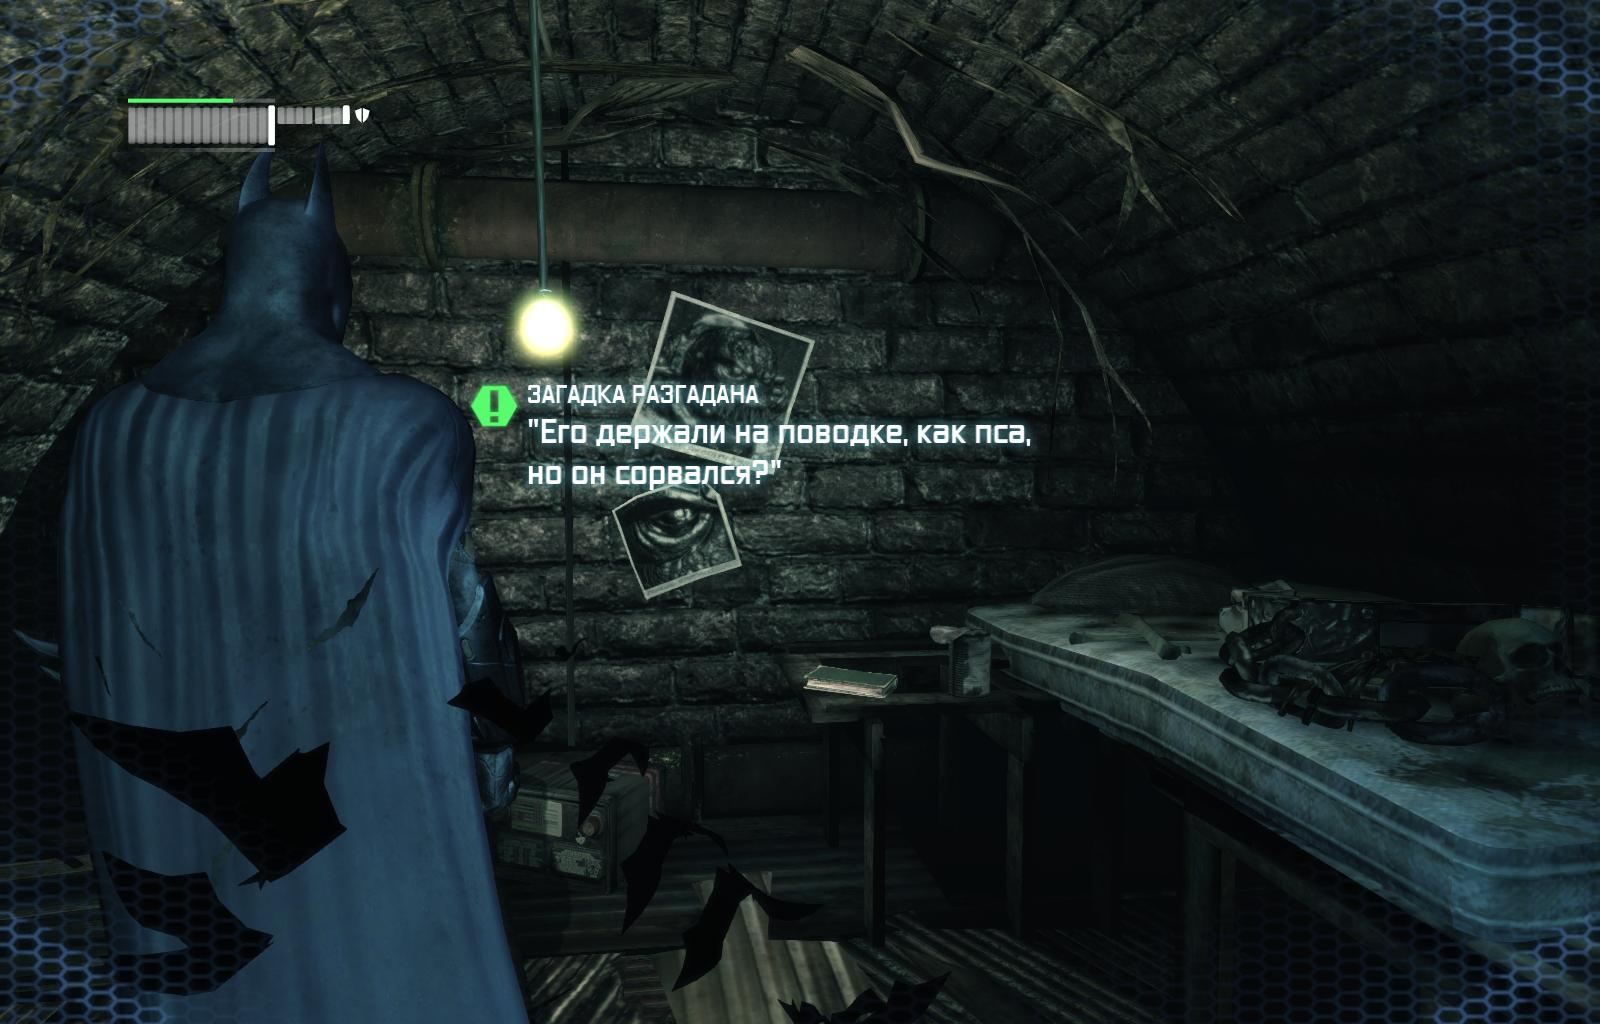 R2
R2 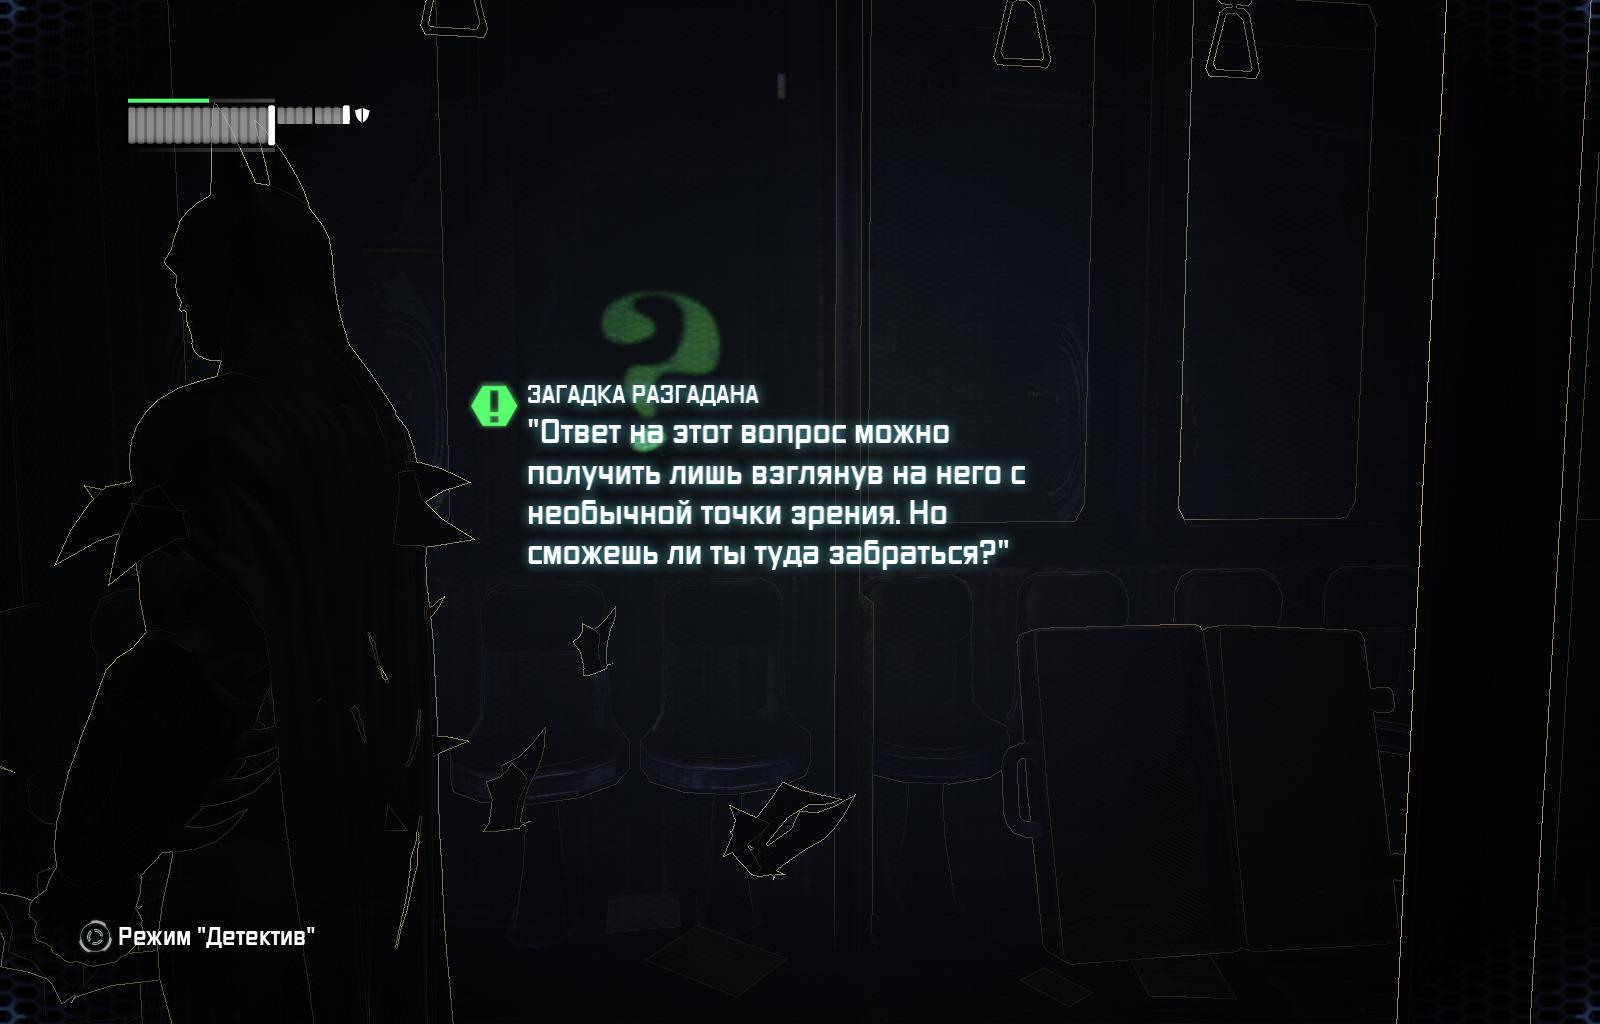 R3
R3 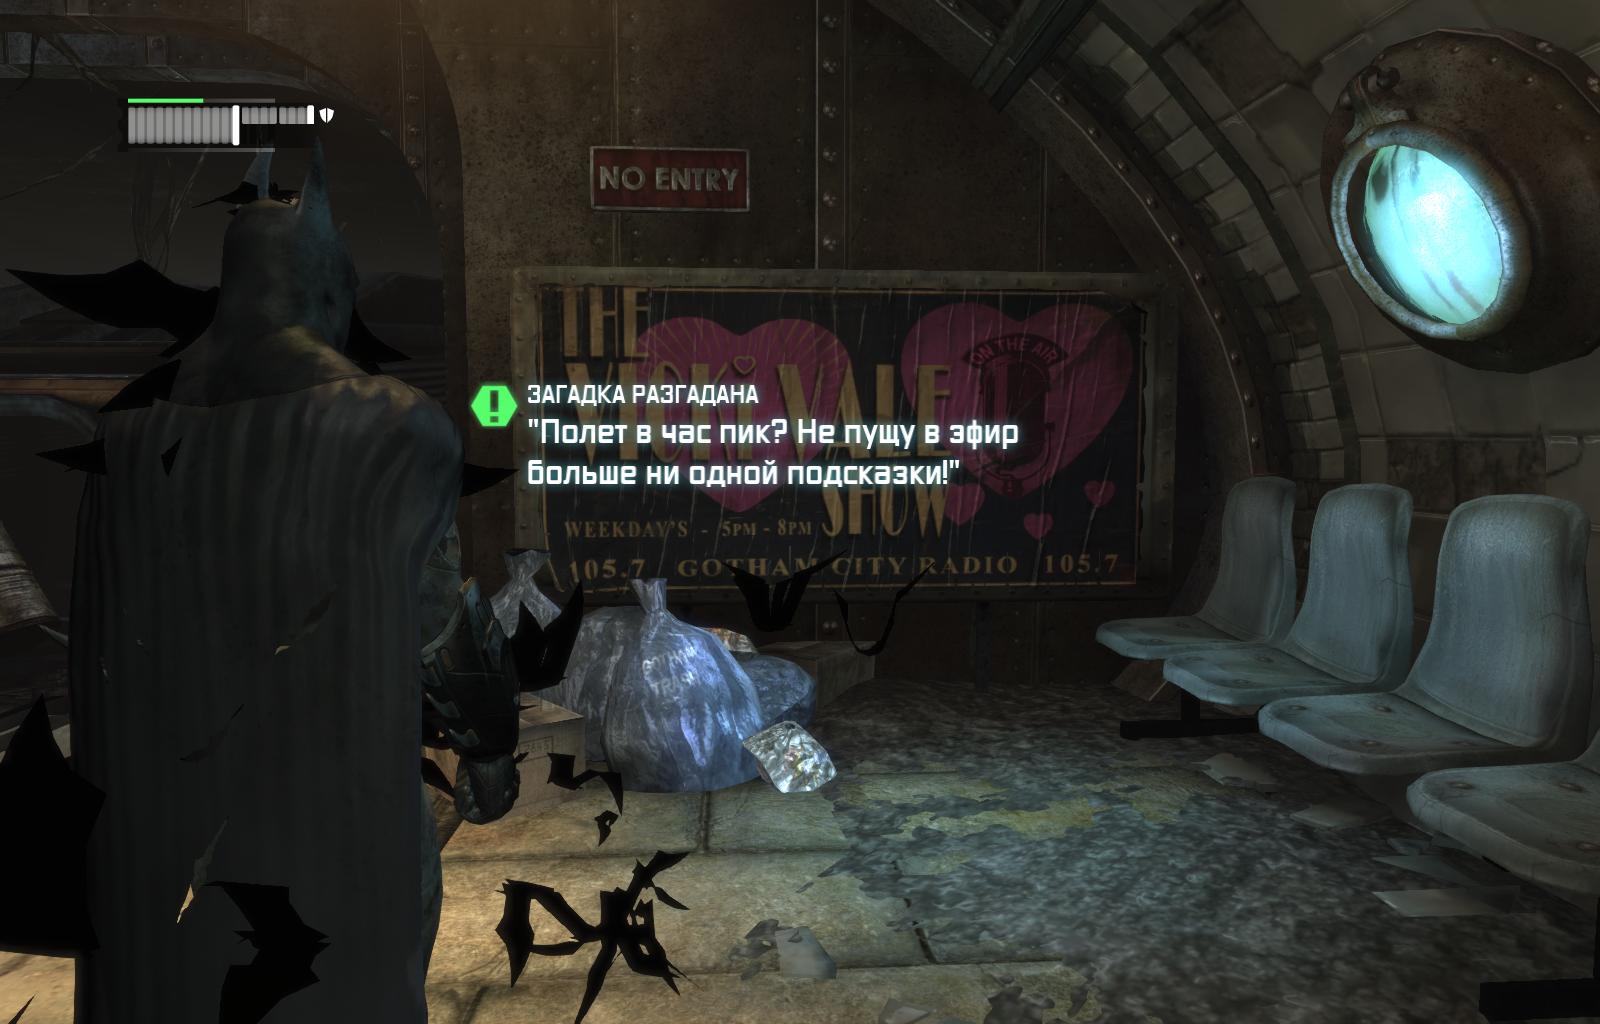 R4
R4  R5
R5 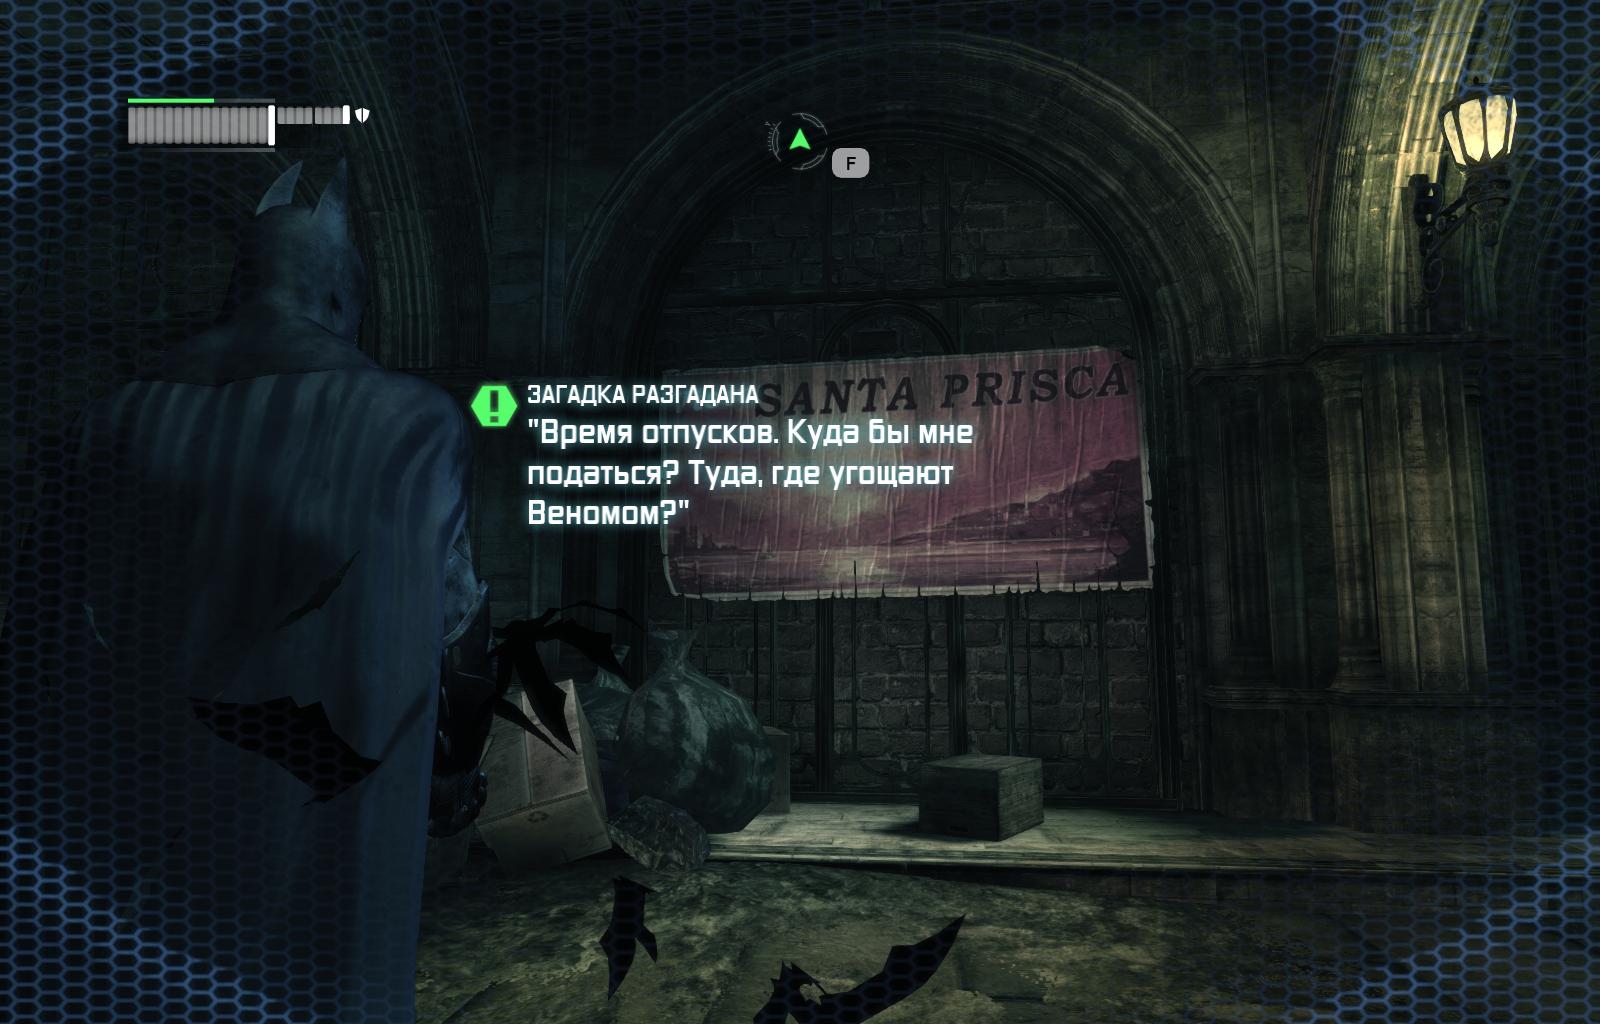
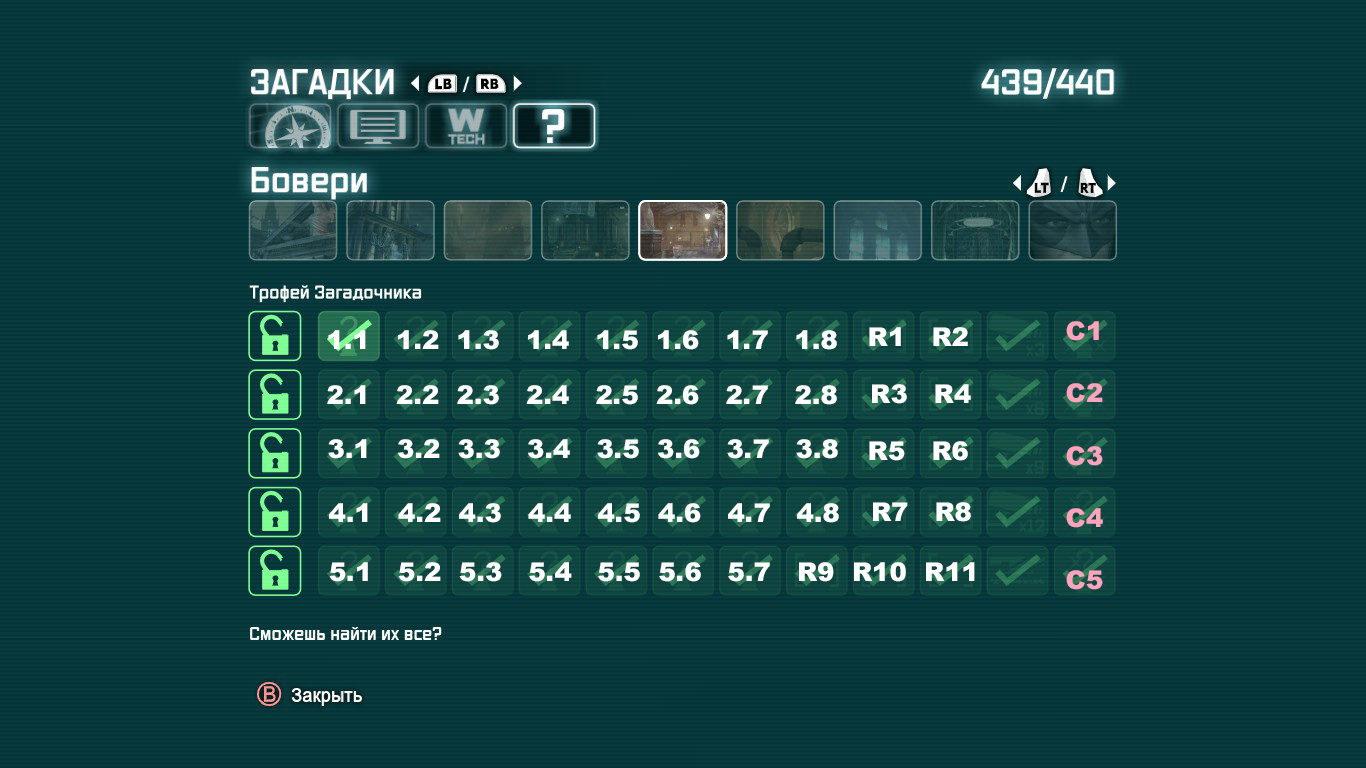
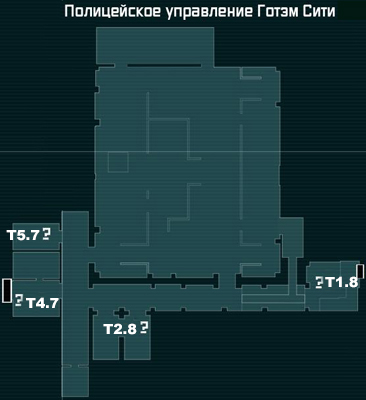
Бовери (Bowery)
Общая карта трофев и загадок
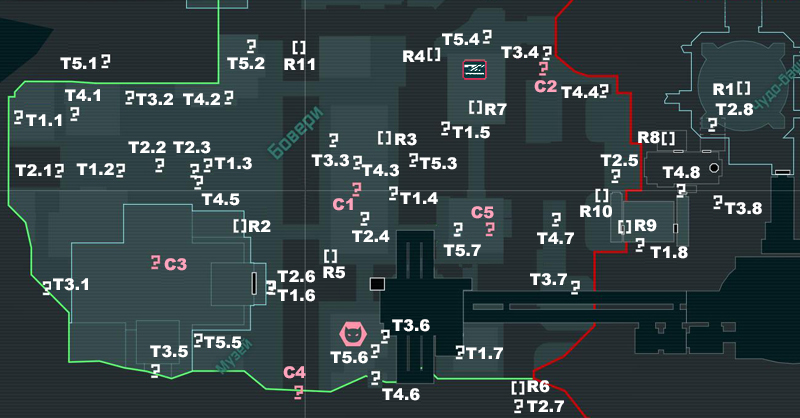
Трофеи
T1.1 – Наносите гель на все три знака вопроса. Встаёте на плиту. Взрываете гель поочередно, смотря на определенный заряд.
T1.2 – Достать бэткогтем с коня T1.3 – Взять с высокой колонны T1.4 – Взорвать одну мину деструктором, потом нанести гель и пройти в комнату T1.5 – Запускаем управляемый бэтаранг сначала в один, затем в второй знаки вопроса.
T1.6 – Нанесите взрывчатый гель на хрупкую стену T1.7 – Запускаем управляемый бэтаранг и умело лавируем в лабиринтике.
T1.8 – Кидаем льдинку на воду, открываем люк и забираем бэткогтем
T2.1 – Последовательно нажимаем на все три плиты не касаясь земли. Тросомёт в помощь.
T2.2 – Забираемся наверх и начинаем пикировать. Выходим из пике над перекрытием и пролетаем на решеткой под напряжением.
T2.3 – Просто подбираем. T2.4 – Подбираем на крыше. T2.5 – Снимаем со стены бэткогтем. T2.6 – Разбиваем хрупкую стену в полете.
T2.7 – Взламываем дверь шифровальным секвенсором. T2.8 – Взрываем хрупкую стену гелем, забираем загадку бэткогтем.
T3.1 – Нажимаем на плиту, выстреливаем тросомет, встаем на него и быстрыми бэтарангами гасим знаки вопроса.
T3.2 – Открываем дверь шифровальным секвенсором T3.3 – Поднимаем дверь электрозарядом T3.4 – Ломаем хрупкую стену в полёте T3.5 – Просто берём T3.6 – C помощью Электроразрядника вытаскиваем шарик из лабиринта.
T3.7 – Нажимаем три плиты в полёте, не касаясь земли. T3.8 – Открываем потайную дверь взрывчатым гелем.
T4.1 – Открываем дверь электроразрядом и берем загадку. T4.2 – Нажимаем на плиту и скользим в короб.
T4.3 – Спамим быстрый бэтаранг в первые три знака вопроса, резко разворачиваемся и спамим во вторые три вопроса.
T4.4 – Замораживаем газ ледяным ударом. T4.5 – Открываем дверь шифровальным секвенсором. T4.6 – Ломаем перегородку гелем либо в полете и забирам загадку. T4.7 – Открываем дверь с помощью шифровального секвенсора. T4.8 – Открываем лифт шифровальным секвенсором и снимаем загадку с потолка.
T5.1 – На всякий случай отключаем пушку деструктором, в будке ломаем перегородку и ныряем в канал. T5.2 – Просто подбираем бэткогтем с расстояния, т.к. на близких дистанциях ловушка захлопывается. T5.3 – Забираемся в подвешенный вагон. У меня это вышло только в полете.
T5.4 – Ломаем перегородку в будке. T5.5 – Скользим под решетку. T5.6 – Нажимаем последовательно три плиты не касаясь земли и стен.
T5.7 – Просто открываем ловушку с помощью шифровального секвенсора
Загадки
R1  R2
R2 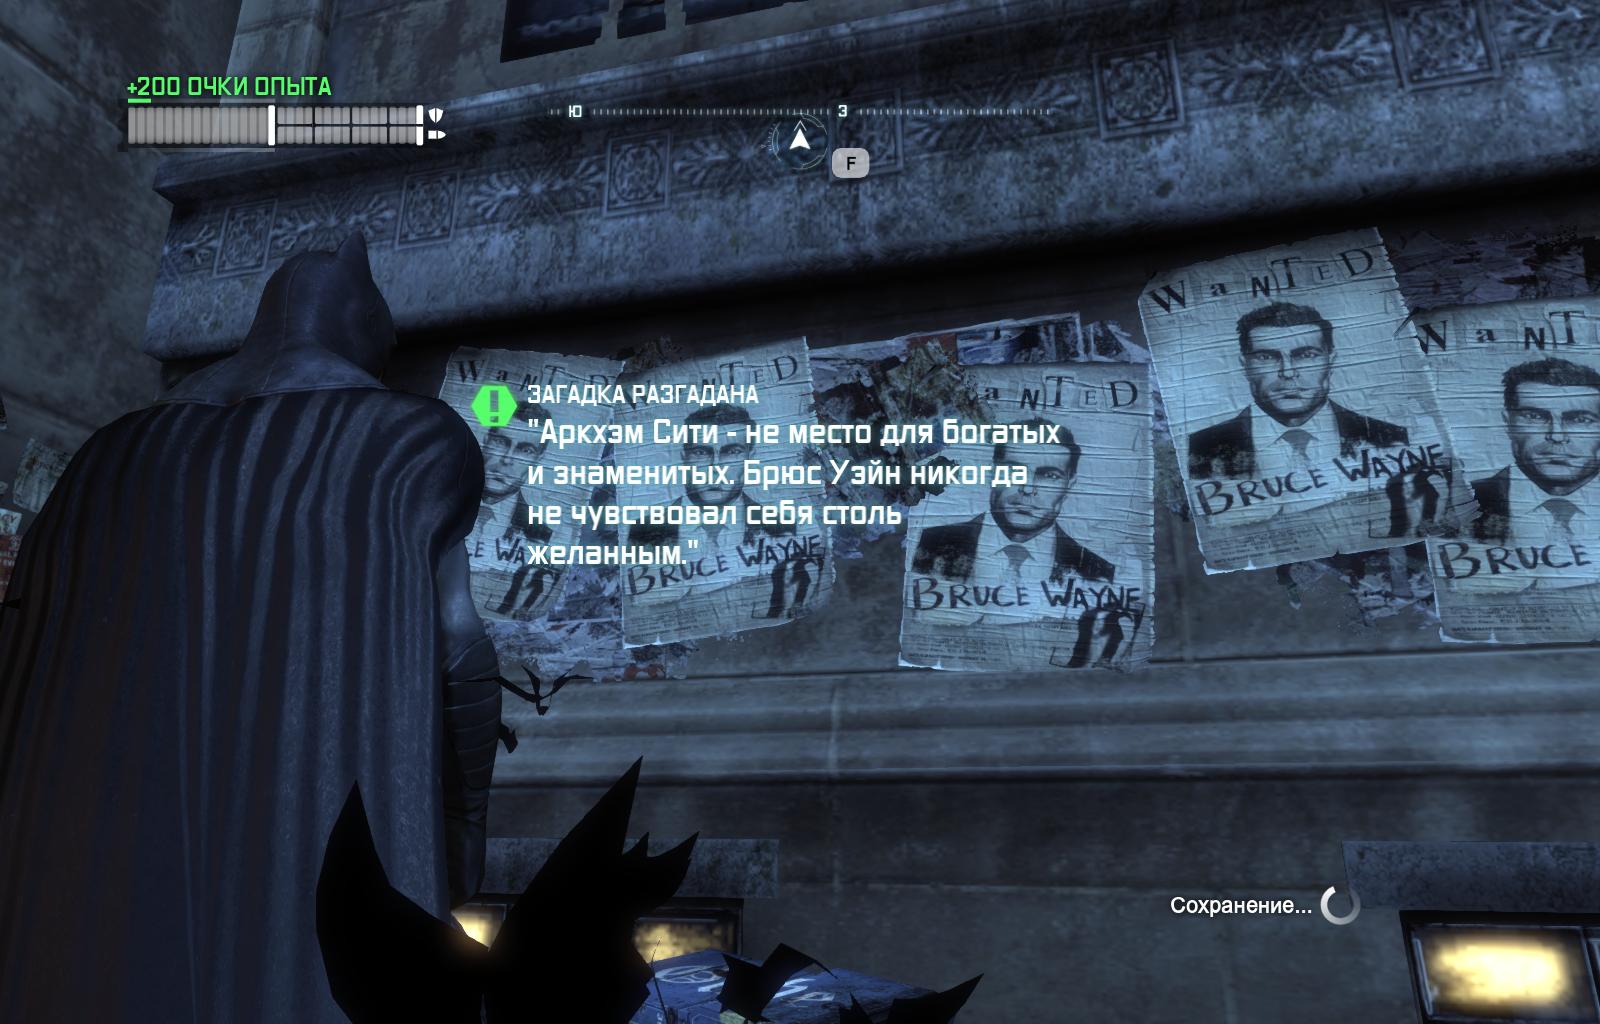 R3
R3  R4
R4 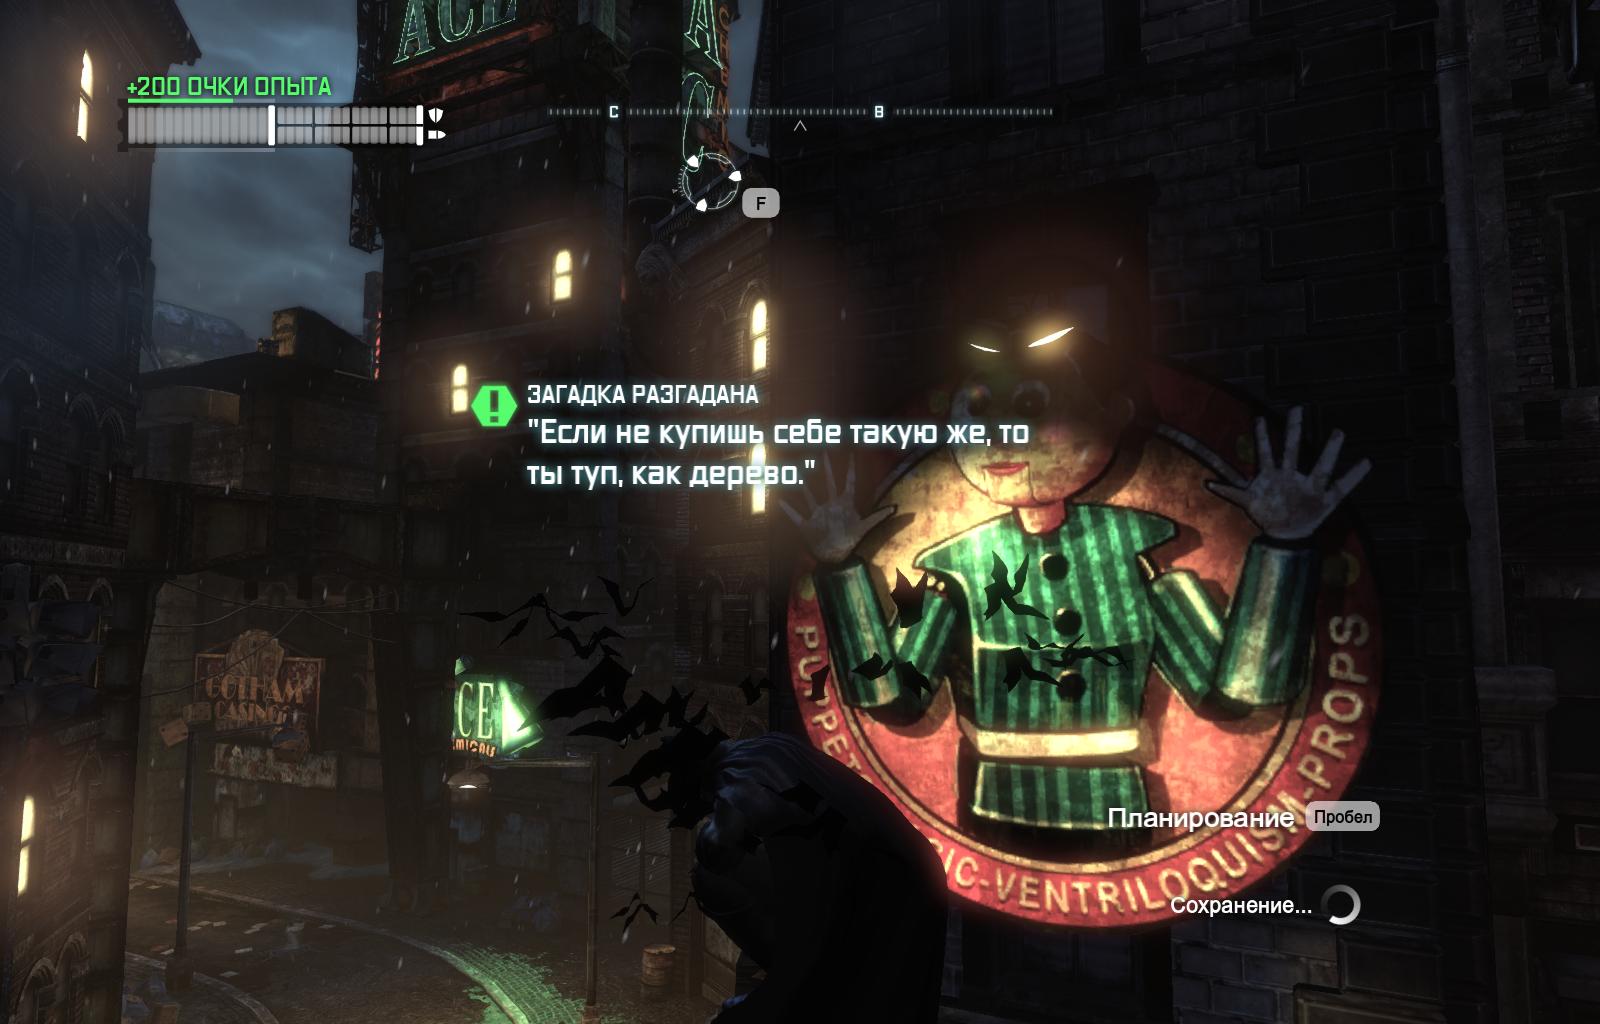 R5
R5  R6
R6  R7
R7  R8
R8 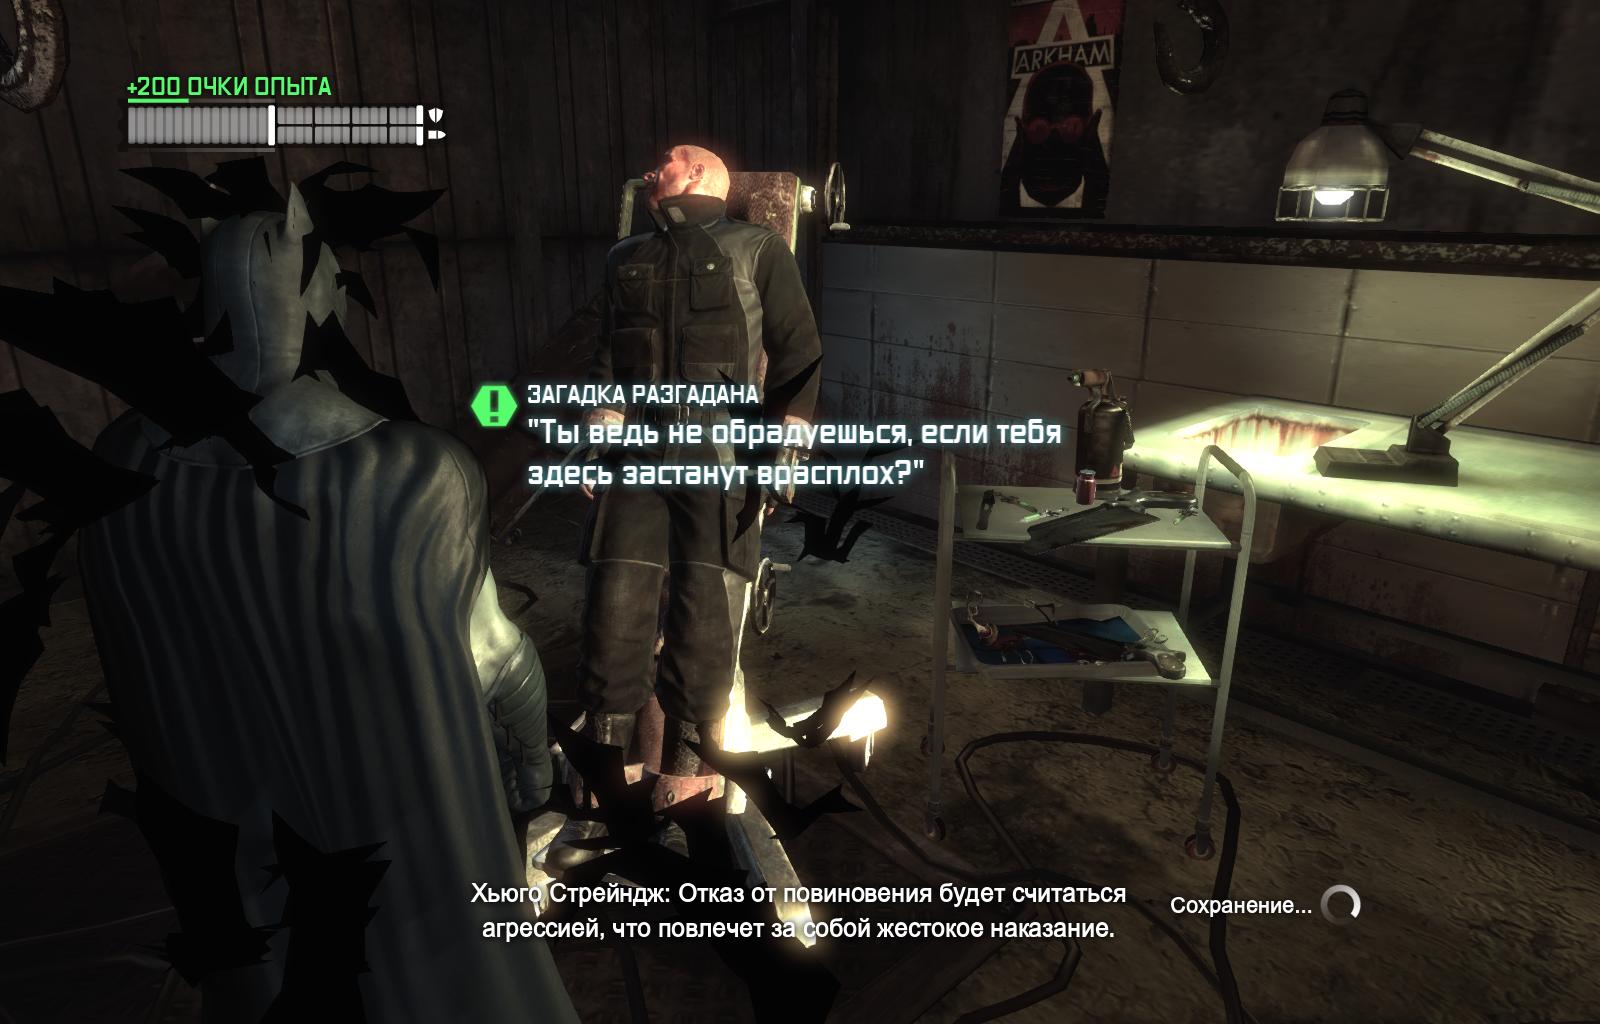 R9
R9  R10
R10  R11
R11 
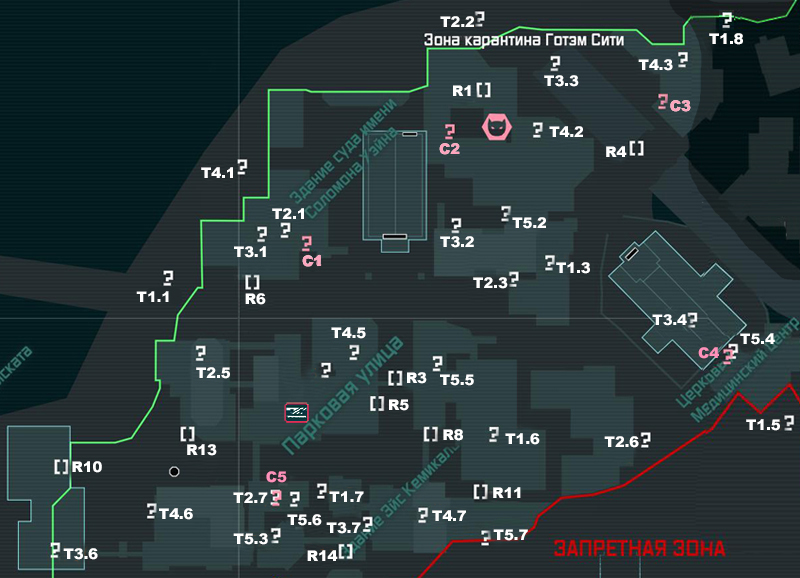
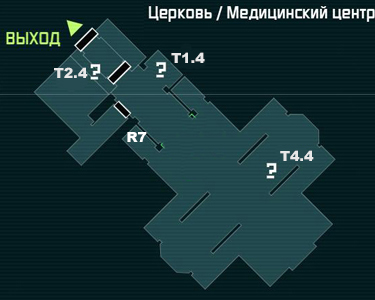
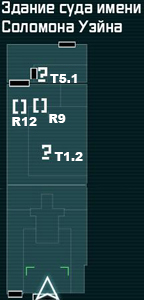
Парковая Улица (Park Row)
Общая карта трофеев и загадок
Трофеи
T1.1 – Отключаем оружие деструктором и проходим за загадкой. T1.2 – Управляемым бэтарангом подбираем электрозаряд и перегружаем коробку. T1.3 – Выбиваем знак вопроса бэтарангом. T1.4 – Разбиваем стенку в парении и забираем вопрос. T1.5 – Перегружаем коробку электроразрядником, ломаем стенку и забираем приз. T1.6 – Ломаем фанерку гелем. T1.7 – Скользим под машиной и подбираем. T1.8 – Кидаем льдинку и с неё подбираем загадку.
T2.1 – Открываем дверь электроразрядом. T2.2 – Отключаем оружие деструктором, взрываем стенку гелем. T2.3 – Замораживаем газ Ледяным ударом. T2.4 – Снимаем Бэткогтем со стены. T2.5 – Взламываем решетку Сиквенсором. T2.6 – Управляемым Бэтарангом гасим вопросик высоко над зданием.
T2.7 – Фанеру над решёткой ломаем в парении и поднимаем загадку.
T3.1 – Наносим на три вопроса Взрывчатый гель, взрываем и сразу гасим последний.
T3.2 – Нажимаем поочередно три плиты за один полет.
T3.3 – Подбираем в трущобах. T3.4 – Открываем ловушку шифорвальным секвенсором. T3.5 – Скользим под решеткой. T3.6 – Пикируем в с высоты на плиту и выбиваем вопросик бэтарангом.
T3.7 – Замораживаем струю ледяным ударом и скользим под решеткой.
T4.1 – Взламываем решетку с электричеством шифровальным секвенсором. T4.2 – Наносим на все вопросы взрывчатый гель.
T4.3 – В режиме детектива определяем активный вопрос и гасим его бэтарангом. T4.4 – Забираем вопросик из кельи. T4.5 – Нажимаем на плиту и снимаем Бэткогтем. T4.6 – Взрываем обе мины ДеструктороМ. T4.7 – Пикируем вниз, пока не захлопнулся люк.
T5.1 – Снимаем Бэткогтем со стены. T5.2 – Нажимаем плиту на крыше и пикируем в фанерный потолок.
T5.3 – Поднимаем Электроразрядником.
T5.4 – Нажимаем на зелёную плиту и с помощью Тросомёта проскакиваем мимо красных. T5.5 – Гасим вопрос Управляемым Бэтарангом.
T5.6 – Открываем дверь Электроразрядником. T5.7 – Проверяем, какой вопросик подключен к ловушке и гасим его.
Загадки
R1 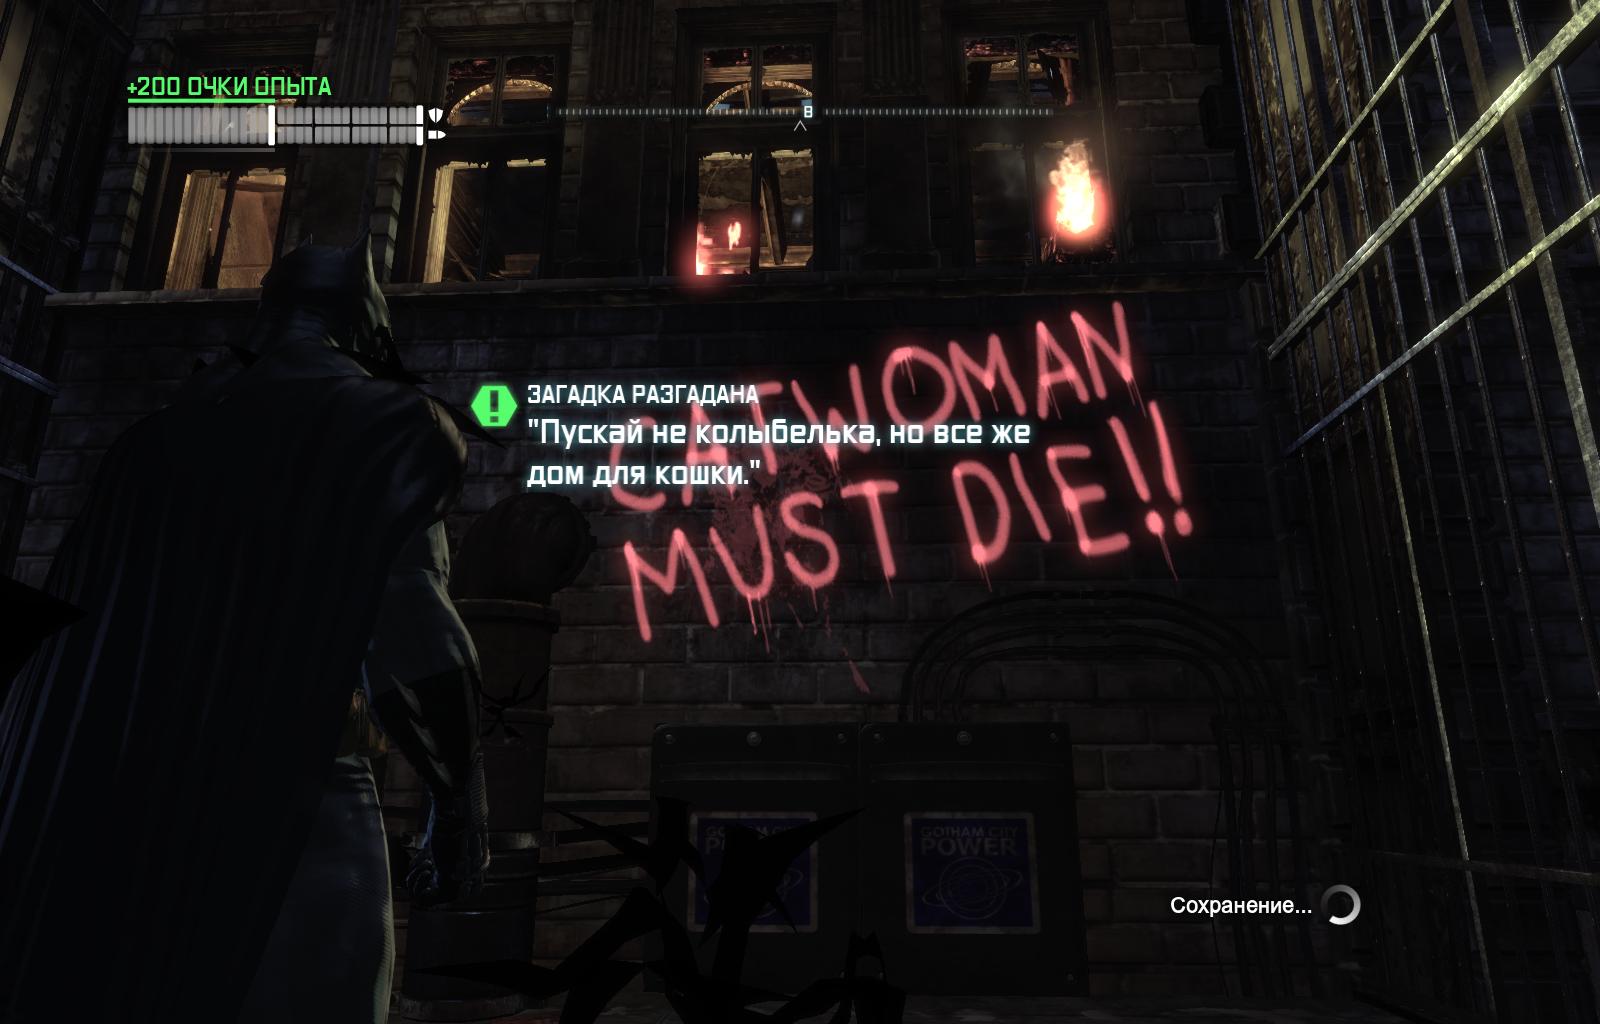 R2
R2  R3
R3 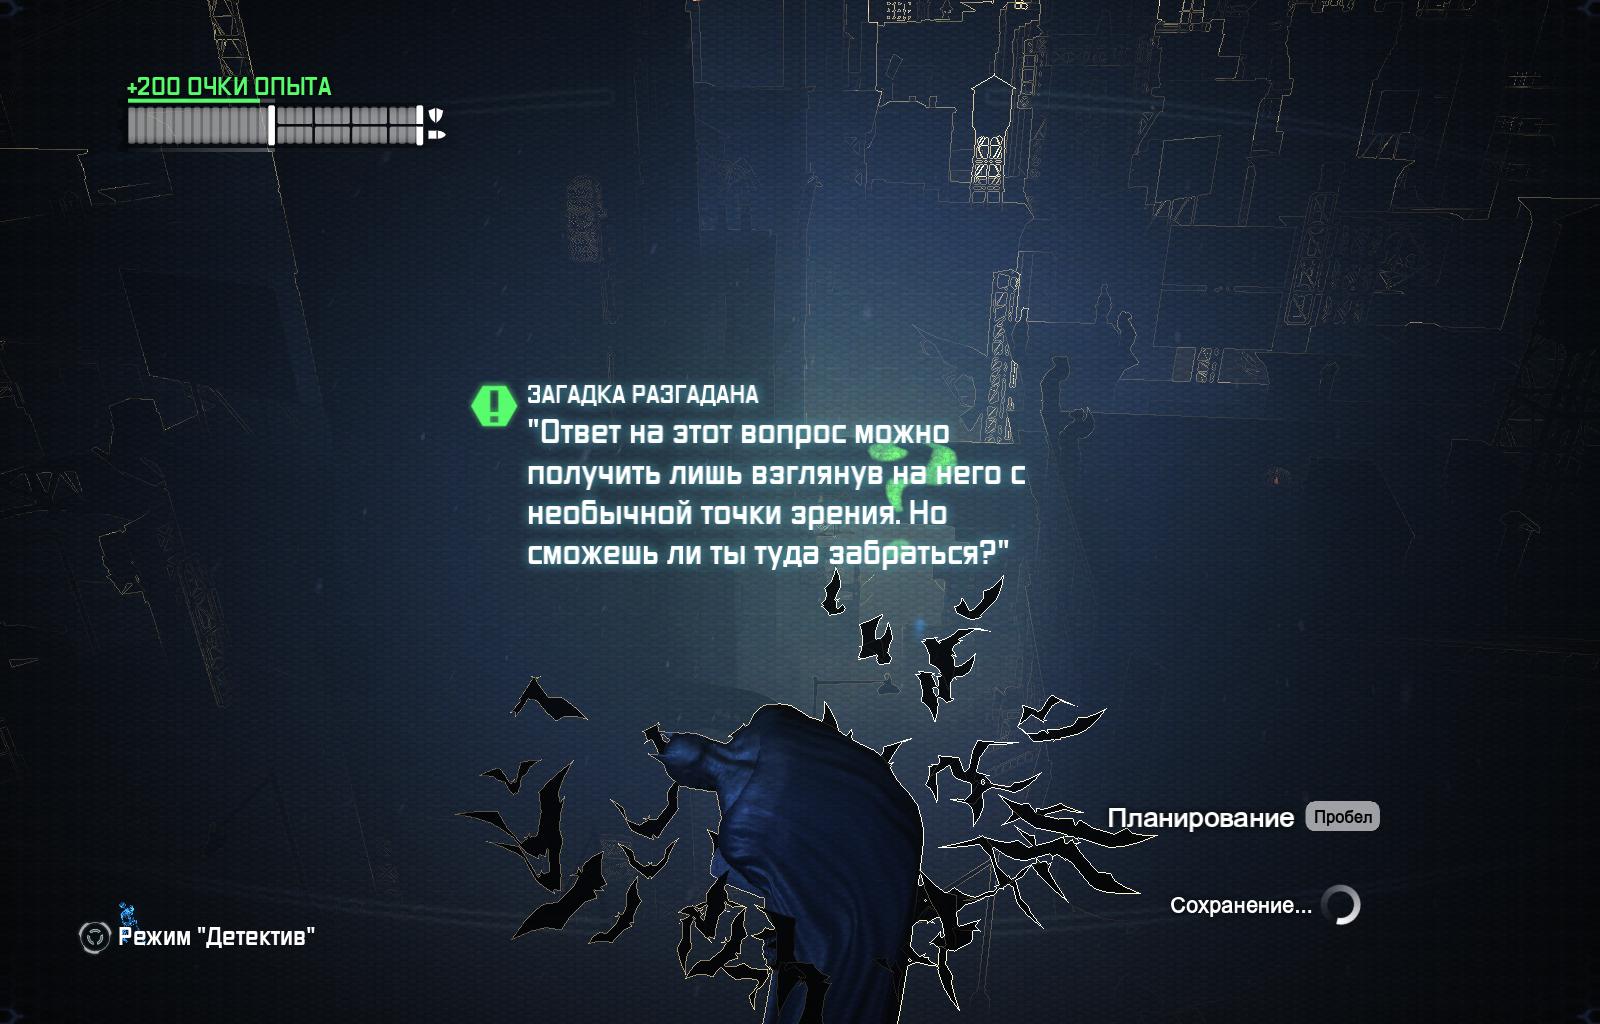 R4
R4  R5
R5  R6
R6 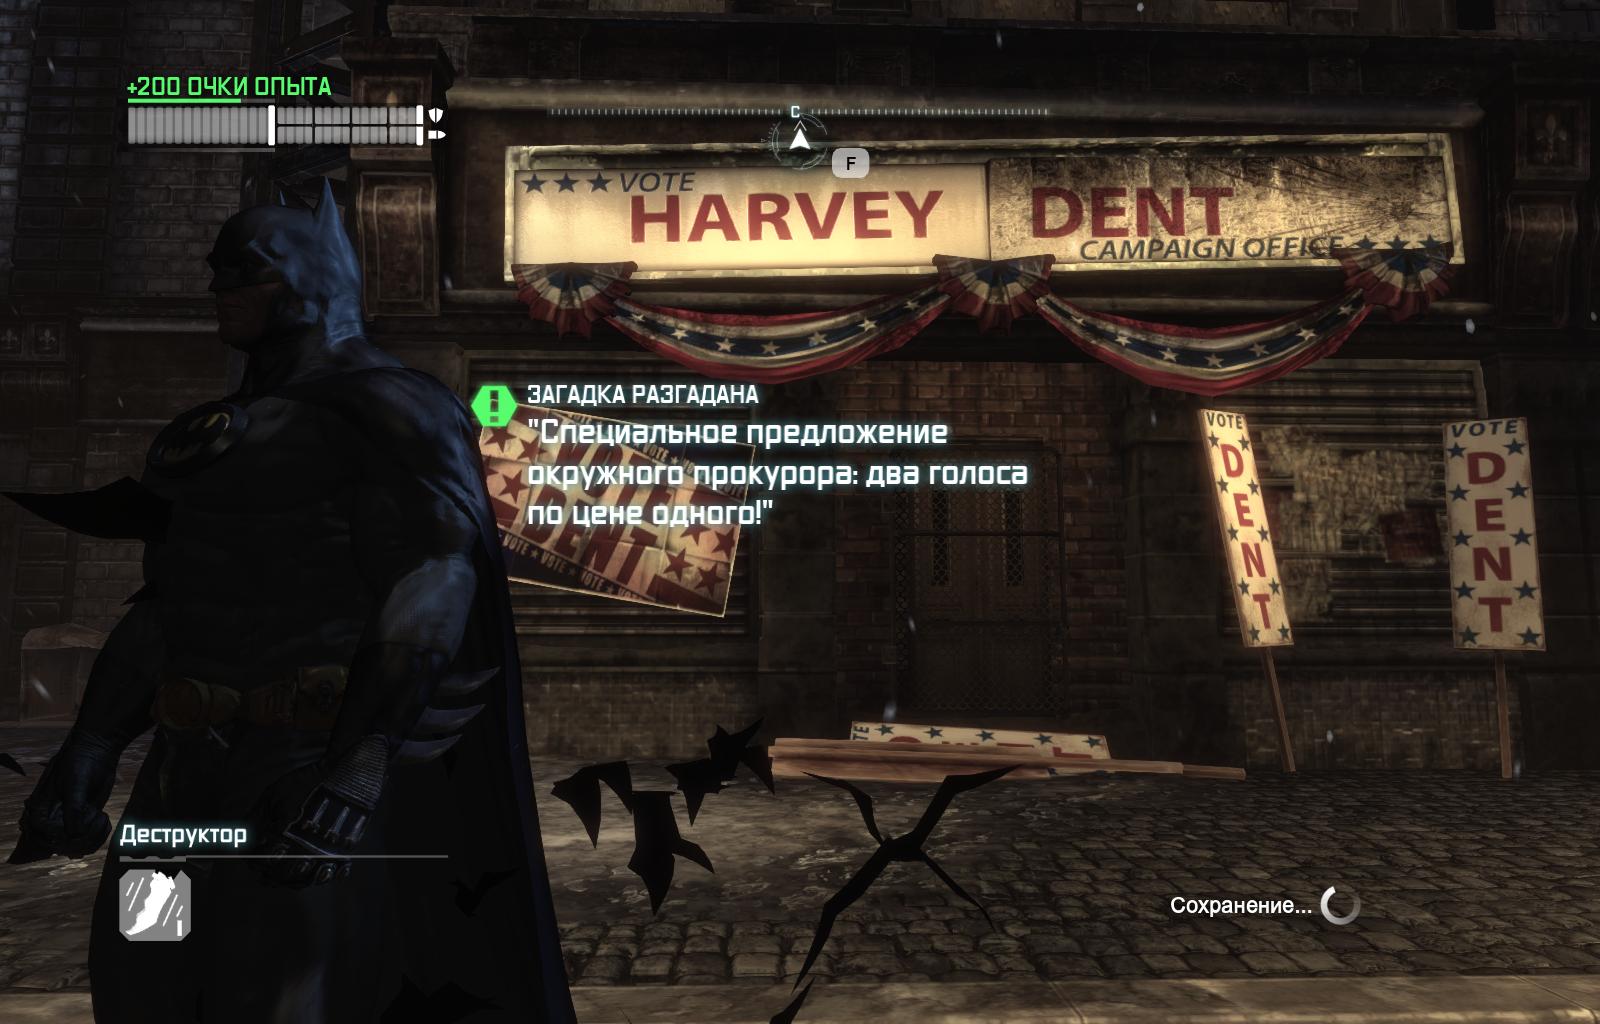 R7
R7 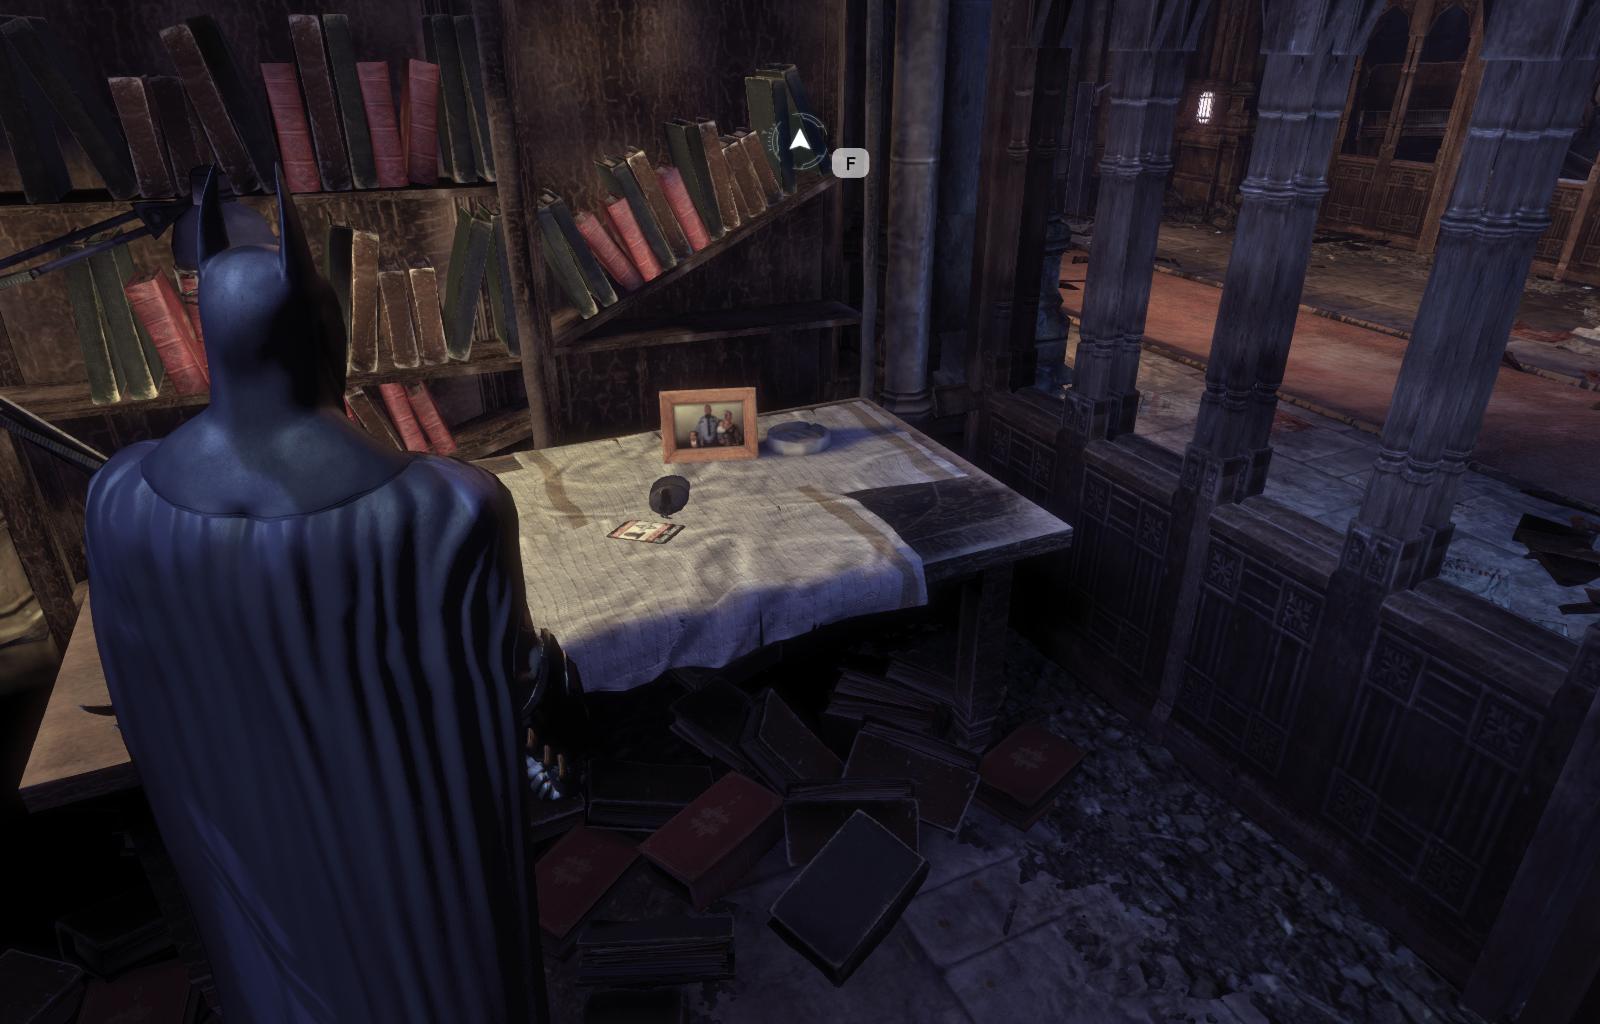 R8
R8 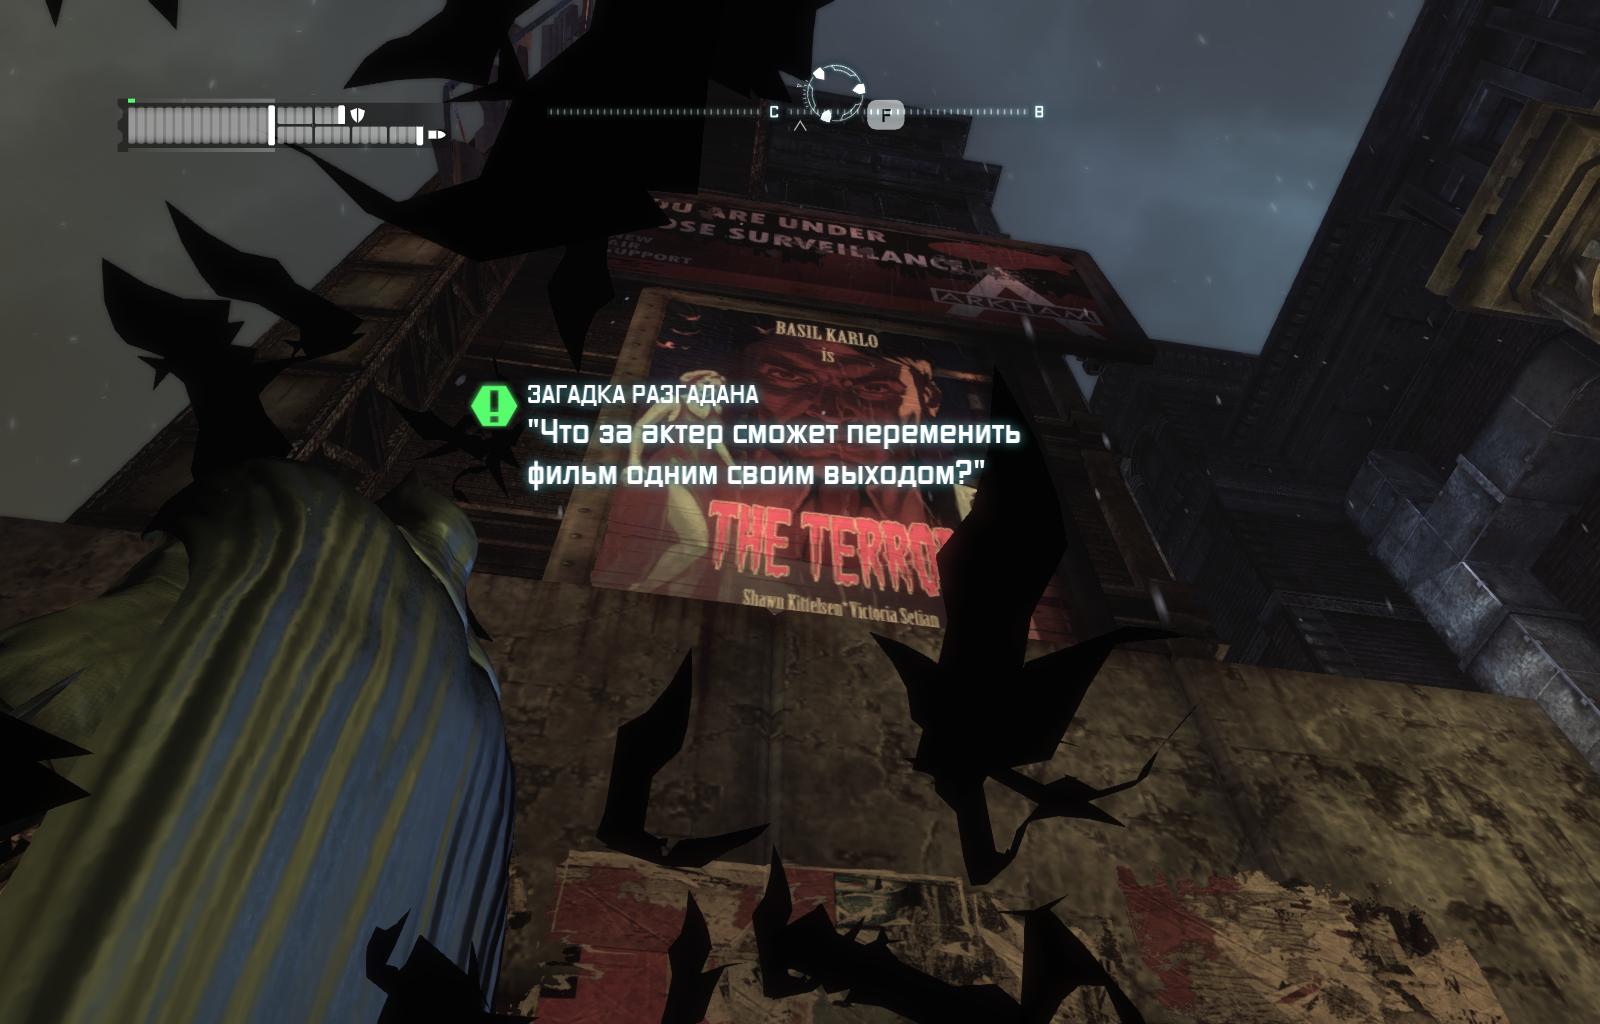 R9
R9  R10
R10 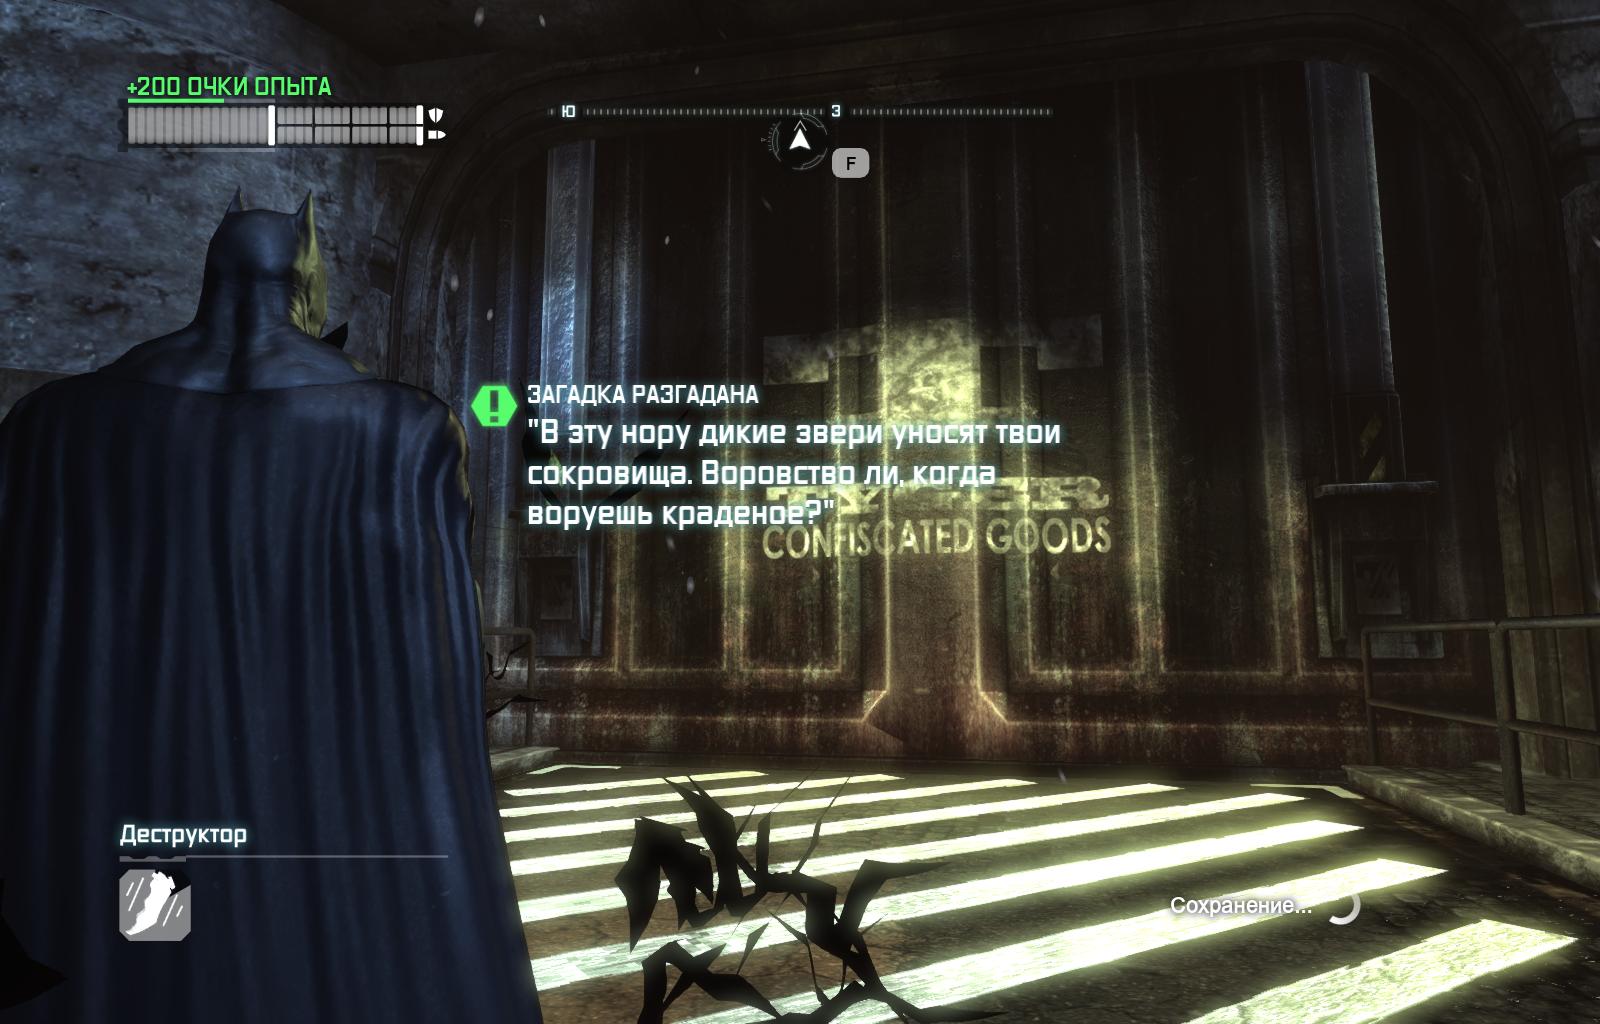 R11
R11  R12
R12  R13
R13  R14
R14 
Промышленный район (Industrial District)
Общая карта трофеев и загадок
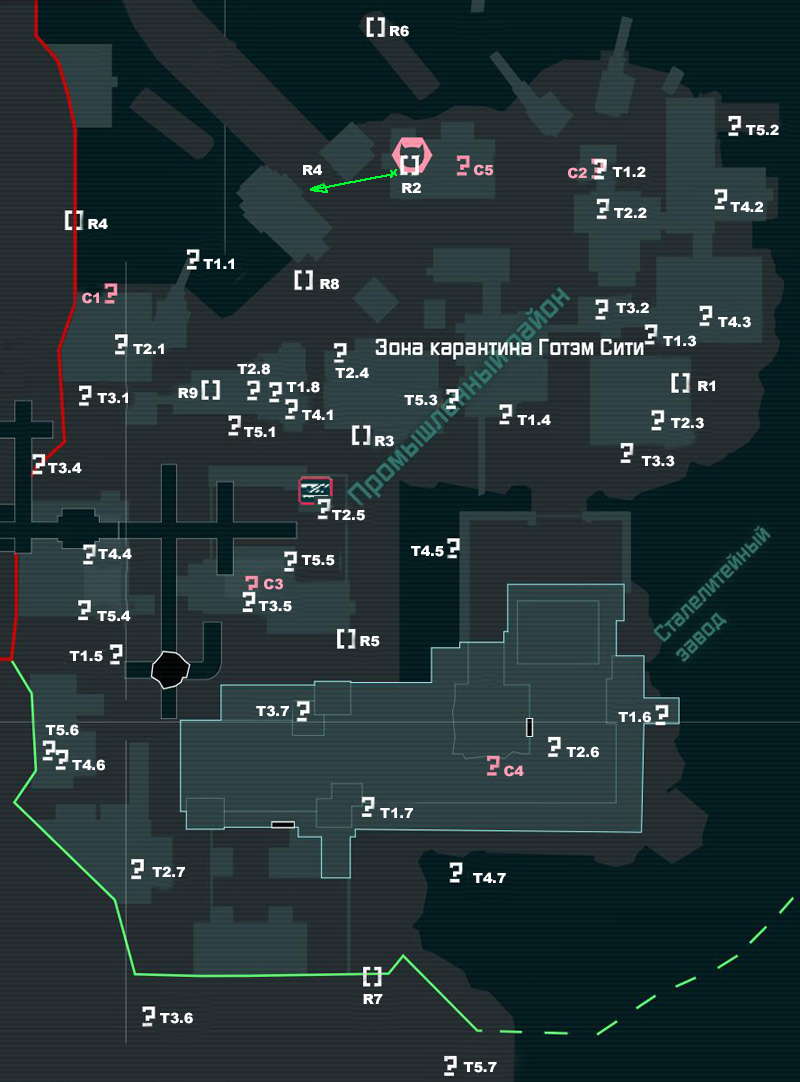
Трофеи
T1.1 – Электроразрядником поднимаем крюк с загадкой из воды. T1.2 – Ломаем в полёте стенку и забираем загадку. T1.3 – Нажимаем на плиту и быстро гасим 3 вопроса управляемым бэтарангом. T1.4 – Взрываем мины деструктором и проползаем к загадке. T1.5 – Забираем из-под экскаватора. T1.6 – Просто подбираем. T1.7 – Подгоняем паравозик под фанеру и с него рисуем гелем. T1.8 – В логове Зсасза сначала включаем электродугу, заряжаем ей правляемый Бэтаранг и перегружаем коробку в тоннеле.
T2.1 – Электроразрядником двигаем сам двигатель, потом захватываем двигателем шар. T2.2 – Ломаем три перегородки с обратной стороны. T2.3 – Снимаем бэткогтем. T2.4 – Открываем ловушку шифровальным секвенсором. T2.5 – В планировании перелетаем через стоп-плиты и нажимаем нужную на стене.
T2.6 – Запускаем управляемый Бэтаранг в вопросик, предварительно сломав стенку к нему.
T2.7 – Проезжаем под решёткой и снимаем Бэткогтем. T2.8 – В логове Зсасза на самом входе, кидаем льдинку правее мостика.
T3.1 – Пикируем с высоты на плиту, зажигая вопрос. Гасим его бэтарангом.
T3.2 – Ледяным ударом замораживаем газ, взрываем мины и проходим к призу. T3.3 – Вытаскиваем шар из лабиринта электроразрядом. T3.4 – Отключаем решетку шифровальным секвенсоромю T3.5 – Вопросик за разрушаемой стеной. T3.6 – Выключаем электричество управляемым бэтарангом в кнопку. T3.7 – Подбираем за стенкой.
T4.1 – Нажимаем три плиты в полёте.
T4.2 – За стенкой в будке. T4.3 – Нажимаем на плиту и спрыгиваем вниз. Бэткогтем снимаем с потолка.
T4.4 – Прото подгадываем момент и пробегаем по всем плитам так, чтоб наступать на зелёные. T4.5 – Кидаем льдинку, с неё открываем люк бэткогтем, подплываем к упавшей замёрзшей загадке и подбираем её. T4.6 – Запоминаем, какой значок горит, встаем на плиту и гасим его. T4.7 – В планировании пробираемся к вопросику.
T5.1 – Пробегаем по зелёным плитам. T5.2 – С помощью тросомёта забираемся наверх и подбираем.
T5.3 – Встаем на левую плиту, потом на правую и забираем вопрос. T5.4 – С помощью тросомёта нажимаем три плиты.
T5.5 – Открываем ловушку шифровальным секвенсором. T5.6 – Открываем электроразрядом левую дверь, заходим и взламываем шифровальным секвенсором решетку правой комнаты. T5.7 – Летим вдаль к стене охранного периметра.
Загадки
R1  R2
R2  R3
R3 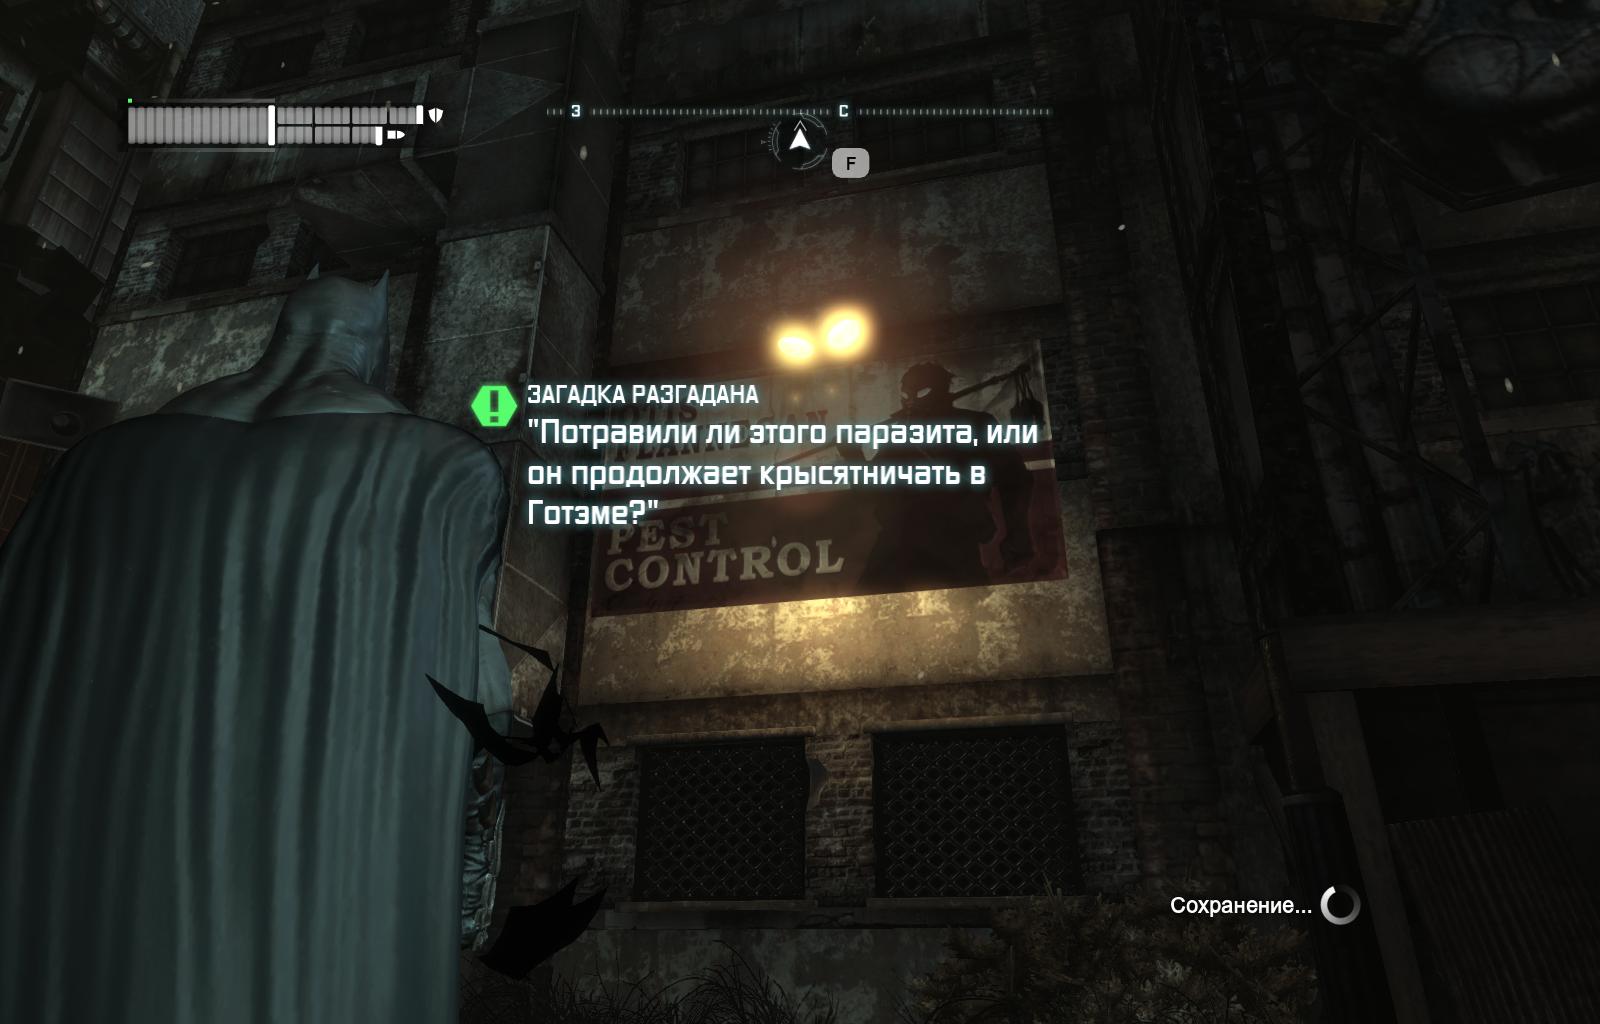 R4
R4  R5
R5  R6
R6  R7
R7 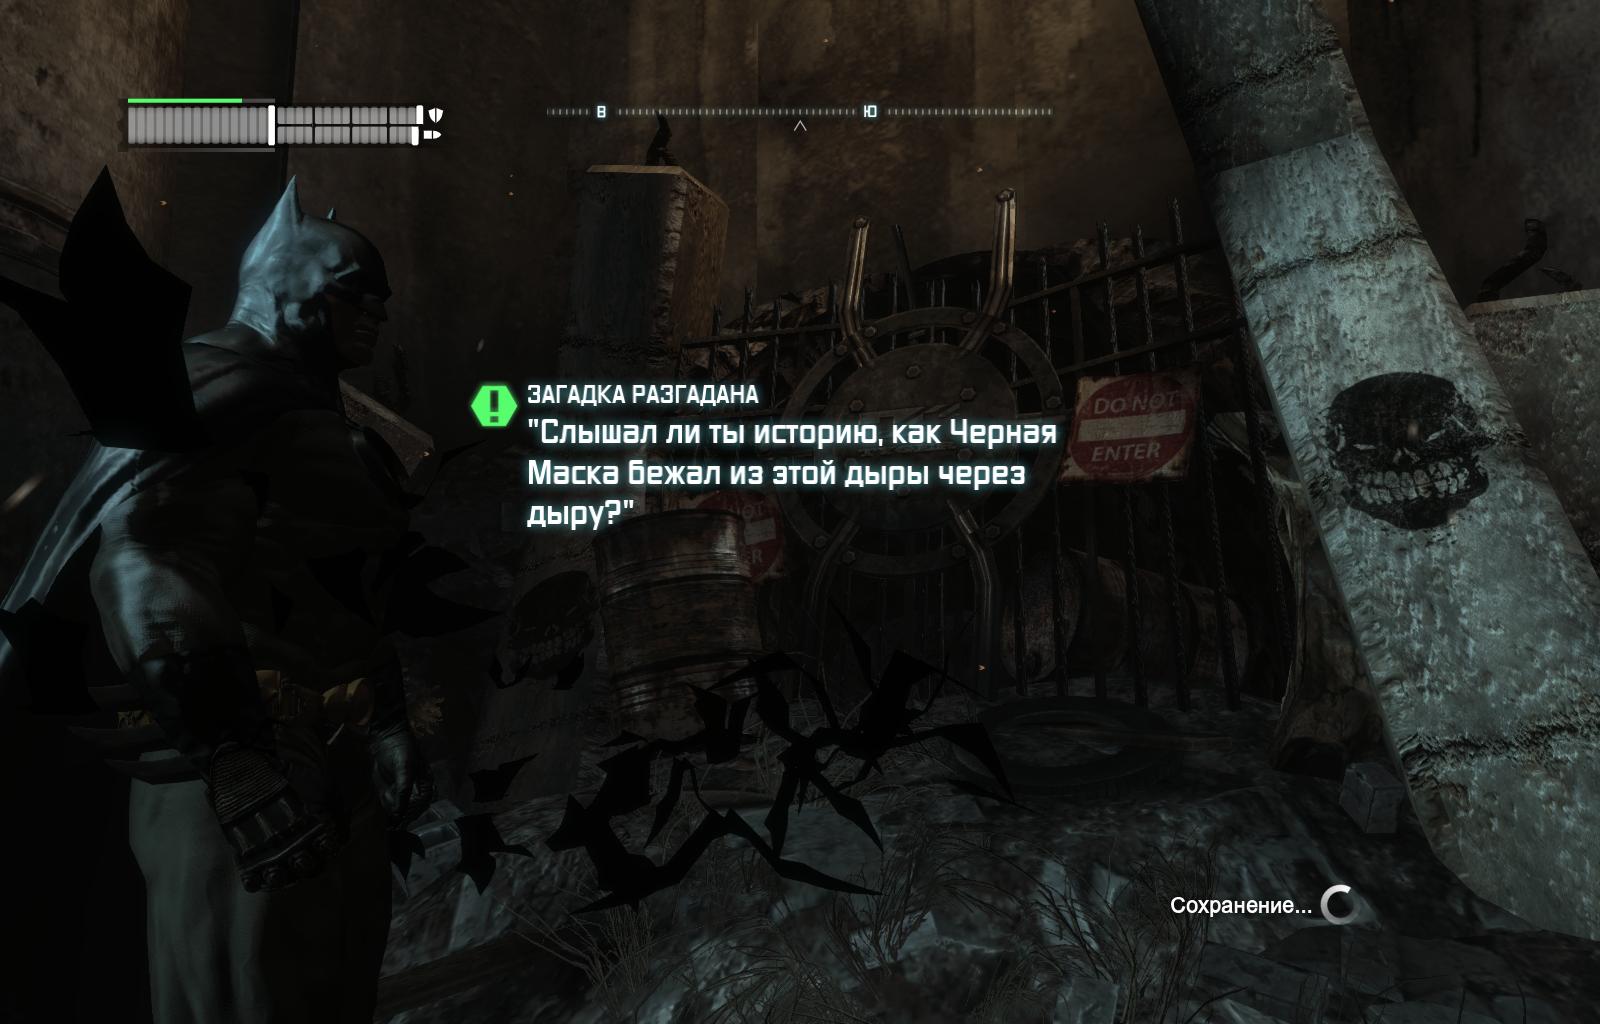 R8
R8  R9
R9 
Парк Аттракционов (Amusement Park)
Общая карта трофеев и загадок

Трофеи
T1.1 – Ломаем фанеру в будке. T1.2 – Спускаемся вниз под решётку, выстреливаем тросомет в стену, забираемся на него и электроразрядником поднимаем шар к выходу.
T1.3 – Активируем вопросики плитой и гасим их управляемым бэтарангом.
T1.4 – Вопросик за разрушаемой стеной. T1.5 – Пикируем с соседнего здания в фанеру. Внутри с помощью тросомёта перебираемся на автостоянку. T1.6 – В планировании нажимаем три плиты.
T1.7 – С помощью усилителя крюка нажимаем последовательно три плиты.https://www.youtube.com/watch?v=D2LEJg41nJo&feature=youtu.be T1.8 – Просто подбираем со стола.
T2.1 – Обезвреживаем охранное орудие и транспортируем себя на льдинке. T2.2 – Просто выжидаем нужный момент, и когда вопросик оказывается внизу – скользим под него и подбираем. T2.3 – На три нижние вопроса наносим гель, три верхних гасим быстрыми бэтарангами и сразу взрываем гель (тоже быстрым вызовом)
T2.4 – Нажимаем и подбираем. T2.5 – Открываем дверь шифровальным секвенсором, но подбираемся к нему с обратной стороны от входа. T2.6 – Открываем решетку шифровальным секвенсором и подгребаем к вопросику. T2.7 – С помощью электроразрядника и мотора на кране опускаем крюк и поднимаем его уже с вопросом. T2.8 – Шифровальным секвенсором открываем камеру, гелем проходим сквозь перегородку в соседнюю.
T3.1 – Подбираем с крыши. T3.2 – Сначала стоя на льдинке наносим Гель на вопросики, потом нажимаем на плиту и взрываем Гель.
T3.3 – Взрываем мины Деструктором и проползаем к вопросу. T3.4 – Нехитрое комбинирование электроразрядника и кажимной плиты позволят вам высвободить этот вопросик. T3.5 – Снимаем с потолка Бэткогтем. T3.6 – Планируем над стоп-плитами и забираем загадку.
T3.7 – Хватаем Бэткогтем (внутри здания).
T4.1 – Нажимаем плиту и несемся вперед на тросомёте. T4.2 – Нажимаем плиту и забираем бэткогтем. T4.3 – Просто проходим по трем плитам и забираем загадку. T4.4 – Просто забираем с вышки. T4.5 – Пробираемся под лесенку/пандус любым способом. ну или вытягиваем бэткогтем. T4.6 – Первый вопрос гасим ускоренным управяемым бэтарангом, второй просто управляемым.
T4.7 – С помощью тросомёта нажимаем поочередно три плиты.
T5.1 – В полете нажимаем три плиты.
T5.2 – С планирования/пикирования нажимаем на плиту, сразу поднимаемся крюком и забираем загадку.
T5.3 – Открываем решетку шифровальным секвенсором. T5.4 – За хрупкой стенкой в парковке. T5.5 – Встаем на льдинку под мостом и снимаем вопрос бэткогтем. T5.6 – Нажимаем на плиту и гасим вопросы в той же последовательности, в какой они зажигаются.
T5.7 – Заряжем управляемый бэтаранг и направляем в распределительный щит.
Загадки
R1  R2
R2  R3
R3  R4
R4  R5
R5  R6
R6 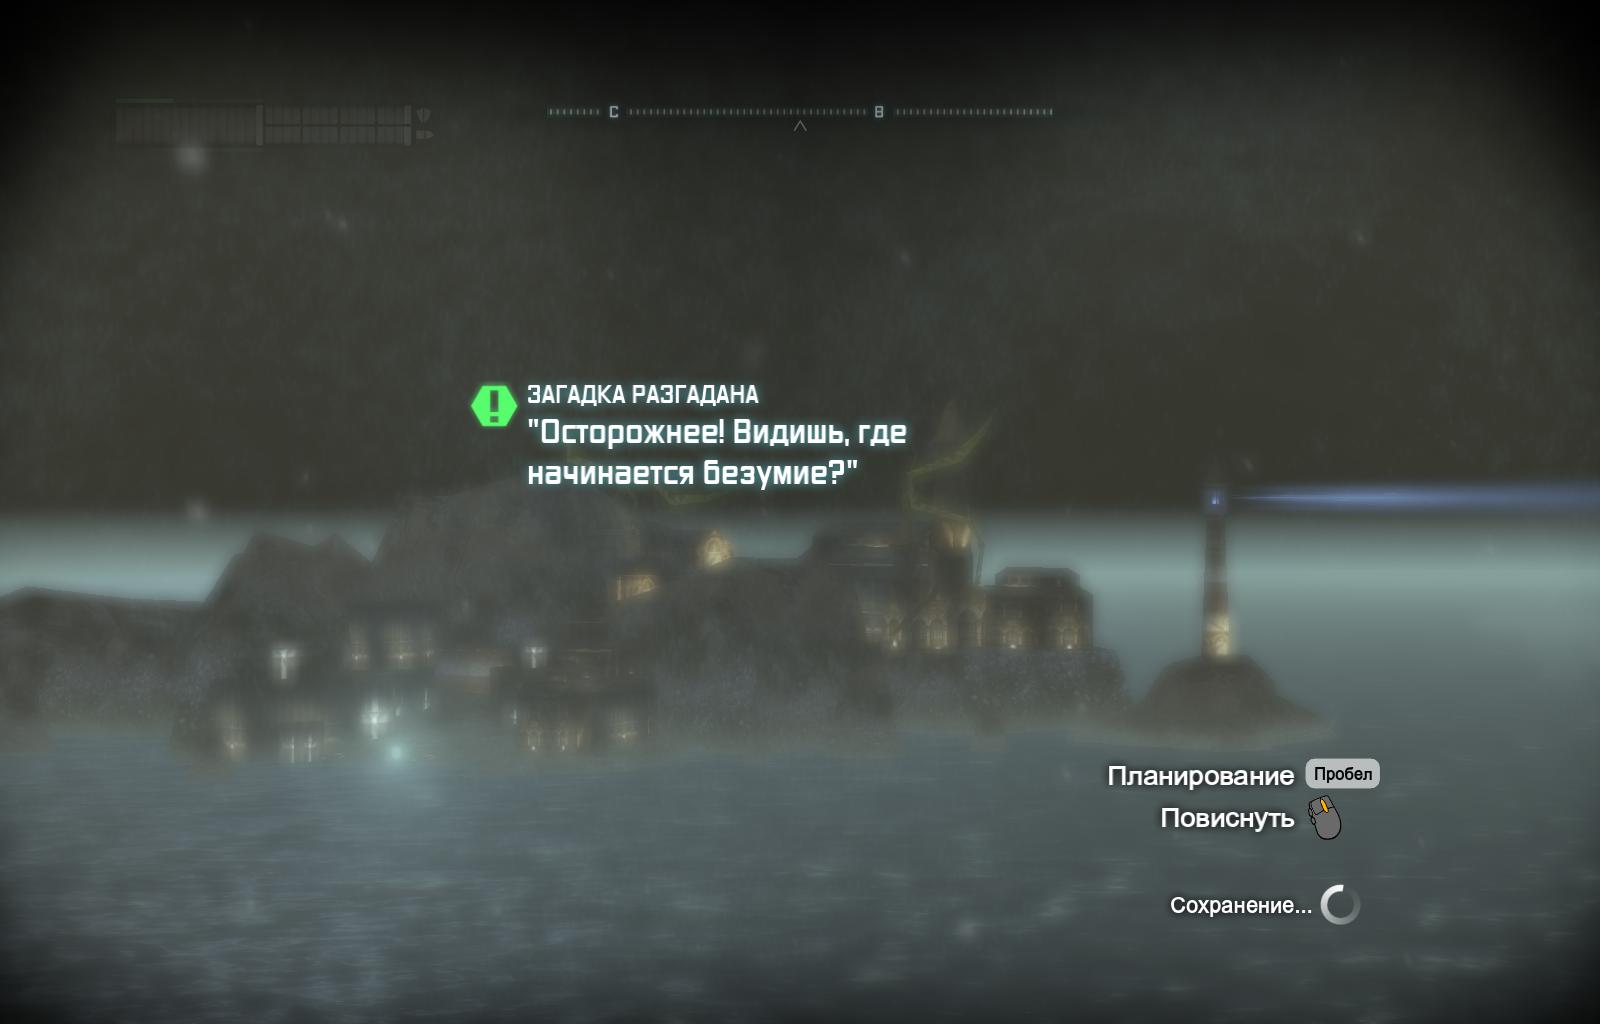 R7
R7  R8
R8  R9
R9 
Сталелитейный завод (Steel Mill)
Общая карта трофеев и загадок

Трофеи
T1.1 – Открываем люк и забираем загадку. T1.2 – Открываем люк и забираем загадку. T1.3 – За хрупкой стенкой. T1.4 – Просто подбираем. T1.5 – Открываем ловушку шифровальным секвенсором и забираем Бэткогтем.
T2.1 – Замораживаем пар ледяным ударом. T2.2 – Подбираем. T2.3 – Скользим под арматурой. T2.4 – Забираем бэткогтем, стоя на льдинке. Следим, чтоб не попасть под мясорубку.
T3.1 – Открываем дверь шифровальным секвенсором. T3.2 – Под хрупким полом в лифтовой. T3.3 – Просто подбираем в застеновом пространстве. T3.4 – В пространстве под потолком. Прям над потоком. T3.5 – Разбиваем всех пингвинов, и нам выезжает приз
T4.1 – Я твой решётка кран шатал. Электроразрядником T4.2 – Пробираемся через решётку в полу в закрытое помещение. T4.3 – Открываем люк и забираем загадку. T4.4 – Управляемым бэтарангом берем электрозаряд, и через предварительно открытый люк влетаем в загончик с распределительной коробкой. T4.5 – За хрупкой стенкой.
T5.1 – В помещении за той решёткой, что крюком шатали. T5.2 – Замораживаем пар ледяным ударом. T5.3 – Отгоняем вагонетку электроразрядом. T5.4 – Гасим вопрос бэтарангом и проходим в помещение.
Загадки
R1  R2
R2  R3
R3  R4
R4  R5
R5 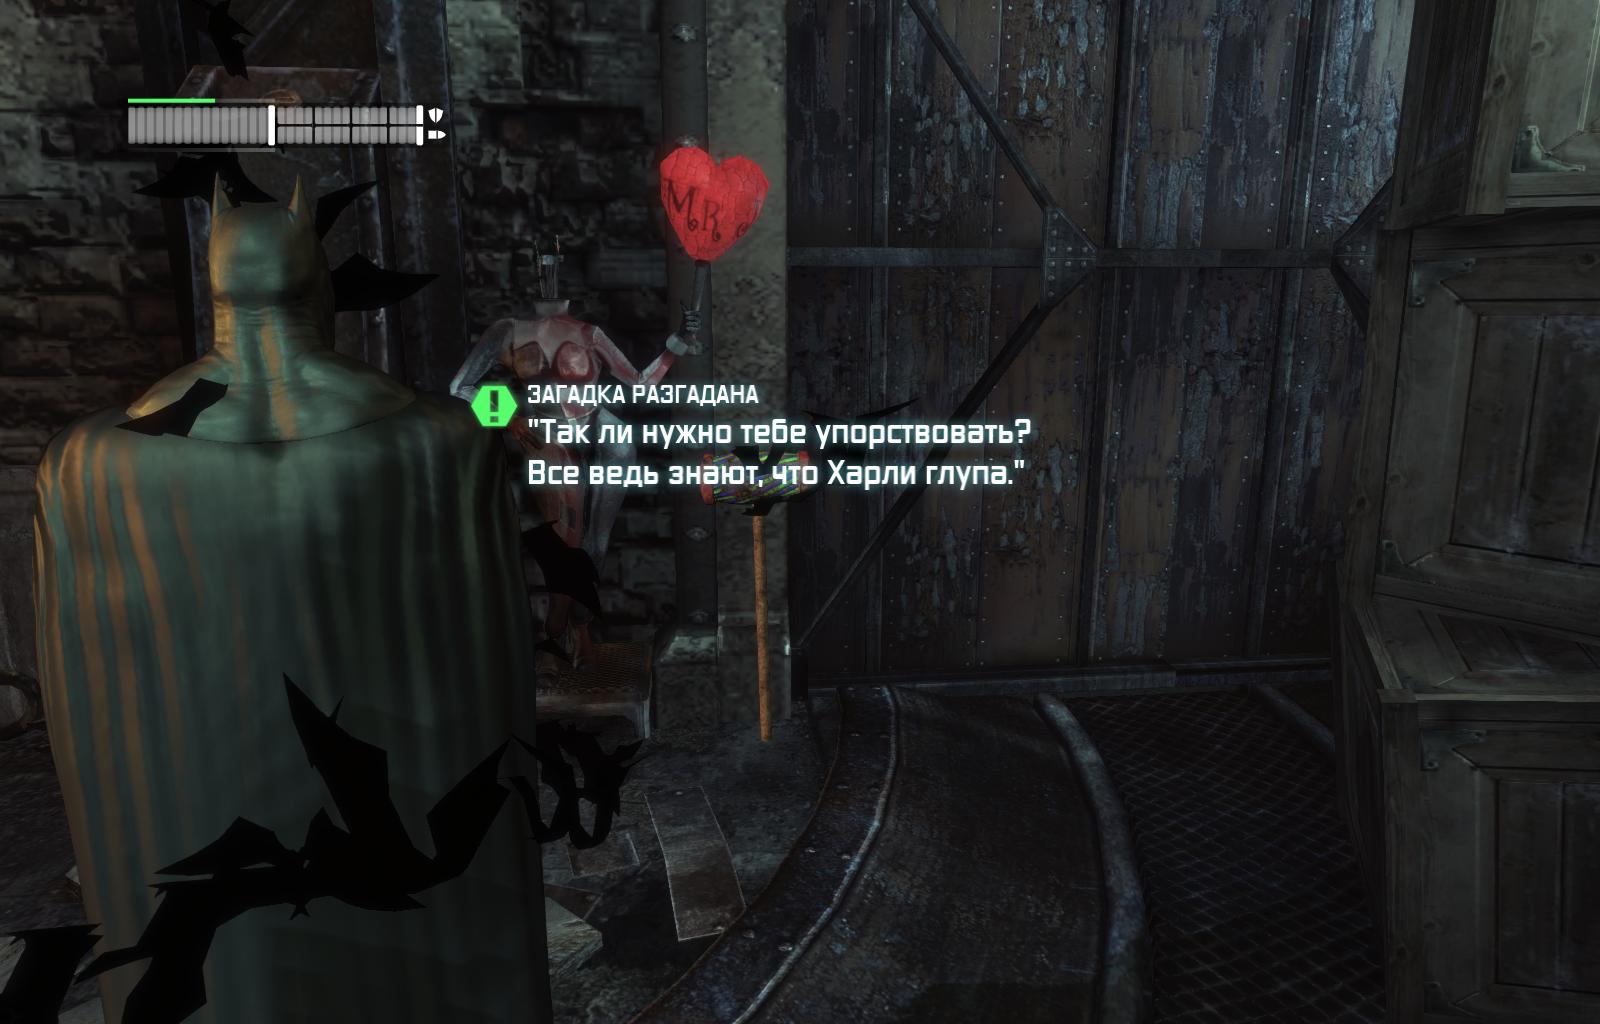 R6
R6 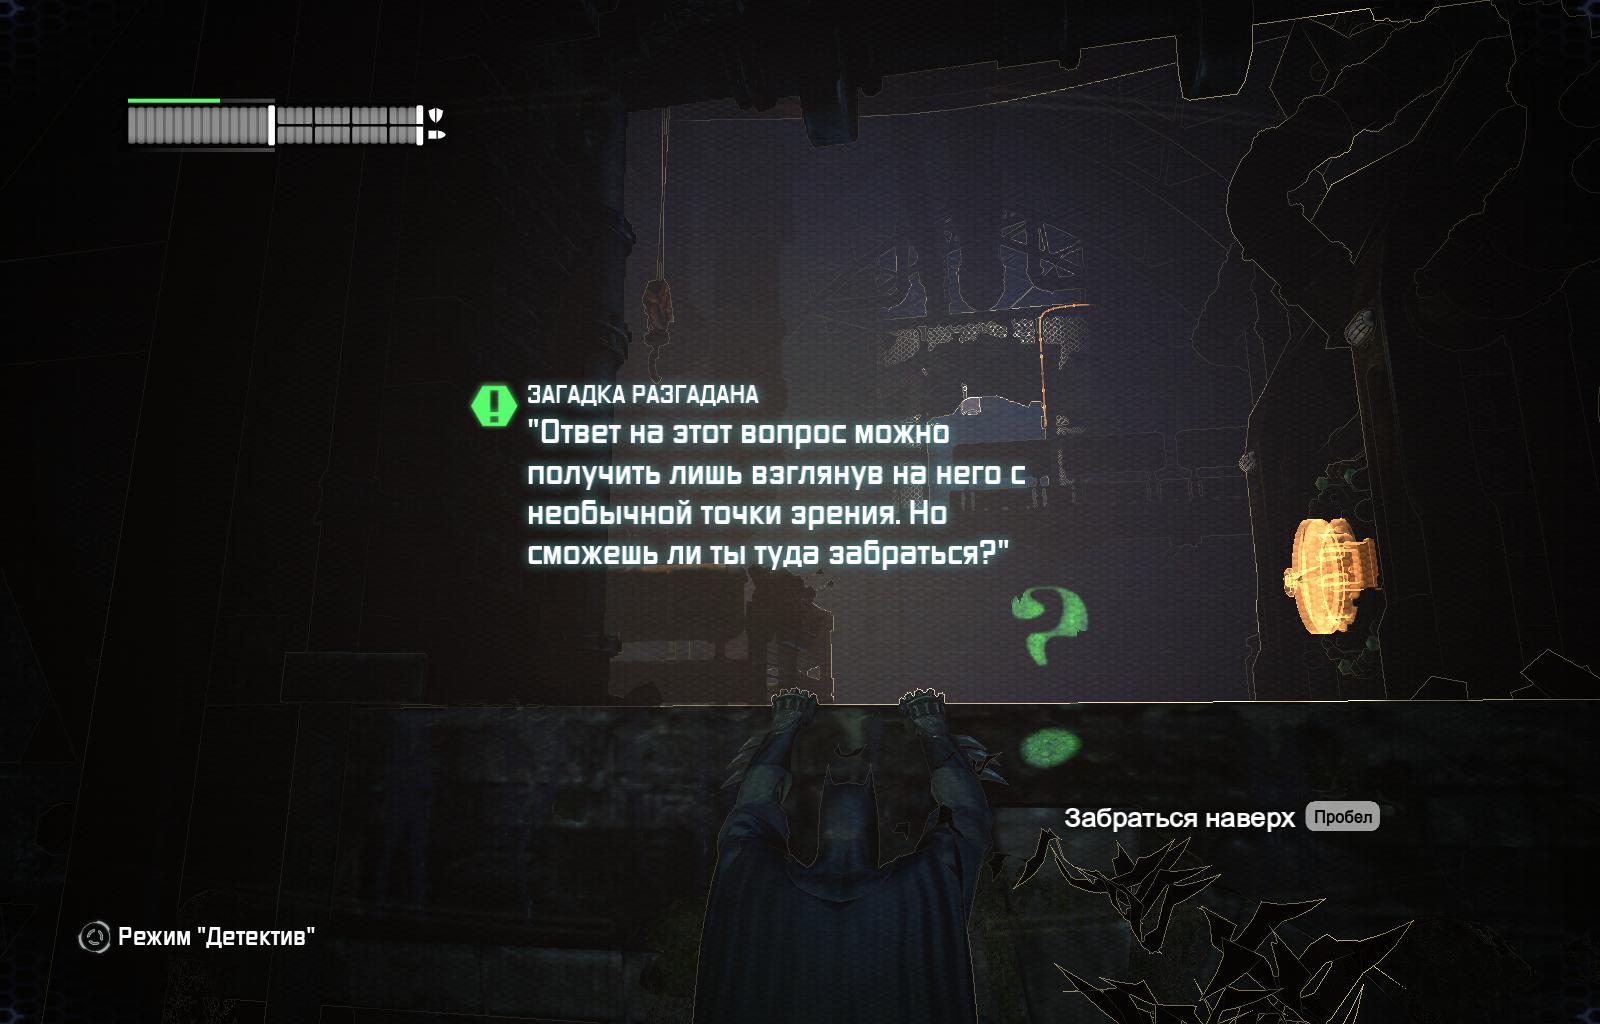 R7
R7 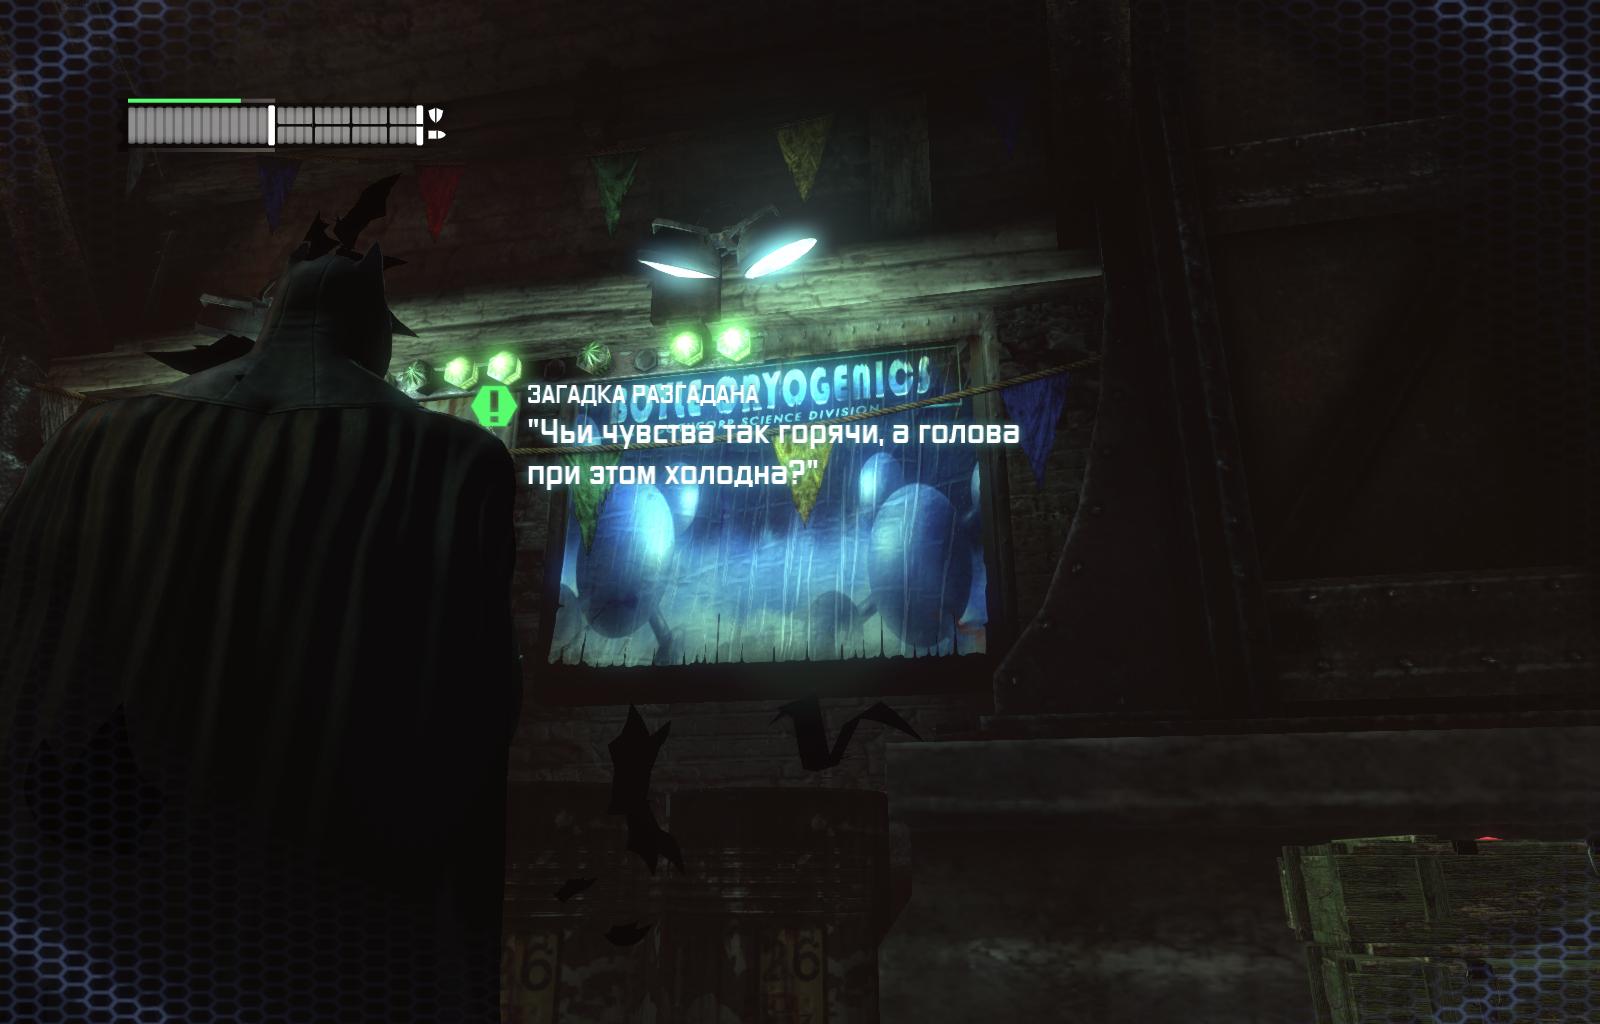
Чудо-Город (Wonder City)
Общая карта трофеев и загадок
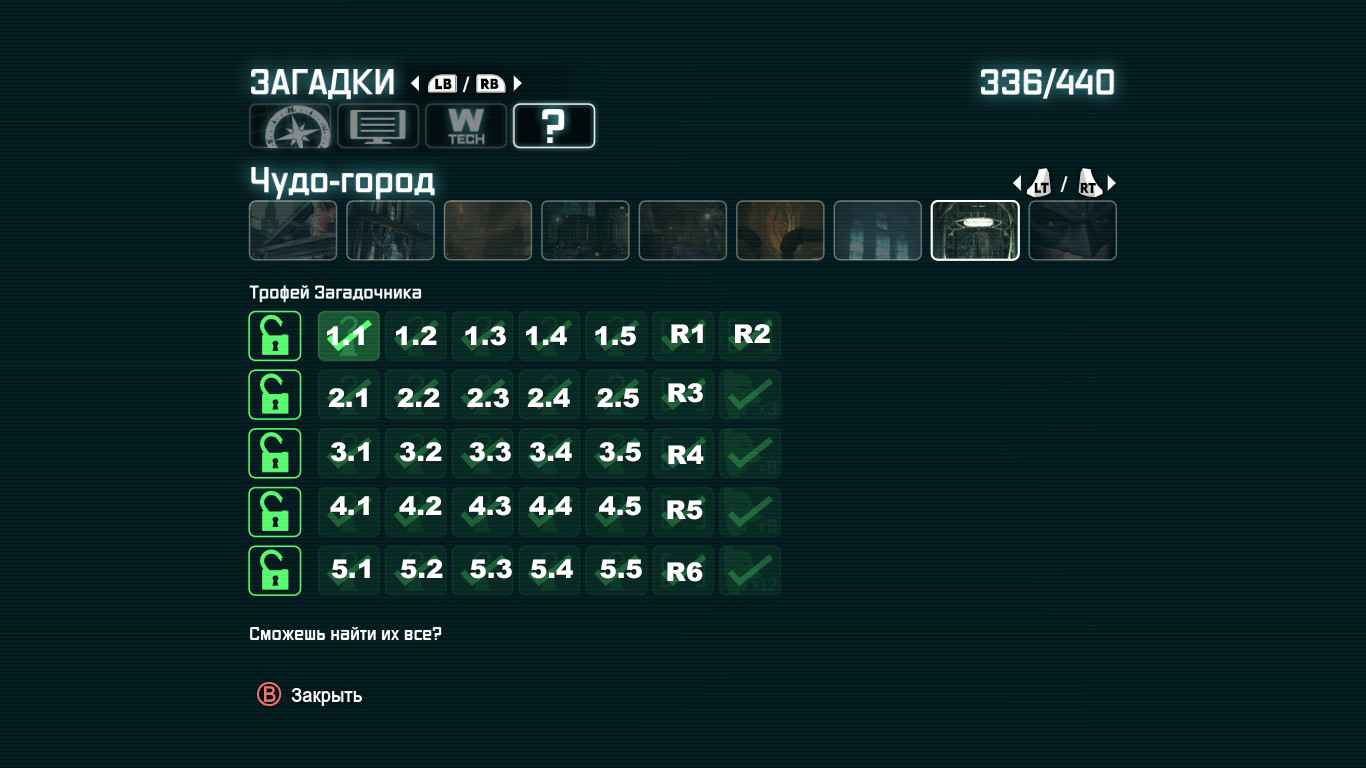
Трофеи
T1.1 – Забираемся наверх и забираем. T1.2 – Облетаем комнату справа, тогда хрупкий потолок превращается в хрупкий пол верхней комнаты. T1.3 – За хрупкой стеной. T1.4 – Гасим вопрос бэтарангом. T1.5 – Находим в коляске.
T2.1 – Подбираем с пола. T2.2 – Берем, стоя на льдинке. T2.3 – Снимаем бэткогтем. T2.4 – Нажимаем три плиты с помощью тросомёта. T2.5 – Уничтожаем мину деструктором и проезжаем к загадке.
T3.1 – Просто подбираем. T3.2 – Снимаем с потолка Бэткогтем. T3.3 – Открываем ловушку Сиквенсором и снимаем загадку Бэткогтем. T3.4 – Проскальзываем в щель за загадкой. T3.5 – Забираем за дверью.
T4.1 – Сломать фанеру, скрывающую загадку, Бэтманом, после усиленного крюка. T4.2 – Чтоб открыть решетку, потребуется шифровальный секвенсор. T4.3 – Подбираем с пола. T4.4 – Гасим вопросик, запуская управляемый бэтаранг практически от загадки. T4.5 – Проще всего взять, спрыгнув с обзорной площадки, после подъема на лифте, повернув сразу направо.
T5.1 – В комнате с загадкой взрываете стекла на окнах, потом из этого окна достаёте бэткогтем загадку. T5.2 – Подбираем с пола. T5.3 – Берем, стоя на льдинке. Саму загадку предварительно сбиваем бэтарангом.. T5.4 – За хрупкой стеной. T5.5 – На вершинах Чудо-Башни.
Загадки
R1 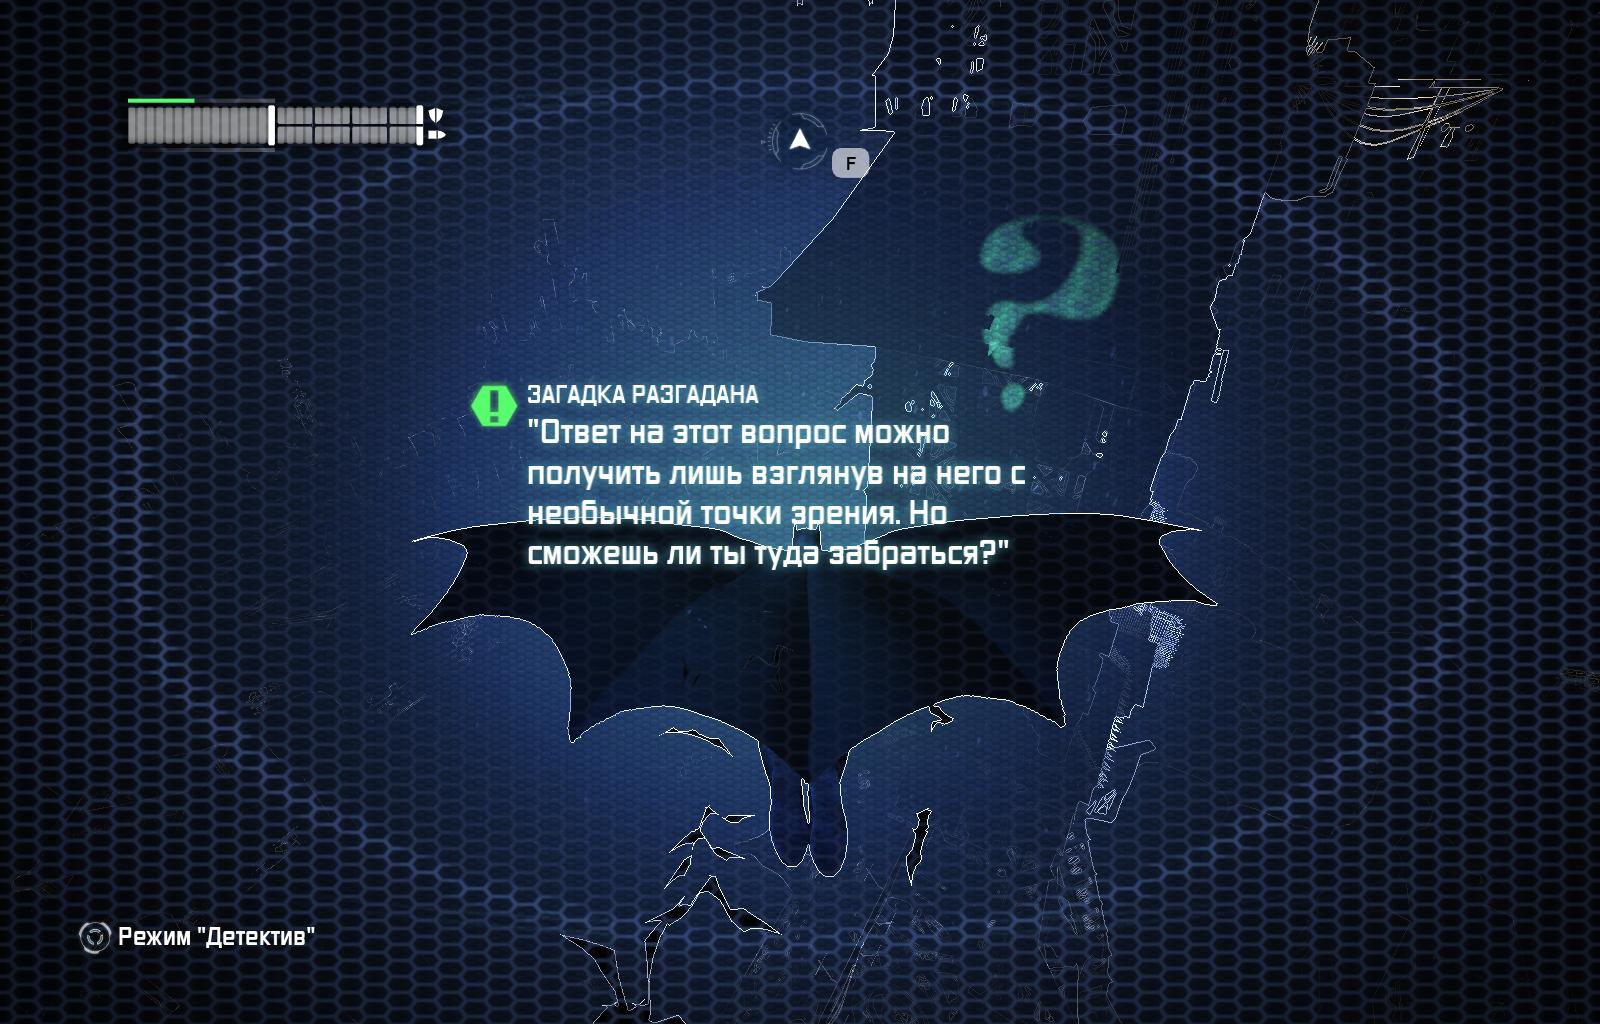 R2
R2 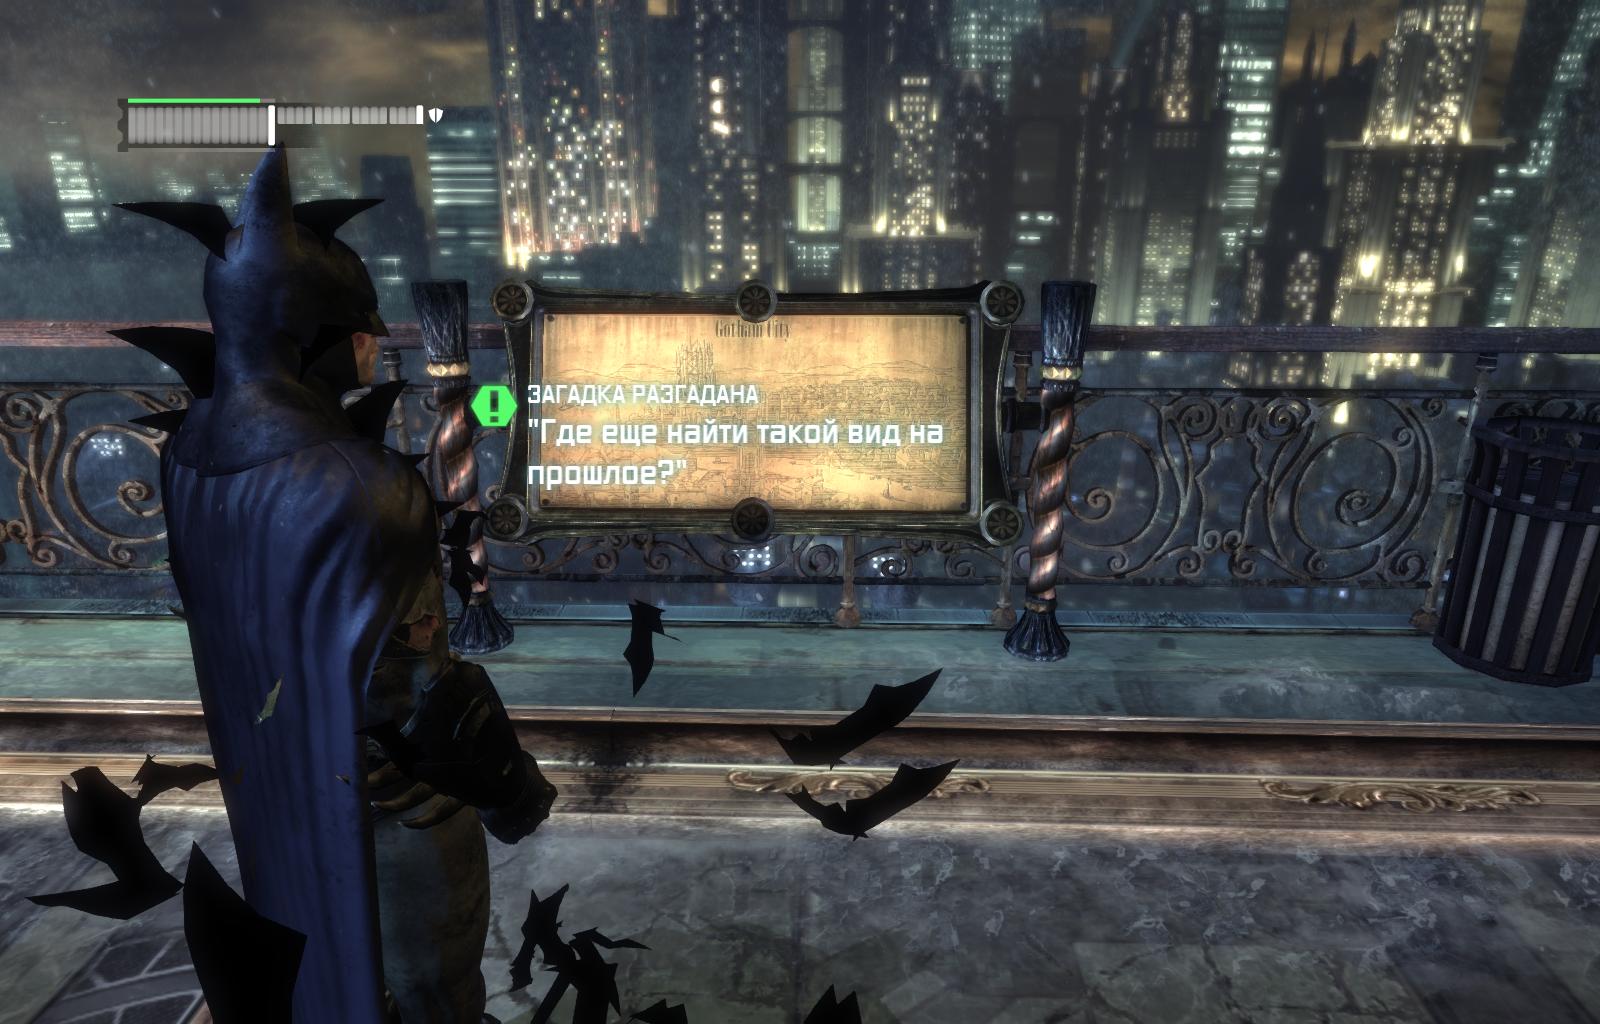 R3
R3  R4
R4 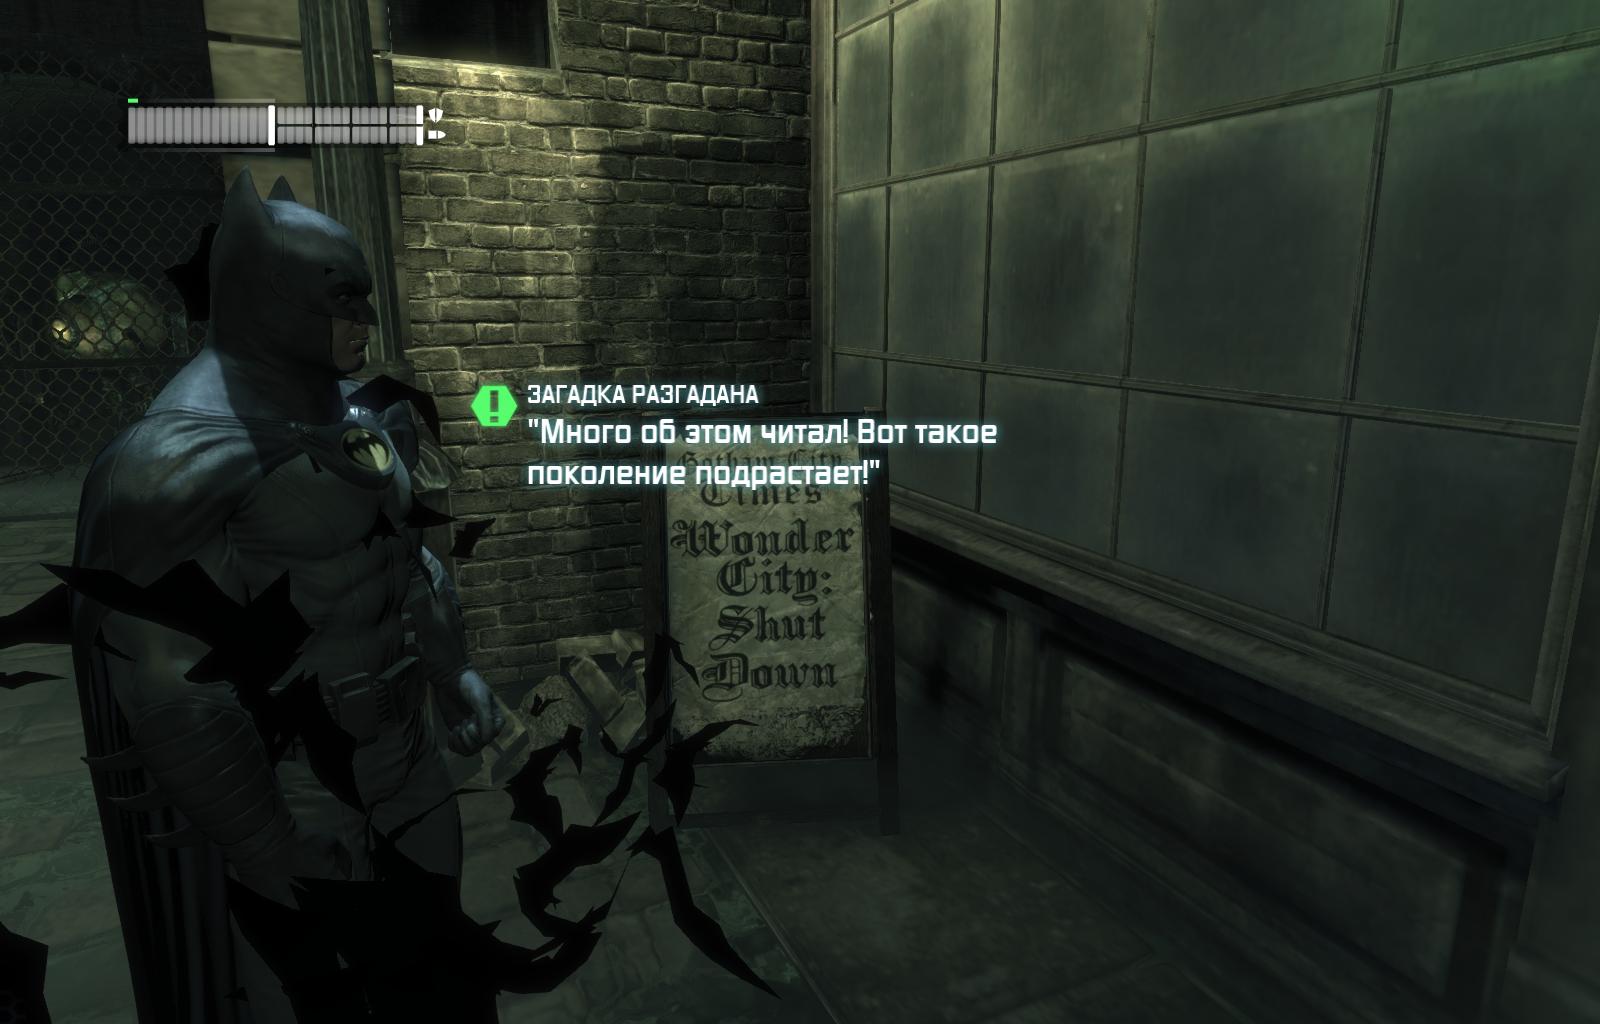 R5
R5 
Физические испытания
За Бэтмена
1-я полоса
2-я полоса
3-я полоса
4-я полоса
5-я полоса
За Женщину Кошку
Заключение
С этой работой возникли небольшие сложности. При написании первых двух разделов моя машина зависла и выдала синий экран. Естественно ничего не сохранилось. В общей сложности на сие произведение у меня ушло полтора дня.
Написал все понятно, вопросов возникнуть не должно. Разжевано дальше некуда.
Если вам понравилось данное руководство, то можете оценить его и добавить в избранное.
This Batman Arkham Asylum Riddler Guide will help you solve all the riddles, as well as find the trophies, Joker’s Teeth, Patient Interviews and all the rest. It’s all here if you want to take on the real challenge — defeating Edward Nigma, aka The Riddler. If you want to 100% the game, and earn the trophies and achievements that go with that then you’ll have to solve Arkham’s biggest mystery
Coming up this atman Arkham Asylum Riddler Guide has all the screens, video and instructions you need, pointing you to every one of Riddler’s Challenges: maps, trophies, interviews, chronicles, teeth and riddle solutions. Get to work!
- Batman Arkham City Shot in the Dark side mission guide
- Batman: Arkham City Identity Theft side mission guide
- Batman Arkham City Watcher in the Wings side mission guide
TOOL NEEDED: Cryptographic Sequencer
The Riddler’s secrets map is in the ground floor guard room closest to the Arkham Mansion stairs and statue of Warden Sharp. You can’t get in, however, until you’ve received the security-hacking sequencer.
ARKHAM EAST
ARKHAM EAST — RIDDLE SOLUTION #1
«The legacy of this island has been well and truly buried.»
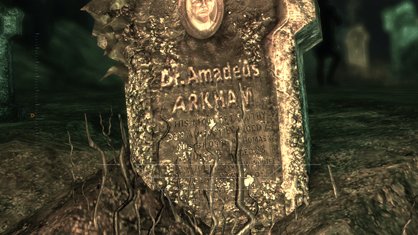
Head to the cemetery and look for the open, sunken grave. It’s well-lit and the headstone is shaped like an «A» for the asylum’s founder, Amadeus Arkham. Zoom in and scan the face of the tomb to solve the riddle.
ARKHAM EAST — RIDDLE SOLUTION #2

«Gotham’s greatest family towers over the city.»
This one’s easy enough. Just find Wayne Tower on the horizon, zoom in and scan the giant «W».
ARKHAM EAST — RIDDLE SOLUTION #3
TOOL NEEDED: Detective Mode
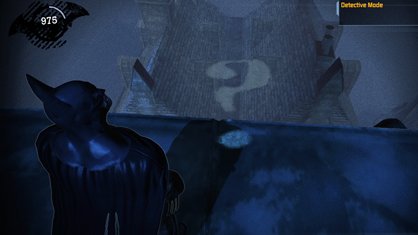
«My challenges appear to those with the correct position in life.»
This is a question mark alignment puzzle. Climb to the very top of Arkham Mansion’s tallest tower and face south. The dot is on the floor at your feet, but the top half of the symbol is spread out upon the roofs below. Line them up and scan.
ARKHAM EAST — PATIENT INTERVIEW #1
The tape is in the southern guard tower. On a desk. Impossible to miss once you’re up there.
ARKHAM EAST — PATIENT INTERVIEW #2
TOOL NEEDED: Cryptographic Sequencer
The two guard towers here are linked by catwalks. Where those two walks meet, there’s an office. Once you can hack your way inside that office with the sequencer, you’ll find both an interview and a trophy.
ARKHAM EAST — CHRONICLE #1
Left of the Arkham Mansion stairs is a locked-off courtyard. Grapple over the wall, drop down and check the right-hand wall — behind the railway — for a tablet.
ARKHAM EAST — CHRONICLE #2
TOOL NEEDED: Explosive Gel
Face the Botanical Garden staircase from the graveyard. You should notice a patch of destructible wall on the side of those stairs. Use your gel or your Ultra Batclaw to get inside and find the tablet.
ARKHAM EAST — RIDDLER TROPHY #1
This one’s sitting out in plain sight, on a little jetty overlooking Gotham harbour. It’s near the southern view of the water, though, not the northern… very close to the Arkham Mansion stairs.
ARKHAM EAST — RIDDLER TROPHY #2
ARKHAM EAST — RIDDLER TROPHY #3
Left of the Arkham Mansion stairs is a locked-off courtyard. Grapple over the wall, run to the back and grapple onto the upper balcony. Behind the column here, facing the view of Gotham City, is a Riddler trophy.
ARKHAM EAST — RIDDLER TROPHY #4
This one is above Trophy #2, on a flat section of Arkham Mansion’s roof. If you look at your map, you can also see that it’s the narrowest part of the roof, separating the northern and southern halves of the mansion.
ARKHAM EAST — RIDDLER TROPHY #5
In the middle of the cemetery is a small wooden shack. The door is open and the trophy is right on the desk.
ARKHAM EAST — RIDDLER TROPHY #6
Grapple and climb your way to the top of the mansion’s tallest tower. On the side with the clock face is the trophy.
ARKHAM EAST — RIDDLER TROPHY #7
If you’re on the tallest mansion tower, and look down towards the circular tower, you should spot a rectangular recess between the slopes of the roof. A trophy is there — just glide down and grab it.
ARKHAM EAST — RIDDLER TROPHY #8
Located on top of the northwestern guard tower, the one closest to the Arkham North door.
ARKHAM EAST — RIDDLER TROPHY #9
TOOL NEEDED: Explosive Gel
Left of the Arkham Mansion stairs is a flat courtyard. Smack dab in the centre of this courtyard is a destructible piece of flooring. Use your explosive gel and take the trophy underneath.
ARKHAM EAST — RIDDLER TROPHY #10

TOOL NEEDED: Cryptographic Sequencer
This one’s in the ground floor guard room closest to the Arkham Mansion stairs and statue of Warden Sharp… the same location as the map. You just need to wait until you have the sequencer to gain access.
ARKHAM EAST — RIDDLER TROPHY #11
TOOL NEEDED: Cryptographic Sequencer
The two guard towers here are linked by catwalks. Where those two walks meet, there’s an office. Once you can hack your way inside that office with the sequencer, you’ll find both the trophy and an interview tape.
ARKHAM EAST — JOKER’S TEETH #1-2
These are halfway up the stairs to Arkham Mansion’s main entrance. They don’t appear until the story directs you to the mansion, however, and you’ll definitely want to get rid of the two snipers on the overhang above first.
ARKHAM EAST — JOKER’S TEETH #3-4
You’ll find these two sets as you’re making your way to the Botanical Gardens, looking for Harley’s fingerprints. They’re at the foot of the long stairs. Watch out for lunging lunatics!
ARKHAM EAST — JOKER’S TEETH #5-6
These two sets are in the more southern guard tower of Arkham East.
ARKHAM EAST — JOKER’S TEETH #7-8
These two are on the stairs to the Botanical Gardens. They didn’t appear for us until Poison Ivy had turned Arkham’s sky red and we were on our way to stop her with the antidote.
ARKHAM EAST — JOKER’S TEETH #9-10
These two are near the door to Arkham West, close to a ground-level guard room. We didn’t spot them until after finishing the game, so can’t be sure when they first appear.
TOOL NEEDED: Cryptographic Sequencer
Once you have the ability to hack open security doors, look for a ground-level guard room halfway between the Medical Facility and the Penitentiary. Turn off the electricity and enter to find the secrets map.
ARKHAM WEST
ARKHAM WEST — RIDDLE SOLUTIONS VIDEO
ARKHAM WEST — RIDDLE SOLUTION #1
TOOL NEEDED: Ultra Batclaw
«Does Scarecrow’s gas break down barriers as it drives you insane?»
Above the door to Arkham East are two concrete rafters. Grapple to the second one and use detective mode to look for a destructible barrier in the rocky cliff face on your left. Pull it down and scan the gas canisters inside. The Jack o’ Lantern faces should warn you that these belong to the Scarecrow.
ARKHAM WEST — RIDDLE SOLUTION #2
TOOL NEEDED: Cryptographic Sequencer with Range Booster Upgrade
«Zsasz is counting on you finding his work.»
Climb the stairs to the left of the main Penitentiary door. On the balcony above, you’ll find an electrified gate. Use your enhanced sequencer to hack the security from afar and — once inside — scan the card table and dead guards.
ARKHAM WEST — RIDDLE SOLUTION #3
TOOL NEEDED: Detective Mode
«Do you see what I can see? No? Then maybe I am in a stronger position.»
This is a question mark alignment puzzle. The top half is on the floor in front of the main Penitentiary door. The dot is on the railing of the balcony above, so grapple up there, look down and shift your view until the question mark is complete.
ARKHAM WEST — PATIENT INTERVIEW #1
Head to the docks and enter the little wooden shack on the Penitentiary side. The tape is waiting inside.
ARKHAM WEST — CHRONICLE #1
TOOL NEEDED: Explosive Gel
Underneath the Penitentiary balcony is a destructible arch. You can spot it best while standing amidst the ambulances. Grapple up, explode the wall and scan the chronicle symbol.
ARKHAM WEST — RIDDLER TROPHY #1

This one’s about as easy as they come — just look underneath the guard tower. It’s sitting right there on the ground, partially obscured by bushes.
ARKHAM WEST — RIDDLER TROPHY #2
The trophy is on top of the Arkham North door. Just grapple up there and you’re done.
ARKHAM WEST — RIDDLER TROPHY #3
Check on top of the little wooden dock house next to Gotham Bay.
ARKHAM WEST — RIDDLER TROPHY #4
Head to the Arkham North door and turn right. There’s a waterfall. Drop down into the waterfall basin and you’ll find a trophy. You can also jump down from the brown wooden ramp leading away from the Visitor Centre.
ARKHAM WEST — RIDDLER TROPHY #5
This trophy is on the Medical Facility’s roof — the southwestern section closest to the water.
ARKHAM WEST — RIDDLER TROPHY #6
TOOL NEEDED: Explosive Gel
In the passage between Arkham East and Arkham West, you should see a trophy trapped behind bars. To get inside, you’ll need to look above the bars, grapple to the ledge you see, detonate the destructible floor you find up there and drop down to claim your prize.
ARKHAM WEST — RIDDLER TROPHY #7
TOOL NEEDED: Batclaw
Go to the front entrance of the penitentiary — it should read «Cell Block» in big block letters above the door. To the right is a wall grate. Pull it off and climb inside to find the trophy.
ARKHAM WEST — RIDDLER TROPHY #8
TOOL NEEDED: Cryptographic Sequencer
Find the large outdoor elevator in front of the Medical Facility. Use your sequencer to hack the nearby panel and lift this elevator. The trophy is underneath.
ARKHAM WEST — RIDDLER TROPHY #9
TOOL NEEDED: Cryptographic Sequencer with Range Amplifier
Climb the stairs to the left of the main Penitentiary door. On the balcony above, you’ll find an electrified gate. Use your upgraded sequencer to hack the security from afar and walk in for both a trophy and a riddle solution.
ARKHAM WEST — RIDDLER TROPHY #10
TOOL NEEDED: Line Launcher
Go to the northern end of the Medical Facility roof — the part closest to the Arkham East door — and look towards the rock cliff. You’ll see a little brick alcove with a trophy awaiting you. Just zip across with the Line Launcher.
ARKHAM WEST — RIDDLER TROPHY #11
TOOL NEEDED: Ultra Batclaw
Stand in front of the door to Arkham East and look directly above you. The ceiling has a destructible panel. Use the Ultra Batclaw to pull it down and climb up for a trophy.
ARKHAM WEST — RIDDLER TROPHY #12
TOOL NEEDED: Ultra Batclaw
This one’s in the passage connecting Arkham West and Arkham North. Halfway along are a couple of high concrete rafters. Grapple up to them and look for the wall grate. Pull it down with the Ultra Batclaw and nab your trophy.
ARKHAM WEST — RIDDLER TROPHY #13

TOOL NEEDED: Ultra Batclaw
This trophy is also in the passage connecting Arkham West and Arkham North. Near the northern end, look up until you spot a destructible wall patch. It’s almost as high as the roof spikes. Use the Ultra Batclaw to pull down those bricks and grapple up.
ARKHAM WEST — JOKER’S TEETH #1-3
These three sets of chompers are located right outside the main door to the Medical Facility. You should pass them on your way to rescue Commissioner Gordon.
ARKHAM WEST — JOKER’S TEETH #4-6
After you’ve defeated Bane, these three sets will appear in the tunnel connecting Arkham West to Arkham North.
ARKHAM WEST — JOKER’S TEETH #7-8
These are located inside the guard tower that sits in front of the Penitentiary. They may not appear until after you’ve completed Arkham Mansion’s story scenes and are following Warden Sharp’s DNA trail. If that’s the case, watch out for the sniper that waits in the same place as the teeth.
ARKHAM WEST — JOKER’S TEETH #9-10
These last two sets are in the passage between Arkham West and Arkham East, right before the door to the East side. We didn’t spot them until after finishing the game, so can’t be sure when exactly they first appear.
TOOL NEEDED: Explosive Gel
The eastern office building in this area has a destructible roof. Climb on top, use your explosive gel to blow it away and drop down for the Riddler’s map.
ARKHAM NORTH
ARKHAM NORTH — RIDDLE SOLUTIONS VIDEO
ARKHAM NORTH — RIDDLE SOLUTION #1
«Tweedledum and Tweedledee SAW it, can you SEE it?»
Head as far north on the map as you can, until you reach the main gates into Arkham Asylum. To your right will be a see-saw with beanie caps sitting at each end. Scan the whole thing to solve the riddle.
ARKHAM NORTH — RIDDLE SOLUTION #2
TOOL NEEDED: Cryptographic Sequencer
«Let’s face it, there are two Dents on the wall.»
Once you have the sequencer, go to the western ground floor guard house and blow the fuse. Enter and scan the «Vote Dent» posters on the wall and desk.
ARKHAM NORTH — RIDDLE SOLUTION #3
TOOL NEEDED: Detective Mode
«Now I see it, now you don’t!»
This is a question mark alignment puzzle. Stand underneath the arched entrance to the dilapidated building and look up. The symbol should be clear.
ARKHAM NORTH — PATIENT INTERVIEW #1
Two guard towers stand in this area. The western one holds an interview tape in its nest.
ARKHAM NORTH — PATIENT INTERVIEW #2
TOOL NEEDED: Cryptographic Sequencer
Once you have the sequencer, go to the western ground-floor guard house and blow the fuse. Enter to find the tape… it’s the same room as the Harvey Dent riddle.
ARKHAM NORTH — CHRONICLE #1
Find the crumbling building to the west of the main asylum gate. When going through the door, look up and right and you’ll see an alcove. This is where the beetle symbol awaits.
ARKHAM NORTH — CHRONICLE #2
You’ll see this symbol on your first trip to the Batcave. Pretty hard to miss.
ARKHAM NORTH — RIDDLER TROPHY #1
Grapple onto the roof of the building, in the section left of the Arkham West door. Once up there, cross the shingles on your left to find the trophy.
ARKHAM NORTH — RIDDLER TROPHY #2
Find the crumbling building to the west of the main asylum gate. When going through its door, look to your left. The trophy is sitting on the floor in the corner.
ARKHAM NORTH — RIDDLER TROPHY #3
On the eastern side of this area is a rocky plateau. To reach it, climb the eastern guard tower and glide down from its roof.
ARKHAM NORTH — RIDDLER TROPHY #4
Look on the roof of the western guard tower… the tower closest to the Arkham West door.
ARKHAM NORTH — RIDDLER TROPHY #5
TOOL NEEDED: Explosive Gel
On your way to the Batcave, you’ll enter a room with some skulls sitting in the center. The right wall is destructible with explosive gel, and has a trophy hiding behind it.
ARKHAM NORTH — RIDDLER TROPHY #6
TOOL NEEDED: Explosive Gel
On the paved road, right between the two guard towers, is a destructible floor panel. Use the gel to blow it away and drop into the little hole to nab the trophy.
ARKHAM NORTH — RIDDLER TROPHY #7
TOOL NEEDED: Cryptographic Sequencer with Range Amplifier
Stand on the road and face the main gate out of Arkham Asylum. On your left is a guard office with an electrified door. Use your upgraded sequencer to power it down and nab the trophy.
ARKHAM NORTH — RIDDLER TROPHY #8
TOOL NEEDED: Line Launcher
Head to the guard tower that’s closest to the Arkham West door. Stand inside its office and look west towards the cliff. You should see an alcove with the trophy. Zip across the gap with the Line Launcher.
ARKHAM NORTH — RIDDLER TROPHY #9
TOOL NEEDED: Ultra Batclaw
Directly below the alcove holding Trophy #7 is a destructible wall hiding Trophy #8. You need the Ultra Batclaw to pull it down.
ARKHAM NORTH — RIDDLER TROPHY #10
Above the entrance to the Batcave is a tunnel. Grapple up there and you’ll find two Riddler trophies. This one’s easy. The next one’s a little trickier.
ARKHAM NORTH — RIDDLER TROPHY #11

TOOL NEEDED: Ultra Batclaw
So tantalizing! This Riddler trophy is only a few feet away from the previous one, but iron bars block your path. To get to it, leave the tunnel and head into the Batcave entrance. Grapple up twice, but before heading through the steel door, turn around and look for a destructible patch of wall. Use the Ultra Batclaw to tear it down and jump over for the prize.
ARKHAM NORTH — JOKER’S TEETH #1-3
These will be directly in front of the door to Arkham East, after surfacing from the sewers and while heading to Arkham Mansion.
ARKHAM NORTH — JOKER’S TEETH #4-6

When you’re breaking back into Intensive Treatment to find Killer Croc’s lair, you’ll have to get past this spiked sniper station. Climb one of the guard towers and use your new Line Launcher to access the platform. After taking out the sniper, take out the three sets of teeth.
ARKHAM NORTH — JOKER’S TEETH #7-8

These are near the door to Arkham East. We didn’t spot them until after finishing the game, so can’t be sure when they first appear.
ARKHAM NORTH — JOKER’S TEETH #9-10
These are on the western guard tower. We didn’t spot them until after finishing the game, so can’t be sure when they first appear.
(Warden’s Office)
Look for a display case on the south side of the Warden’s office… it’s to your right if you’re facing the fireplace. On a desk against the wall is the secret map.
ARKHAM MANSION
ARKHAM MANSION — RIDDLE SOLUTIONS VIDEO
ARKHAM MANSION — RIDDLE SOLUTION #1
(Main Hall)
«Who is the main man in the main hall?»
On the east side of this room is a short hallway that leads to the South Corridor. On the left wall is a portrait of Commissioner Gordon. Scan it.
ARKHAM MANSION — RIDDLE SOLUTION #2
(North Corridor)
«Did Amadeus go mad, or was he just dizzy?»
On your way to Dr. Young’s office, while searching for her notes, you should come across a jail cell with spiral text written in dizzying circles on the walls. Scan some of those spirals.
ARKHAM MANSION — RIDDLE SOLUTION #3
(Dr. Young’s Office)
«It’ll be a cold day in Hell when this Ghul rises again.»
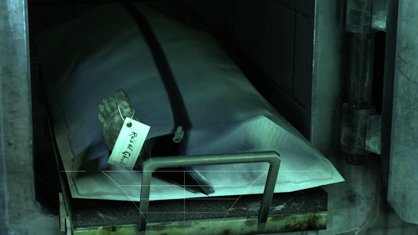
When trying to find a way into Dr. Young’s office, you’ll notice a wall of morgue drawers. Only one’s open and, according to the toe tag, it’s holding the body of Ra’s al Ghul. Scan the cadaver.
ARKHAM MANSION — RIDDLE SOLUTION #4
(Dr. Young’s Office)
«How do you mask your feelings without losing control?»
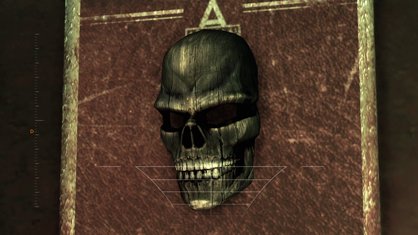
Get inside Dr. Young’s office and look for the skull-like face hanging on the wall. That belongs to the villain Black Mask. Scan it.
ARKHAM MANSION — RIDDLE SOLUTION #5

(South Corridor)
«What does a bird need in the rain?»
This hallway, which you pass through while tracking Dr. Young’s fingerprints, holds several display cases. The one against the wall has Penguin brand umbrellas inside. Scan them.
ARKHAM MANSION — RIDDLE SOLUTION #6
(East Wing Corridor)
«A game of Cat and mouse can be painful.»
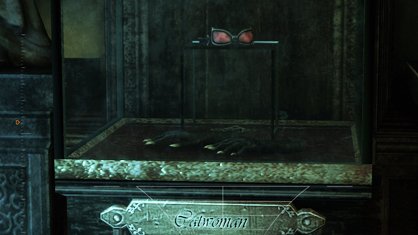
While traveling through this hallway, probably on your way to rescue Dr. Young from Zsasz, look out for a display case in the shadows. It’s got Catwoman’s mask and clawed gloves inside — scan them.
ARKHAM MANSION — RIDDLE SOLUTION #7
(Warden’s Office)
«Isn’t the Warden too old for a puppet show?»
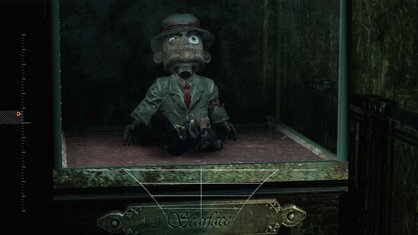
Look for a display case on the south side of the Warden’s office… it’s to your right if you’re facing the fireplace and contains the Scarface puppet. Scan him.
ARKHAM MANSION — RIDDLE SOLUTION #8
TOOLS NEEDED: Cryptographic Sequencer, Line Launcher
(Arkham Records Room)
«Our records show that a Strange transfer request was made in this room.»
Head for the southern door in the Records Room and use your sequencer to unlock its electrified gate. There’s still the electrified floor to deal with, however, so get out your Line Launcher and zip across. The files for Professor Hugo Strange are on your right as you enter.
ARKHAM MANSION — RIDDLE SOLUTION #9
TOOL NEEDED: Detective Mode
(South Corridor)
«This fiendish puzzle literally appears out of thin air.»
This is a question mark alignment puzzle. Check the western wall of this corridor — above one of the display cases is the top half of the question mark. Turn around and zip up to the air vents to find the symbol’s dot.
ARKHAM MANSION — PATIENT INTERVIEW #1
(Main Hall)
In the cathedral-like foyer at the top of this room — past the statue and branching stairs — are two security rooms, each with wall grates. The eastern one holds an interview tape — just pull open the grate to get in.
ARKHAM MANSION — PATIENT INTERVIEW #2
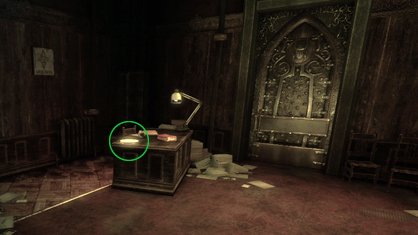
(Dr. Young’s Office)
On your way out of Dr. Young’s office — through a newly accessible door — you’ll pass a desk with a lamp and an interview tape.
ARKHAM MANSION — PATIENT INTERVIEW #3
TOOL NEEDED: Cryptographic Sequencer
(Library)
When entering the Library, walk left around the circle. You should find an electrified security door. Hack the panel and take the interview tape on the other side.
ARKHAM MANSION — PATIENT INTERVIEW #4
TOOL NEEDED: Ultra Batclaw
(West Wing Corridor)
On the western wall of this corridor — at the top of the stairs, before the Records Room and opposite the path to Dr. Young’s office — is a destructible patch between two columns. Pull it down with the Ultra Batclaw and jump over to find the tape.
ARKHAM MANSION — PATIENT INTERVIEW #5
TOOL NEEDED: Ultra Batclaw
(Records Room)
You’ve spotted this one through bars, but how to get inside? Look for a high vent near the entrance to the Professor Strange solution (see Riddle #8). It’s in the southern wing, on the eastern wall. Pull the grate off with your Ultra Batclaw and grapple up. Follow the air ducts and you’ll soon reach the room with the tape.
ARKHAM MANSION — CHRONICLE #1
TOOLS NEEDED: Batclaw, Explosive Gel
(Mansion Entrance Hall)
You’ll see this on your way from the Main Entrance Hall to the Main Hall. The door between them is locked at first, so you’re forced to grapple into a ceiling air duct and crawl through. The tablet is halfway along that path, in a room right after a desctructible wall.
ARKHAM MANSION — CHRONICLE #2
(Main Hall)
Go to the northern section of this room, where the pendulum swings and where the bell drops. Look high up, across from the cathedral-like windows. See that balcony? Grapple up there and you’ll find a tablet.
ARKHAM MANSION — CHRONICLE #3
TOOL NEEDED: Explosive Gel
(South Corridor)
Keep your eyes up as you walk down this hallway. Halfway along, on the eastern side, you’ll see a complicated section of air ducts and ceiling fans. Grapple there and find the destructible wall. Behind it is the beetle tablet. Note that this is the same area for Riddle #9.
ARKHAM MANSION — RIDDLER TROPHY #1
(Mansion Entrance Hall)
To the right of the very first set of stairs in this room is a wall grate. Duck in there for the trophy.
ARKHAM MANSION — RIDDLER TROPHY #2
TOOL NEEDED: Batclaw
(Main Hall)
See the big statue holding a book and skull? See the wall grate on its pedestal? See the trophy within? Yup, there you go.
ARKHAM MANSION — RIDDLER TROPHY #3
(North Corridor)
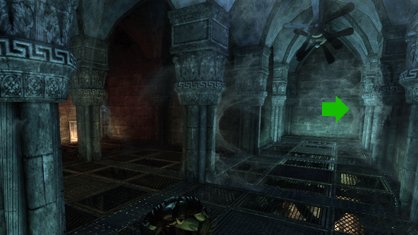
After passing by the jail cell with spiralling text on its walls, you’ll grapple up to a wall grate and crawl into a large room with ceiling fans. Dr. Young’s office is through a second wall grate on the left, but head forward — to the back of the room — and you’ll find a trophy hidden around the corner.
ARKHAM MANSION — RIDDLER TROPHY #4
TOOL NEEDED: Batclaw
(South Corridor)
Where this corridor bends, look up to the rafters. There’s a very high wall grate that you can pull open and grapple into. The trophy’s inside.
ARKHAM MANSION — RIDDLER TROPHY #5
TOOL NEEDED: Batclaw
(Library)
As soon as you enter the Library, look right. See the wall grate between the two desks? Use your Batclaw to pull it off and climb in for a trophy.
ARKHAM MANSION — RIDDLER TROPHY #6
(Library)
When you’re at the top of the Library, getting ready to cut the chandelier’s cord, look for a grate along the circular wall. Inside is a trophy.
ARKHAM MANSION — RIDDLER TROPHY #7

(Warden’s Office)
As you’re exiting the main office with the fireplace, turn right instead of left. You’ll find a small file room and a trophy sitting on the desk next to a TV monitor.
ARKHAM MANSION — RIDDLER TROPHY #8
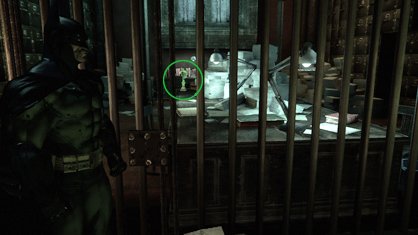
TOOL NEEDED: Ultra Batclaw
(Records Room)
You’ve seen this trophy through the bars, taunting you on the western end of the Records Room; once you have the Ultra Batclaw, you can finally nab it. Look up and to the right of the bars and you should notice a grate. Pull it down with the Ultra Batclaw and crawl inside. Follow the path to the trophy.
ARKHAM MANSION — RIDDLER TROPHY #9
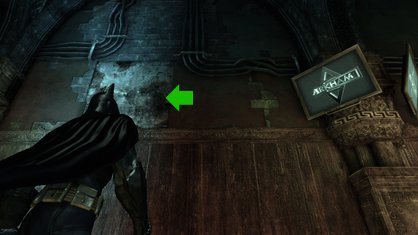
TOOL NEEDED: Ultra Batclaw
(East Wing Corridor)
Face the door to the Warden’s Office and look to your left. There’s a destructible patch of wall up there and, behind it, a trophy.
ARKHAM MANSION — JOKER’S TEETH #1-3
(Main Hall)
In the cathedral-like foyer at the top of this room — past the statue — are two security rooms. Three sets of teeth are chomping around the western one, though you’ll have to pull open a wall grate to destroy the third.
ARKHAM MANSION — JOKER’S TEETH #4-5
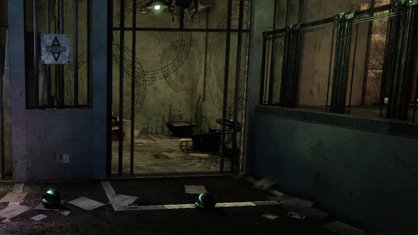
(North Corridor)
These are chomping right outside the jail cell with spiral text written on the walls. You should encounter them while looking for Dr. Young’s office.
ARKHAM MANSION — JOKER’S TEETH #6-8

(West Wing Corridor)
After exiting Dr. Young’s office, following her fingerprints, you’ll run into a purple gift box in the West Wing Corridor. Destroy all three sets of teeth.
ARKHAM MANSION — JOKER’S TEETH #9-11
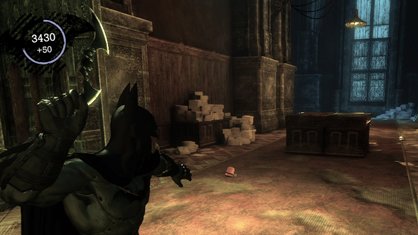
(South Corridor)
You can’t miss these three as you’re tracking Dr. Young’s fingerprints. They’re in the middle of the hallway, near the display cases… one of which holds the solution to a Penguin riddle.
ARKHAM MANSION — JOKER’S TEETH #12-14
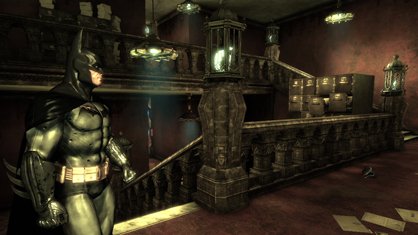
(Library)
On the stairs leading to the lowest level of the library — where the prisoners are tied up — is where you’ll find these three sets.
ARKHAM MANSION — JOKER’S TEETH #15-17
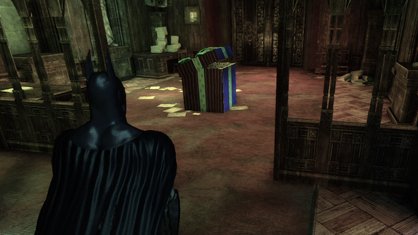
(East Wing Corridor)
You’ll run into these three sets while following the Warden’s DNA trail out of his office. They’re in a purple gift box, right after the turn in this corridor.
ARKHAM MANSION — JOKER’S TEETH #18-20
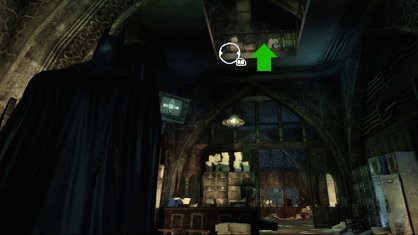
(Warden’s Office)
These are the easiest-to-miss teeth in the entire game. They’re on the upper floor of Warden Sharp’s office… which, unless you were searching very carefully, you probably didn’t even realize had an upper floor. Go to the door that leads back to the East Wing and look up at the ceiling. There’s a hole you can grapple into. Arkham Mansion’s final teeth are near the back of the filing cabinets.
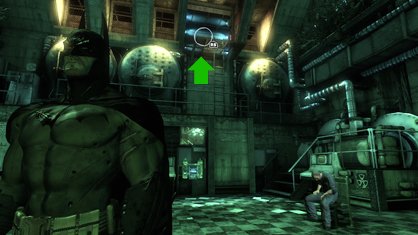
TOOL NEEDED: Cryptographic Sequencer with Range Booster Upgrade
(Glasshouse Generator Room)
This is the area where you save a janitor and turn off the electricity. Look up and you’ll see an electrified gate, situated high above the room. Grapple to it, then use the long-range cryptographic sequencer (available with an upgrade) to hack the panel inside. Enter to find the map, as well as a trophy.
BOTANICAL GARDENS
BOTANICAL GARDENS — RIDDLE SOLUTIONS VIDEO
BOTANICAL GARDENS — RIDDLE SOLUTION #1
(Glasshouse Entrance)
«Is the number up for these guards?»
As soon as you’ve entered the Botanical Gardens, turn left and find the bench. There are two dead security men, posed with books, and numbered marks are scratched onto the nearby wood. Scan the whole scene to solve the riddle.
BOTANICAL GARDENS — RIDDLE SOLUTION #2
(Statue Corridor)
«Remember the Waynes? How could anyone forget?»
When heading to the Generator Room to save the janitor and turn off the power, you’ll pass through this corridor. At its center is a garden bench with an inscription honoring Bruce’s parents. Zoom in and scan the gold plate to solve the riddle.
BOTANICAL GARDENS — RIDDLE SOLUTION #3
(Botanical Glasshouse)
«What time is tea time in Wonderland?»
This circular greenhouse rotunda has three levels and a Poseidon-like fountain in the middle. On the second level, behind the fountain statue’s back and nestled between some tree branches, is the Mad Hatter’s tea set.
BOTANICAL GARDENS — RIDDLE SOLUTION #4
(Ventilation System)
«The Ratcatcher needed more than just his charm to lead his army.»
This solution is hidden in the air duct tunnels between the Flooded Corridor and the Abandoned Chamber… you crawl through them after crossing the previously electrified water. As you’re moving along, keep the camera pointed downward. Eventually, you’ll see a pair of gloves, a gas mask and a book under the bars below you. They belong to the Ratcatcher.
BOTANICAL GARDENS — RIDDLE SOLUTION #5
(Flooded Corridor)
«Looks like all the king’s horses trampled all the king’s men.»
After returning to the Flooded Corridor, you’ll rescue a second janitor from prisoners. He asks you to find some orderlies in the Aviary. Before doing so, go down the southern hallway and turn the corner. In front of you is a bench with broken toy soldiers strewn across the seat. Scan them to solve the riddle and get info on the fix-it villain Humpty Dumpty.
BOTANICAL GARDENS — RIDDLE SOLUTION #6
(Flooded Corridor)
«Is this a tribute to what a mad dog left behind?»
On your way to the Aviary, you’ll pass through a small square room with a headless statue holding flowers. The gold inscription plate has been vandalized with the name «Mad Dog». Scan it to solve the riddle.
BOTANICAL GARDENS — RIDDLE SOLUTION #7
(Aviary)
«There’s no closet in the Gardens, so someone is using the roof instead.»
Stand facing the secret door that leads to the Titan Production Facility (it’s on the western side of the Aviary) and turn left. Look up. See the cobwebbed skeleton? That’s actually a Killer Moth victim in its cocoon. Scan for the solution.
BOTANICAL GARDENS — RIDDLE SOLUTION #8
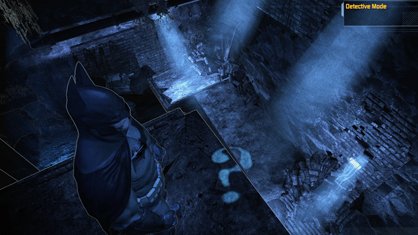
TOOL NEEDED: Detective Mode
(Abandoned Chamber)
«This challenge can only be seen by those with a different view of life.»
This is a question mark alignment puzzle. Before exiting this area through the steel door, turn left and you’ll see that you can jump to a lower platform (while being careful not to hit the pipe). Run along that platform and you’ll reach a shimmy hand hold, which will take you to a waterfall. Climb up, turn around and jump again. Now just head right until you reach a metal catwalk — use your Batarang to cut its rope and knock it down. Halfway across the catwalk, turn left and grab hold of the brickwork. Shimmy around this section until you can climb up to the chamber’s highest point. Head to the northern end of this platform — you’ll need to duck under some debris — and the question mark should become clear.
BOTANICAL GARDENS — PATIENT INTERVIEW #1
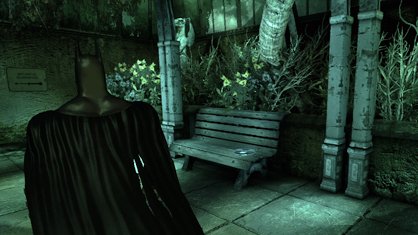
(Glasshouse Entrance)
As soon as you’ve entered the Botanical Gardens, look for a bench on the righthand wall. A tape sits there.
BOTANICAL GARDENS — PATIENT INTERVIEW #2
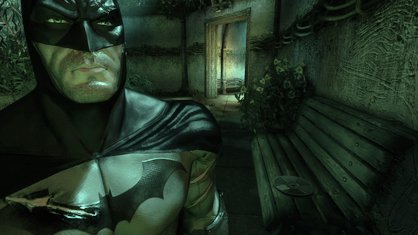
(Statue Corridor)
When heading to the Generator Room to save the janitor and turn off the electricity, you’ll pass through this corridor. Along its southern side is a shadowy bench, with the tape sitting right on top.
BOTANICAL GARDENS — PATIENT INTERVIEW #3
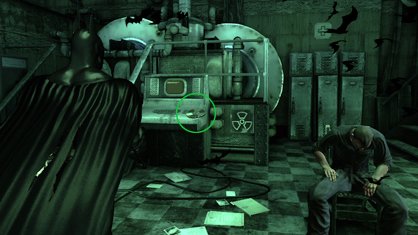
(Glasshouse Generator Room)
The tape is on a computer terminal behind the janitor’s chair.
BOTANICAL GARDENS — PATIENT INTERVIEW #4
(Flooded Corridor)
This tape is sitting on a bench next to the headless Mad Dog statue (see Riddle #6), in front of the door to the Aviary.
BOTANICAL GARDENS — PATIENT INTERVIEW #5
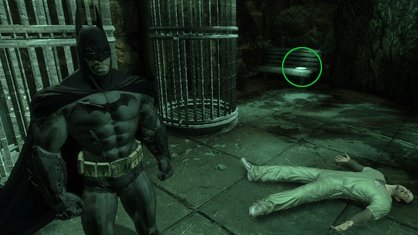
(Aviary)
The tape is on a bench in the southeastern corner of the Aviary, behind two tall birdcages.
BOTANICAL GARDENS — CHRONICLE #1
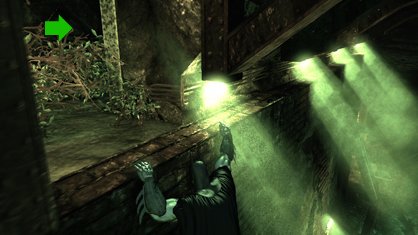
(Abandoned Chamber)
Follow the same complicated path you did to get to Riddle #8. In fact, the exact spot where you stood to scan Riddle #8 is the exact spot you need to jump from to reach this chronicle. Make sure to get a slight running start, then leap towards the northern wall and catch hold of the ledge. Shimmy left and climb up to find the tablet.
BOTANICAL GARDENS — CHRONICLE #2
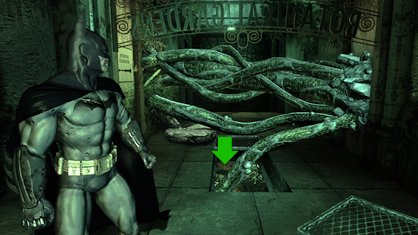
(Glasshouse Entrance)
When trying to exit the Botanical Gardens, Poison Ivy will block your way with huge, tentacle-like vines. Drop down through the floor and, before continuing with your mission, turn around and scan the beetle symbol behind you.
BOTANICAL GARDENS — CHRONICLE #3
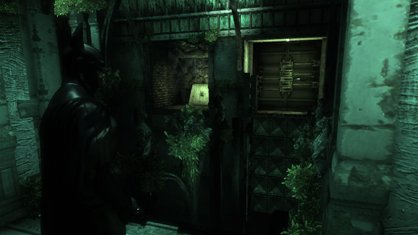
TOOLS NEEDED: Line Launcher, Ultra Batclaw
(Titan Production Facility)
Remember when you used the Line Launcher for the first time, leaving the fight with Joker’s two deformed henchmen and heading out to find Poison Ivy? You would have zipped across a gap to the exit. On either side of that exit, however, is a reward. On the right is a trophy. On the left is a destructible wall (you’ll need to return with the Ultra Batclaw) and a Chronicle of Arkham.
BOTANICAL GARDENS — RIDDLER TROPHY #1

TOOL NEEDED: Cryptographic Sequencer with Range Amplifier
(Glasshouse Generator Room)
This is the area where you save a janitor and turn off the electricity. Look up and you’ll see an electrified gate, situated high above the room. Grapple to it, then use the long-range cryptographic sequencer (available with an upgrade) to hack the panel inside. Enter to find a trophy, as well as the Riddler’s map.
BOTANICAL GARDENS — RIDDLER TROPHY #2
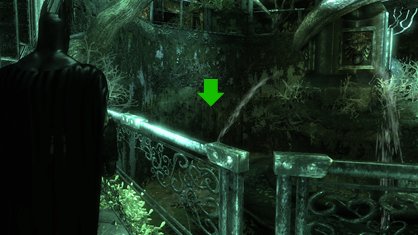
TOOL NEEDED: Explosive Gel
(Botanical Glasshouse)
When you enter this room, the first thing you’ll notice is the three-story tall fountain of a man with a spear. Switch to detective mode and look at the bottom of the fountain. You’ll see a destructible wall at the back. Explode it and crawl through the revealed ventilation duct to grab the trophy.
BOTANICAL GARDENS — RIDDLER TROPHY #3
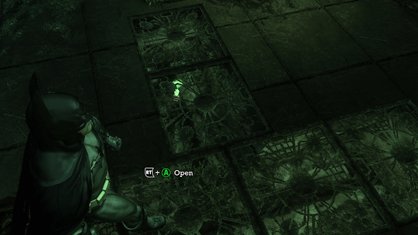
(Botanical Glasshouse)
Head to second level of this three-level room. Head to the back, or northern, side. Right past the Mad Hatter’s tea set, you’ll see a T-shaped series of floor grates. Pop underneath for the trophy.
BOTANICAL GARDENS — RIDDLER TROPHY #4
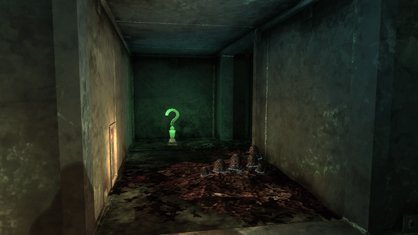
(Ventilation System)
You’ll locate this in the air duct tunnels between the Flooded Corridor and the Abandoned Chamber… you crawl through them after crossing the previously electrified water. If you reach the exit, you’ve passed it. Go back and take a different branch until you see the trophy next to some brownish blue mushrooms.
BOTANICAL GARDENS — RIDDLER TROPHY #5
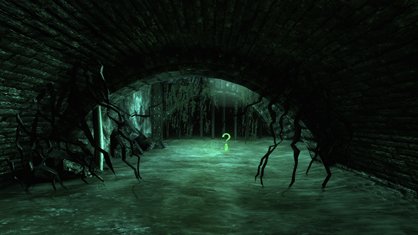
(Abandoned Chamber)
You should have noticed a large circular floor grate in the southeastern corner of this area. It’s glowing green from the water below… but how to get down there? Simply make your way to the northeastern corner of the room, then drop into the sewer stream and duck into the arched tunnel. You’ll see the trophy ahead.
BOTANICAL GARDENS — RIDDLER TROPHY #6

(Abandoned Chamber)
As you walk around the central structure of this room, you should see a trophy tucked on the ground level. If you climb the stairs to get inside the structure, however, you’ll discover that the trophy is actually underneath the floor. Instead, head to the northern outside edge of the structure and look for an accessible grate at your feet. Pop in and follow the tunnel, then pop back out inside the structure. The trophy should be right in front of you.
BOTANICAL GARDENS — RIDDLER TROPHY #7

(Abandoned Chamber)
Before exiting this area through the steel door, turn around and look slightly up. A trophy, glimmering in the beam of light! Getting there is a little complicated, unless you’ve already made the journey for Riddle #8. First, jump across to the western platform (it’s to your right if facing the trophy). Second, run forward and grab the hand holds on the western wall. Third, shimmy across and climb up into the greenish waterfall, then turn around and jump to the opposite platform. Fourth, turn right and head slightly south until you see a diagonal catwalk on your left. Finally, use your Batarang to cut the rope holding the catwalk up — it’ll crash down, providing you easy access, after another quick run and jump, to the trophy beyond.
BOTANICAL GARDENS — RIDDLER TROPHY #8
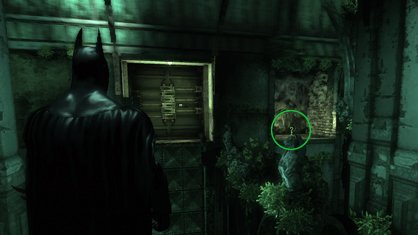
TOOL NEEDED: Line Launcher
(Titan Production Facility)
Remember when you used the Line Launcher for the first time, leaving the fight with Joker’s two deformed henchmen and heading out to find Poison Ivy? You would have zipped across a gap to the exit. On either side of that exit, however, is a reward. On the left is a chronicle (though you’ll need the Ultra Batclaw to get it) and on the right is this trophy.
BOTANICAL GARDENS — RIDDLER TROPHY #9
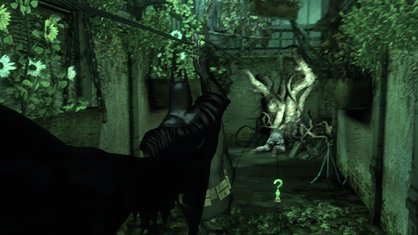
TOOL NEEDED: Line Launcher
(Flooded Corridor)
You’ll walk over this trophy in your search for Poison Ivy, immediately after Line Launching through the arched greenhouse tunnel full of flower pots. Pretty hard to miss.
BOTANICAL GARDENS — RIDDLER TROPHY #10
TOOLS NEEDED: Ultra Batclaw, Line Launcher
(Abandoned Chamber)
To find this trophy, you need to follow the same complicated path as you did for Riddle #8 and Trophy #7. Like with Riddle #8, you’ll want to stop halfway along the catwalk and grab hold of the brickwork to your left. Once you’ve shimmied around and onto the central platform, check out the eastern wall in Detective Mode. Pull down the destructible patch you see with the Ultra Batclaw, then Line Launch yourself to the trophy.
BOTANICAL GARDENS — JOKER’S TEETH #1-3
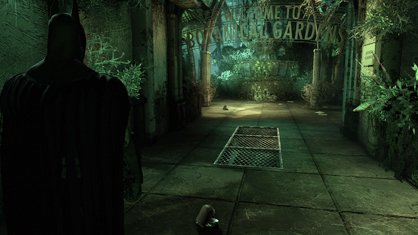
(Glasshouse Entrance)
You’ll find these wandering around the very first room of the Botanical Gardens. Make sure to get all three before moving on.
BOTANICAL GARDENS — JOKER’S TEETH #4-6
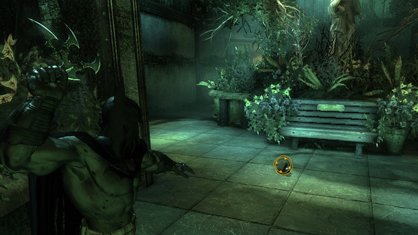
(Statue Corridor)
These are found while heading to the Generator Room to save the janitor and turn off the power. They’re a little spread out, but not very hard to find and destroy.
BOTANICAL GARDENS — JOKER’S TEETH #7-8
(Flooded Corridor)
Cross the water in this room after you’ve turned off the electricity flowing through it. Two sets of teeth are waiting for you on the other side.
BOTANICAL GARDENS — JOKER’S TEETH #9-11

(Aviary)
You have to take out the main henchman in the control tower in order to pass this room’s mission — saving the orderlies in the cages. After you’ve done so, destroy the three sets of teeth chattering about his body.
BOTANICAL GARDENS — JOKER’S TEETH #12-14
(Flooded Corridor)
You’ll find these three while following Poison Ivy’s trail, immediately after line launching across a narrow arched hallway full of flower pots. There’s a trophy here too.
BOTANICAL GARDENS — JOKER’S TEETH #15-17
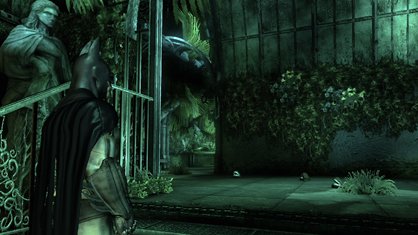
(Glasshouse Entrance)
These three will appear on your way out of the Botanical Gardens, after speaking with Poison Ivy.
BOTANICAL GARDENS — JOKER’S TEETH #18-20
(Flooded Corridor)
These won’t appear until you’ve returned to the Botanical Gardens with the antidote. You’ll want to destroy them before crossing the electrified water.
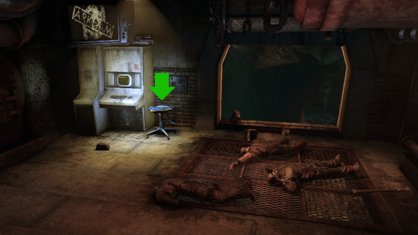
TOOL NEEDED: Ultra Batclaw
(Pump Control Room)
This is the first room you enter while trying to shut down the three Titan pump valves. You’ll use the Ultra Batclaw to tear down a wall, revealing a group of thugs. Defeat them, then grab the map off the computer terminal stool.
CAVES
CAVES — RIDDLE SOLUTIONS VIDEO
CAVES — RIDDLE SOLUTION #1
TOOL NEEDED: Detective Mode
(Main Sewer Junction)
«A puzzle has many sides, but only some are visible.»
This is a question mark alignment puzzle. While running up the second collapsed column, you’ll see a hand hold on the platform above. Use it to shimmy around, climb up and then look at the brick wall in front of you to spot the symbol. There’s a trophy here, too.
CAVES — PATIENT INTERVIEW #1
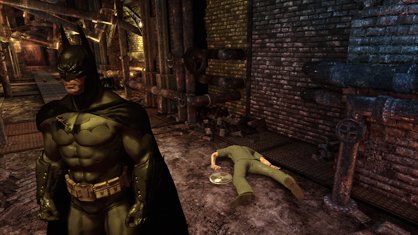
(Old Sewer)
Just follow the objective path on your first trip through the sewers and this one will be obvious. It’s next to a doctor’s corpse, underneath a grate hiding a Riddler Trophy.
CAVES — PATIENT INTERVIEW #2
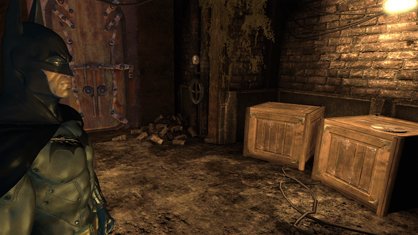
(Surface Access)
Immediately after you exit the Main Sewer Junction — the cavernous room with all the crumbling brick columns — you’ll find this tape waiting for you on a couple of wooden crates.
CAVES — PATIENT INTERVIEW #3
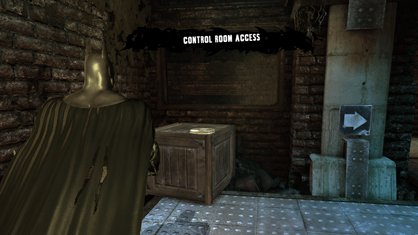
(Control Room Access)
When entering the Caves again to find Croc’s Lair — from Intensive Treatment — you’ll pass through this room first. The interview is waiting on top of a wooden crate.
CAVES — PATIENT INTERVIEW #4

(Pump Control Room)
This is pretty hard to miss, sitting on a metal barrel in the hallway between the Pump Control Room and the Pressure Control Junction.
CAVES — PATIENT INTERVIEW #5
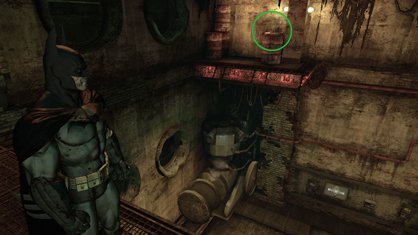
TOOL NEEDED: Line Launcher
(Pump Room)
When you enter this room, you’re in a high position and the control panels are below you. Rather than drop down, Line Launch to the barb-wired platform across from you. The tape is sitting on a barrel here.
(Having trouble re-entering the pump section later in the game? When you reach the electrified door blocking your entrance into the central hub of the Pressure Control Junction — with the dead Titan henchman lying in the centre of the floor — turn on Detective Mode and follow the orange wires. They’ll actually lead you back through the door you just came through… the security panel is on the other side.)
CAVES — CHRONICLE #1
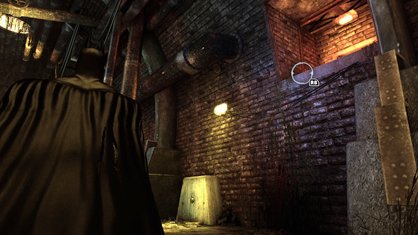
(Old Sewer)
Drop into the Old Sewer from the Batcave path and turn right. You should see the tablet only a few yards away from you, against the brick wall.
CAVES — CHRONICLE #2
TOOL NEEDED: Ultra Batclaw
(Pressure Control Junction)
In order to escape the Caves after shutting down the Titan pumps, you need to Ultra Batclaw a couple of walls down in the elevator shaft. Behind the first one, you’ll find a message from Amadeus Arkham.
CAVES — CHRONICLE #3
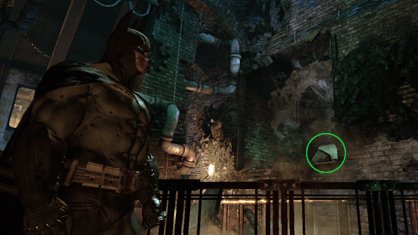
TOOL NEEDED: Ultra Batclaw
(Control Room)
As you enter this area, you can turn left or right and see a destructible patch on either of the diagonal walls. The one on the right hides a chronicle tablet. Use the Ultra Batclaw to gain entry.
(Having trouble re-entering the pump section later in the game? We did too! See our solution under Patient Interview #5.)
CAVES — RIDDLER TROPHY #1
TOOL NEEDED: Batclaw
(Old Sewer)
Just follow the objective path on your first trip through the sewers and you’ll probably spot this one. It’s in a high grate, above the doctor’s corpse and patient interview.
CAVES — RIDDLER TROPHY #2
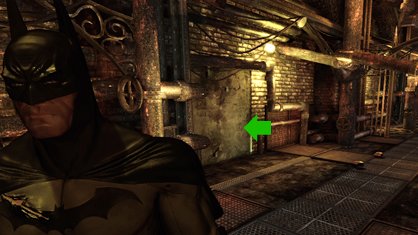
TOOL NEEDED: Explosive Gel
(Old Sewer)
As you’re walking from the watery sewer area (Old Sewer) to the cavernous area with the crumbling surfaces (Main Sewer Junction), you’ll pass through this hallway. It also holds an interview tape, three sets of teeth and a trophy in a high grate. This second trophy is behind a destructible wall, halfway down the passage.
CAVES — RIDDLER TROPHY #3
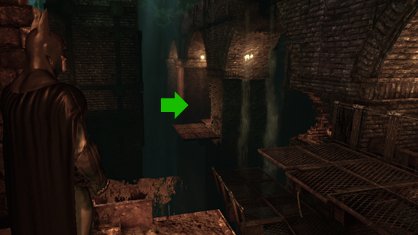
(Main Sewer Junction)
If you’re starting at the bottom of this room and moving upward, the trophy is near the beginning of your climb. Just jump onto the first block, make your first small jump and turn left (or west). After a longer jump, you’ll turn a corner and find it on the floor.
CAVES — RIDDLER TROPHY #4
(Main Sewer Junction)
After jumping off the ground-level metal catwalks, but before jumping across to the first fallen column (which also holds two sets of chattering teeth), look at the wall next to this middle platform. See the hand holds? Grab those and shimmy left around the corner. Climb up and find the trophy in a reddish alcove.
CAVES — RIDDLER TROPHY #5

(Main Sewer Junction)
Again, this is almost impossible to miss if you’re climbing the room properly. About halfway up, you’ll jump into a shallow stream of water, right before walking up the second fallen column. Simply jump across to the red alcove to nab the prize.
CAVES — RIDDLER TROPHY #6
(Main Sewer Junction)
While running up the second fallen column, you’ll see a hand hold on the platform above. Before jumping across to the room’s exit, grab that and shimmy right, around the corner. Climb up, climb again and there’s the trophy.
CAVES — RIDDLER TROPHY #7
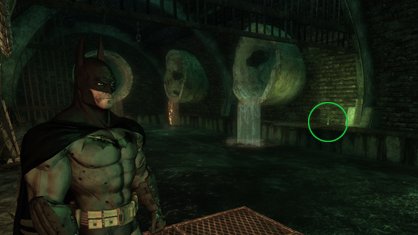
TOOL NEEDED: Line Launcher
(Croc’s Lair)
This is in the long sewer tunnel with fast-running green water. The entrance to Croc’s Lair is on the western end of the tunnel. The trophy is on the eastern (dead) end.
CAVES — RIDDLER TROPHY #8
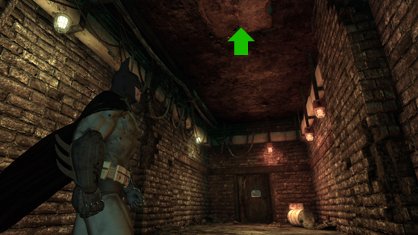
TOOL NEEDED: Ultra Batclaw
(Croc’s Lair)
Before exiting this tunnel and entering the Old Sewer, take a look at the ceiling with Detective Mode turned on. If you’re in the area with the metal door and the barrels, you should see a destructible panel above that you can pull down with the Ultra Batclaw. Afterwards, just grapple up to find a green-hued room and the trophy.
CAVES — RIDDLER TROPHY #9
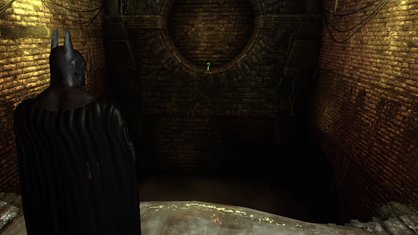
TOOL NEEDED: Line Launcher
(Old Sewer)
You’ll have passed this trophy a couple times on your trips through the sewers, but you can’t cross the gap and reach the circular cutout in the brick wall until you have the Line Launcher. Then the trophy is a quick zip away.
CAVES — RIDDLER TROPHY #10
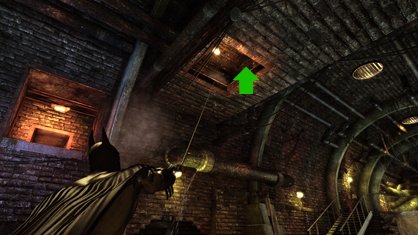
TOOL NEEDED: Ultra Batclaw
(Old Sewer)
Drop into the Old Sewer from the Batcave path and turn left, then look up at the ceiling. See the destructible panel there? Pull it down with the Ultra Batclaw and grapple into the alcove to find a trophy.
CAVES — RIDDLER TROPHY #11
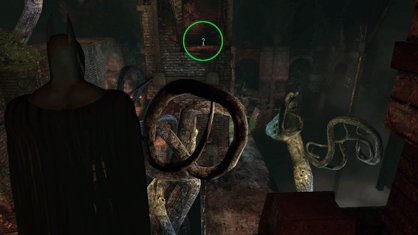
TOOL NEEDED: Line Launcher
(Main Sewer Junction)
After traversing the first fallen column and jumping into the shallow stream of water, jump the next gap and into the little dead-end alcove. Turn left — far away, on the opposite side of the chamber, you should see another alcove with the trophy. Line Launch across the distance, passing some twisted vines along the way.
CAVES — RIDDLER TROPHY #12
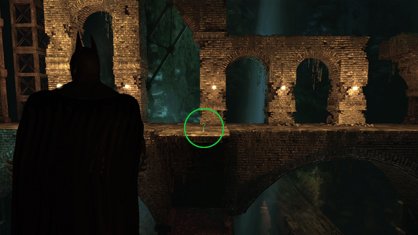
TOOL NEEDED: Line Launcher
(Main Sewer Junction)
This trophy is directly on your path from the bottom of the chamber to the top, if headed towards the Pump Rooms. It’s sitting right in front of one of the brick archways, directly opposite the door to Surface Access and Arkham North exit.
CAVES — RIDDLER TROPHY #13
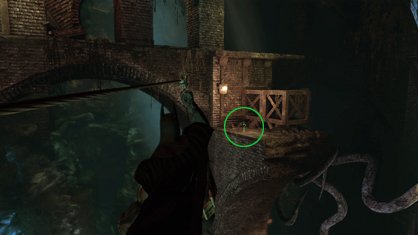
TOOL NEEDED: Line Launcher
(Main Sewer Junction)
This trophy is also directly along your path from the bottom of the chamber to the top, if headed towards the Pump Rooms. You’ll pass after your second Line Launch across the chamber.
CAVES — RIDDLER TROPHY #14
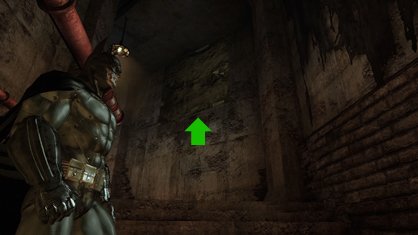
TOOL NEEDED: Ultra Batclaw
(Pressure Control Junction)
This can be found along the passage to the smaller, western Pump Room. As you head there, watch the right wall for a destructible patch. Pull it down with the Ultra Batclaw and grapple up for the trophy.
(Having trouble re-entering the pump section later in the game? We did too. Read our solution under Patient Interview #5.)
CAVES — RIDDLER TROPHY #15
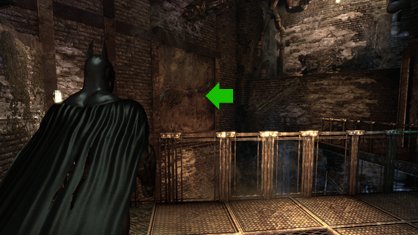
TOOL NEEDED: Ultra Batclaw
(Control Room)
As you enter this area, you can turn left or right and see a destructible patch on either of the diagonal walls. The one on the left hides a trophy. Use the Ultra Batclaw to gain entry.
CAVES — RIDDLER TROPHY #16
(The Batcave)
Grab this one as you’re gliding from island to island between the Batcave and Old Sewer. It’s on the first island, at the lowest point… the only way you could miss it is if you flew too far and forgot to look down.
CAVES — RIDDLER TROPHY #17
TOOL NEEDED: Line Launcher
(The Batcave)
Another trophy hidden in the island outcroppings between the Batcave and Old Sewer. You won’t pass this one on the main flight path, however… you have to take a detour by gliding from the second large island to the tiny northern cliff alcove you should see on your map. To get back safely, you’ll want to use the Line Launcher.
CAVES — JOKER’S TEETH #1-3
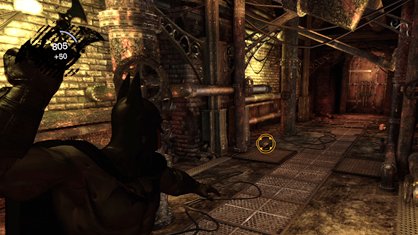
(Old Sewer)
Just follow the objective path on your first trip through the sewers (after finding the Batcave) and you can’t miss these three sets. They’re right past the Killer Croc interview tape, and right before the cavernous area with the crumbling surfaces.
CAVES — JOKER’S TEETH #4-5
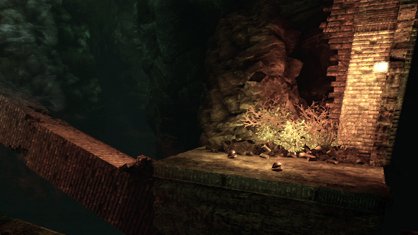
(Main Sewer Junction)
While manually scaling this room — the grapple hook doesn’t work here — you can’t miss these two sets of teeth. They’re in a square area right before the first fallen column.
CAVES — JOKER’S TEETH #6-8
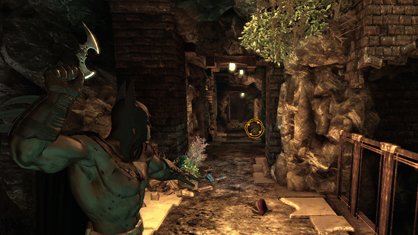
(Main Sewer Junction)
These teeth will be waiting for you at the end of your climb, along the hallway to the metal door exit.
CAVES — JOKER’S TEETH #9-11
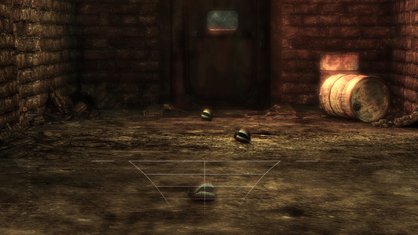
(Croc’s Lair)
After defeating Killer Croc, exit his lair through the western end door. You’ll pass three sets of teeth on the way out.
CAVES — JOKER’S TEETH #12-14
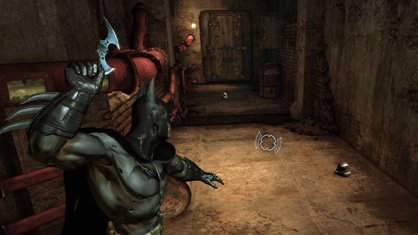
(Pressure Control Junction)
You’ll encounter these three sets on the stairs between the Pressure Control Junction and the western Pump Room.
CAVES — JOKER’S TEETH #15-17
(Pressure Control Junction)
You’ll encounter these three sets in the passageway between the Pressure Control Junction and the eastern Pump Room.
CAVES — JOKER’S TEETH #18-20
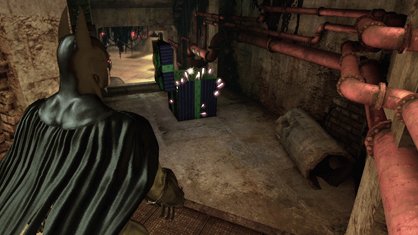
(Pressure Control Junction)
After shutting down the third and final pump in this area, the Joker will leave you a purple gift box on your way back to the Pressure Control Junction. They contain the final three sets of teeth for the Caves.
(Secure Transit)
You won’t be able to grab this map until you’ve returned to Intensive Treatment in search of Killer Croc’s lair. Once you reach the very bottom of the facility — down two elevator shafts — look for the monster’s meat locker. On the opposite side of the room is a staircase that leads to an office full of Killer Croc research. The map is there as well.
INTENSIVE TREATMENT
INTENSIVE TREATMENT — RIDDLE SOLUTION #1

(Intensive Treatment Lobby)
«Don’t cut yourself on this Sharply observed portrait.»
Impossible to miss, as the game holds your hand through this first riddle. Just scan the painting of Warden Sharp, hanging on the nearby wall, to proceed.
INTENSIVE TREATMENT — RIDDLE SOLUTION #2
(Utility Corridor)
«You don’t know Jack about Gotham. Tune in to find out.»
In this locker room, simply scan the radio on the bench. It’s playing jazz music and a Jack Ryder news report.
INTENSIVE TREATMENT — RIDDLE SOLUTION #3
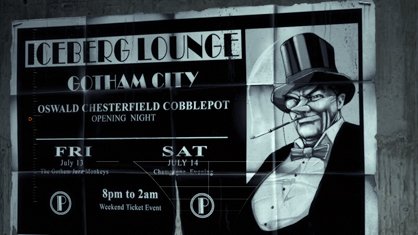
(Transfer Loop)
«A top hat and tails is the only dress code for this party in the North.»
Midway along the Transfer Loop corridor, you’ll spot an office with an Emergency Shutdown gate blocking half the door. Simply crouch underneath and look at the southern wall. Scan the poster advertising Penguin’s Iceberg Lounge.
INTENSIVE TREATMENT — RIDDLE SOLUTION #4
(Holding Cells)
«Where would you find my home sweet home?»
The Riddler’s cell is in the area where you first start the game, the one in which the Joker escapes. Look for the room with all the green question marks painted on its walls. Note that you can’t scan it when beginning Arkham Asylum because the game hasn’t yet introduced you to the Riddler’s Challenges.
INTENSIVE TREATMENT — RIDDLE SOLUTION #5
TOOL NEEDED: Cryptographic Sequencer
(Cell Block Transfer)
«Hook up with the relatives before you’re transferred out of here.»
You’ll walk past this room during the intro to the game, but you can’t access the adjacent office until later, when you return for Killer Croc’s lair. Just make sure you enter the Cell Block Transfer on the eastern side and hack through the southern security gate. Up the stairs and on the desk is a portrait of Aaron Cash — the guard with a hook for a hand — and his family. Scan it.
INTENSIVE TREATMENT — RIDDLE SOLUTION #6
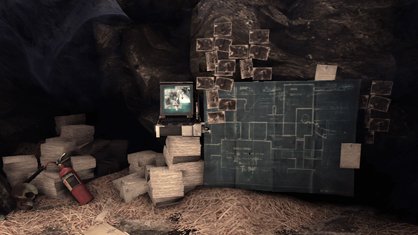
(Secure Transit)
«Dr. Jonathan Crane plans on elevating fear to new depths.»
On your second trip to Intensive Treatment, after the Scarecrow has crashed the elevator, drop down the first shaft and then down the second shaft into Killer Croc’s area. If you stand on top of that second elevator and look up, you should notice a wall grate in the shaft. Grapple up and crawl through the red-hued air duct until you reach the Scarecrow’s straw-covered headquarters.
INTENSIVE TREATMENT — RIDDLE SOLUTION #7
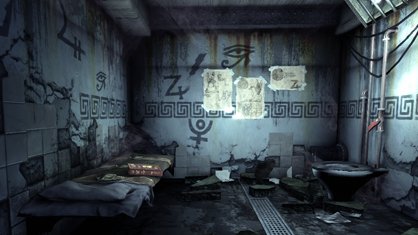
TOOL NEEDED: Explosive Gel
(Patient Pacification Chamber)
«Even I was shocked when I saw how Maxie Zeus was treated!»
Once you have the explosive gel — or the Ultra Batclaw — return to the room where you rescued a guard from Zsasz’s electric chair. One of the walls is destructible and hidden behind it is Zeus’s cell.
INTENSIVE TREATMENT — RIDDLE SOLUTION #8
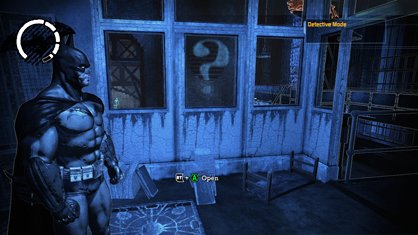
TOOL NEEDED: Detective Mode
(Intensive Treatment Lobby)
«A puzzle has many sides, but only some are visible.»
This is a question mark alignment puzzle. Head to the windowed offices in the middle of this room and turn on detective mode. You should see the top half of the question mark on one of the windows facing south (towards Frank Boles’ body). Look through it and aim for the circular air vent on the far wall. The symbol should align correctly.
INTENSIVE TREATMENT — PATIENT INTERVIEW #1
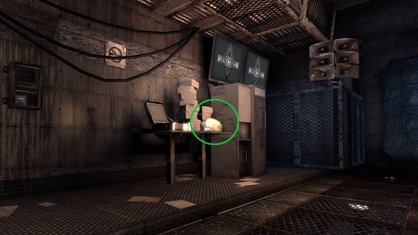
(Secure Transit)
This tape is next to the elevator shaft that Harley escapes up and that you’re forced to climb. Just look for a set of stairs on the ground level and follow the passage to a desk.
INTENSIVE TREATMENT — PATIENT INTERVIEW #2
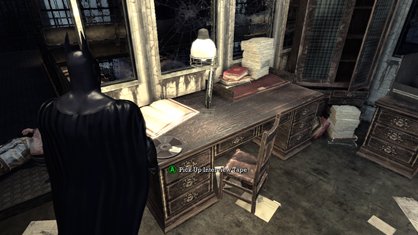
(Intensive Treatment Lobby)
In the centre of this warehouse-like room is a raised office. A desk on the eastern side has the tape sitting on its corner.
INTENSIVE TREATMENT — PATIENT INTERVIEW #3
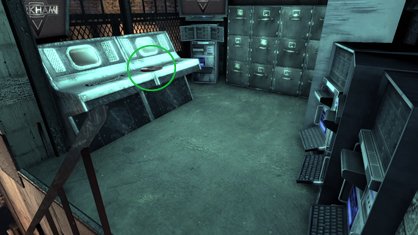
(Cell Block Transfer)
You’ll walk past this room during the intro to the game, but you can’t access the adjacent office until later, when you return for Killer Croc’s lair. Just make sure you enter the Cell Block Transfer on the eastern side and hack through the northern security gate… the one that isn’t Aaron Cash’s. The tape is up the stairs.
INTENSIVE TREATMENT — PATIENT INTERVIEW #4

(Secure Transit)
If you enter the elevator shafts area from one of the Cell Block Transfer doors, simply turn right and you should see stairs to an upstairs office. Follow them to find the tape.
INTENSIVE TREATMENT — PATIENT INTERVIEW #5
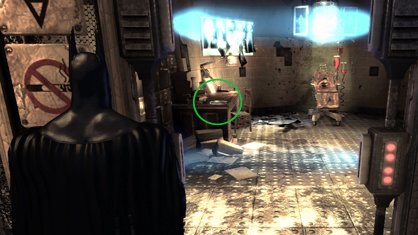
TOOL NEEDED: Cryptographic Sequencer
(Decontamination)
Once you have the ability to hack security panels, return to this room, where you cleared Joker toxin for the very first time. Inside is an office with an electrified door. Now that you can bypass the door, the tape is easy to grab off the desk within.
INTENSIVE TREATMENT — CHRONICLE #1
(Secure Transit)
You can’t miss the beetle symbol as you’re climbing the elevator shaft. It’s near the very top, right before an encounter with enemies.
INTENSIVE TREATMENT — CHRONICLE #2
TOOL NEEDED: Explosive Gel
(Secure Transit)
You might also spot this tablet while climbing, if you have your Detective Mode turned on. About halfway up, through a crawl space, there’s an empty room with two destructible walls. The chronicle’s behind the left one… return when you have the explosive gel (or Ultra Batclaw).
INTENSIVE TREATMENT — CHRONICLE #3
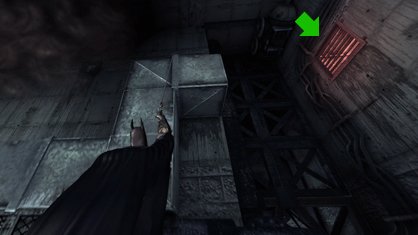
TOOL NEEDED: Ultra Batclaw
(Transfer Loop)
In the eastern roundabout area of the Transfer Loop, keep your eyes toward the ceiling until you spot a high wall grate. Grapple to the opposite air duct, use your Ultra Batclaw to pull down the grate and carefully jump across to grab onto the small ledge. Once inside the secret area, you’ll find the tablet with no problem.
INTENSIVE TREATMENT — RIDDLER TROPHY #1
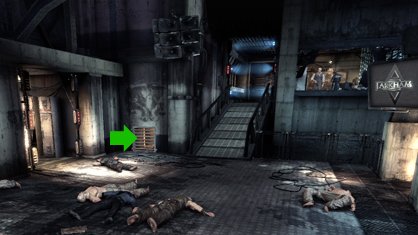
(Holding Cells)
After the Joker escapes and you’ve dealt with his two waves of thugs, look towards the south side of the room (where you can see Commissioner Gordon through the window). The trophy is behind the wall grate next to the cell.
INTENSIVE TREATMENT — RIDDLER TROPHY #2
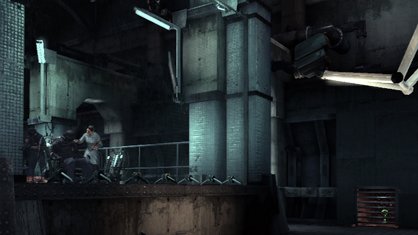
(Patient Pacification Chamber)
In the room where you saved a guard from Zsasz’s electric chair, there are two wall grates. The one in the northeast corner continues the story forward, while the one in the southwest corner hides a trophy.
INTENSIVE TREATMENT — RIDDLER TROPHY #3
(Processing Corridor)
Escape the Patient Pacification Chamber by opening the northeast wall grate. The trophy is near the end of the air duct passage, right before the exit grate.
INTENSIVE TREATMENT — RIDDLER TROPHY #4

(Decontamination)
Go to the large decontamination chamber where you saved guards from Joker’s toxin. Near the middle and on the western side are some showers with two floor grates on either side. Pop down into either one to find the trophy.
INTENSIVE TREATMENT — RIDDLER TROPHY #5
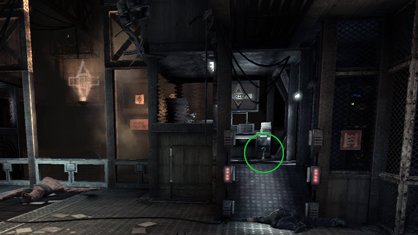
(Secure Treatment Transfer)
In the room where you fight Joker’s first mutated test subject. One control room has a guard. The other control room has the trophy.
INTENSIVE TREATMENT — RIDDLER TROPHY #6
(Maintenance Access)
On your return to Intensive Treatment in search of Killer Croc’s lair, this is the area you’ll come through first. Look for an openable grate while crawling through the vents. You should already be able to see the trophy straight ahead of you, through more bars… to get to it, you’ll have to climb above it and then drop down into the passage next to it.
INTENSIVE TREATMENT — RIDDLER TROPHY #7
TOOL NEEDED: Explosive Gel
(Utility Corridor)
This trophy is hidden in the same area as the Jack Ryder radio. You can’t get it at the beginning of the game, however, because it is behind a destructible wall. Return when you have explosive gel or the Ultra Batclaw.
INTENSIVE TREATMENT — RIDDLER TROPHY #8
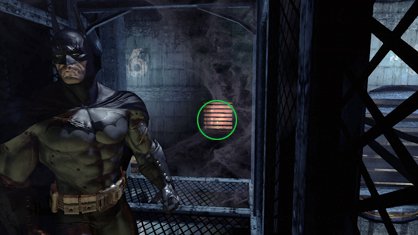
TOOL NEEDED: Ultra Batclaw
(Secure Transit)
While climbing the elevator shaft, keep your eyes peeled for an orange glowing wall grate with a green trophy inside. You probably noticed it at the beginning of the game, but once you have the Ultra Batclaw, you can return and pull that grate off. Then, all you need to do is get a running jump and grab onto the bit of ledge. Pull yourself into the duct and the trophy is yours.
INTENSIVE TREATMENT — RIDDLER TROPHY #9
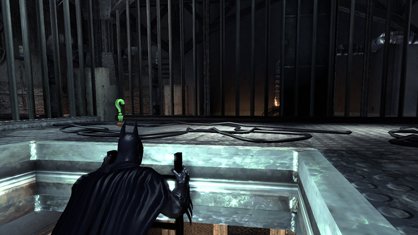
TOOL NEEDED: Cryptographic Sequencer
(Decontamination)
Once you have the ability to hack security panels, return to this area, where you cleared Joker toxin for the very first time. Inside is an office with an electrified door. Now that you can bypass the door, do so and climb the ladder you discover within. The trophy is at the top.
INTENSIVE TREATMENT — RIDDLER TROPHY #10
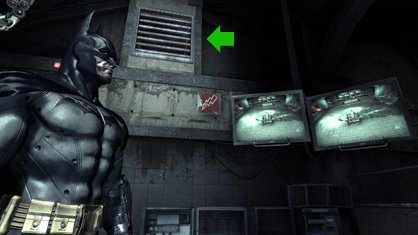
TOOL NEEDED: Batclaw
(Patient Pacification Chamber)
Head to the upper levels of this area. You were up here before taking out Zsasz the first time. On the western side, near the top of some ramps, is this wall grate. Pull it down and find the trophy behind.
INTENSIVE TREATMENT — JOKER’S TEETH #1-3
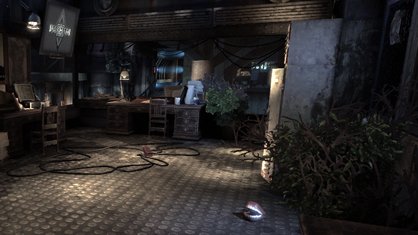
(Holding Cells)
This area holds two offices. One has Gordon and Boles trapped inside. The other, near the Processing Corridor, is where you’ll find these three sets of Joker’s teeth.
INTENSIVE TREATMENT — JOKER’S TEETH #4
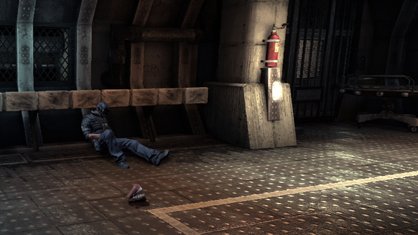
(Processing Corridor)
The single set of teeth is in the corner of this hallway, right next to a slumped guard.
INTENSIVE TREATMENT — JOKER’S TEETH #5
(Processing Corridor)
This is a dead end at first, with a guard named Eddie Burlow trying to get the locked door open. The single set of teeth is in the middle of the hallway.
INTENSIVE TREATMENT — JOKER’S TEETH #6-8
(Decontamination)
As soon as you exit the Processing Corridor and enter the Decontamination area — through the door that Eddie Burlow was trying to unlock — you’ll find three sets of chomping teeth in the hallway. They’re right before the room full of Joker toxin.
INTENSIVE TREATMENT — JOKER’S TEETH #9-11
(Decontamination)
In the large decontamination chamber are three sets of teeth. The first is immediately after the north entrance, the second is in the middle of the floor a bit further inside and the third is near the control panel that you Batarang’d to clean the toxin.
INTENSIVE TREATMENT — JOKER’S TEETH #12
(Transfer Loop)
You’ll find this set immediately after exiting the decontamination chamber on its southern side. It’s in front of a door painted with a bright green «HA HA».
INTENSIVE TREATMENT — JOKER’S TEETH #13
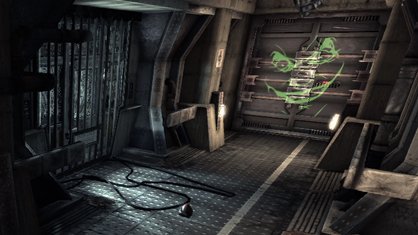
(Transfer Loop)
Keep following the green arrows after collecting Teeth #12 and you’ll find this set right before the door with Joker’s painted face in green. A cutscene with Joker and his mutated test subject follows immediately after this spot, so try to get the teeth beforehand.
INTENSIVE TREATMENT — JOKER’S TEETH #14-16
(Transfer Loop)
While following Gordon and Bole’s trail, you’ll pass through a reception area in which you hear Joker take a worried wife’s call. Three sets of teeth surround the central desk.
INTENSIVE TREATMENT — JOKER’S TEETH #17
(Secure Transit)
At the top of the elevator shaft, you meet a large group of thugs. The teeth are to the side, next to an electrified door and dead security guard.
INTENSIVE TREATMENT — JOKER’S TEETH #18-20
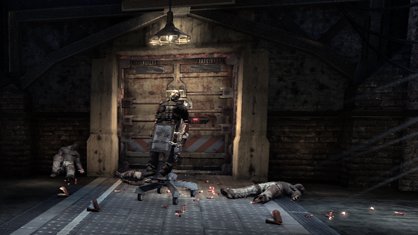
(Intensive Treatment Lobby)
When Gordon’s trail ends and you find the «dead end», three sets of teeth are chattering around the body.
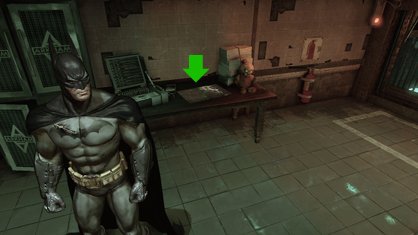
(Experimental Chamber)
The map to the Medical Facility is in the area where you must save Gordon from Harley Quinn without being detected by guards. When you enter that area for the first time, you should be in a room with a window that overlooks everything else. On a desk is both the map and the solution to one of the riddles — a teddy bear.
MEDICAL FACILITY
MEDICAL FACILITY — RIDDLE SOLUTIONS VIDEO
MEDICAL FACILITY — RIDDLE SOLUTION #1
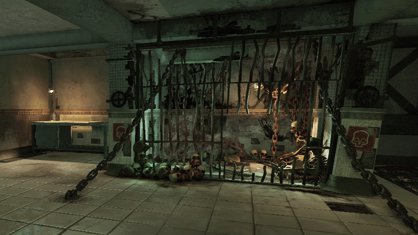
(Sanatorium)
«TICK! TOCK! News flash! Someone is not getting out of here alive.»
Drop down to the bottom most floor of this room and look for the ripped-open cage full of skulls and chains. Scan the entire gruesome scene to solve the riddle.
MEDICAL FACILITY — RIDDLE SOLUTION #2
(Patient Observation)
«Was this fire fly too hot off the press?»
This solution is in the room where you Batarang three control panels to clear the Joker’s toxin and save Aaron Cash. See the little sub-office? Where you probably dropped that hanging thug through the roof? Go inside and check out the newspaper clippings on the cabinet. They’re about — surprise, surprise — the villain Firefly.
MEDICAL FACILITY — RIDDLE SOLUTION #3
(Surgery Room)
«Shhhhsshh! Rumors persist that Tommy Elliot operates in Arkham. Can it be true?»
Unstrap Dr. Chen from the operating chair, then turn around and grapple up to the balcony behind you. The whiteboard on the right is what you want to scan for information on the villain Hush.
MEDICAL FACILITY — RIDDLE SOLUTION #4
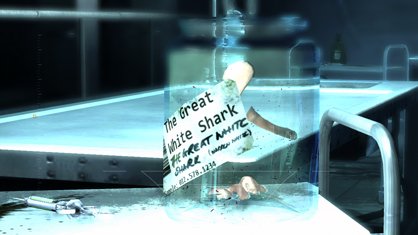
(Morgue)
«What silent killer of the oceans can be found in a tiny jar?»
After dealing with the Scarecrow in the morgue, look for a glass jar sitting next to one of the autopsy tables. Inside are the nose and ears of a new Batman villain, the Great White Shark. Scan the jar to solve the riddle.
MEDICAL FACILITY — RIDDLE SOLUTION #5
(Experimental Chamber)
«Is this bear the Bane of his life?»
This solution is in the area where you must save Gordon from Harley without being detected by guards. When you enter that area for the first time, you should be in a room with a window that overlooks everything else. On a desk is both the answer to the riddle — Bane’s childhood teddy bear — and the Riddler’s map.
MEDICAL FACILITY — RIDDLE SOLUTION #6
(Medical Foyer)
«Is the generosity of our benefactors on the Wayne?»
This solution is in the very first room of the Medical Facility, but you can’t access it until you’ve completed the level. Once you have, and Harley’s not watching over the foyer any more, return there and scan the gold plated inscription on the wall.
MEDICAL FACILITY — RIDDLE SOLUTION #7
TOOL NEEDED: Batclaw
(Secure Access)
«Are you going to take your hat off to Harley, Bats?»
You probably noticed Harley Quinn’s office — and the jester hat inside — when coming through the Medical Facility the first time. Unfortunately, you didn’t have the Batclaw yet, so couldn’t remove the high wall grate next to the elevator doors. Once you do, the solution is just a grapple, crawl and short drop away.
MEDICAL FACILITY — RIDDLE SOLUTION #8
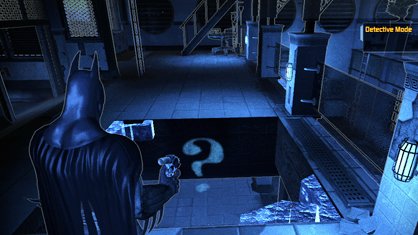
TOOLS NEEDED: Explosive Gel, Detective Mode
(Sanatorium)
«A question can only be answered from a new perspective. Don’t you agree?»
This is a question mark alignment puzzle. Head to the western side of the middle level and blow up the floor panel. When you look north and downward through the newly created hole, the symbol should be staring back at you.
MEDICAL FACILITY — PATIENT INTERVIEW #1
(Sanatorium)
Go to the elevator area. Opposite the rescued doctors is a short hallway with an office at the end. Inside, on the desk, is the interview tape.
MEDICAL FACILITY — PATIENT INTERVIEW #2
(Patient Observation)
Check out the office where Aaron Cash and his coughing doctor friend were trapped by the Joker’s toxin. If you haven’t saved them yet, do so to open the doors. If you have, grab the tape off the desk here.
MEDICAL FACILITY — PATIENT INTERVIEW #3
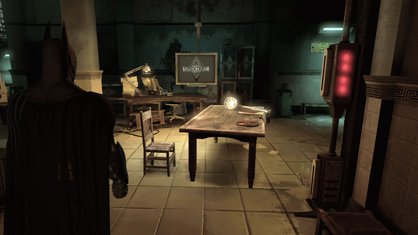
(Medical Foyer)
This tape is in the very first room of the Medical Facility, but you can’t grab it until you’ve completed the level and Harley no longer blocks off the foyer. Return anytime afterwards to claim the interview.
MEDICAL FACILITY — PATIENT INTERVIEW #4
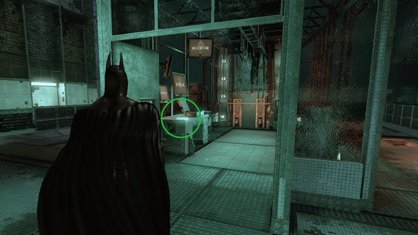
(Experimental Chamber)
Return to the room in which you discovered Bane and rescued Gordon. Inside the central holding cell — where Bane was being kept — is a patient interview.
MEDICAL FACILITY — PATIENT INTERVIEW #5
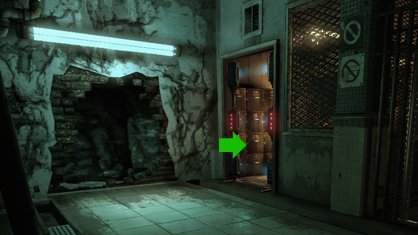
TOOL NEEDED: Cryptographic Sequencer
(Secure Access)
Enter this room from the elevator area and turn left. Next to the crumbling wall — which you destroyed on your first trip through here — is an electrified security door. Hack it open and grab the interview tape inside.
MEDICAL FACILITY — CHRONICLE #1
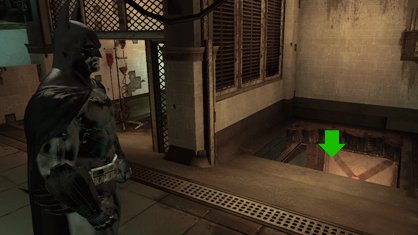
TOOL NEEDED: Explosive Gel
(Sanatorium)
When you enter the Sanatorium from the Medical Foyer, turn left and walk along the western side of the room. Tucked between the first and third patient rooms is an empty area with a destructible floor. Blast it and drop down to find the chronicle.
MEDICAL FACILITY — CHRONICLE #2
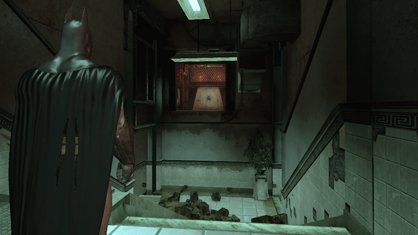
TOOL NEEDED: Ultra Batclaw
(Medical Foyer)
Go to the Sanatorium door, but rather than exit the Foyer, turn 180 degrees and check the wall opposite. It’s destructible if you have the Ultra Batclaw and the beetle tablet is behind it.
MEDICAL FACILITY — CHRONICLE #3
TOOL NEEDED: Ultra Batclaw
(X-Ray Room)
This is where you first met Dr. Young, rescuing her from thugs. Grapple to the roof of the X-Ray area — which also holds a trophy — and turn back towards the exit. You should see a destructible panel on the wall. Pull it down with the Ultra Batclaw and jump in to scan the tablet.
MEDICAL FACILITY — RIDDLER TROPHY #1

(Maintenance Access)
When you first break into the Medical Facility, you’ll see this trophy trapped in a metal box. To get it, just follow the same air duct that takes you out of here, but branch right about halfway through. Simple.
MEDICAL FACILITY — RIDDLER TROPHY #2

(Sanatorium)
On the lowest floor of this room, go to the northernmost end of the showers. You should find a wall grate. Open it and follow the path to the trophy. Alternately, you can use the explosive gel to blow open the destructible wall on this floor. It leads to the same area.
MEDICAL FACILITY — RIDDLER TROPHY #3
(Upper Corridor)
This area is recognizable by the three coloured lines — blue, red and yellow — that run along its halls. Follow the red path and look for a ventilation grate. The trophy is inside the air ducts, accessible from two such grates along the red path.
MEDICAL FACILITY — RIDDLER TROPHY #4
(X-Ray Room)
After saving Dr. Young, just grapple onto the roof above her to find the trophy.
MEDICAL FACILITY — RIDDLER TROPHY #5
(Experimental Chamber)
You should stumble upon this trophy while sneaking through the ventilation ducts, trying to avoid detection by the guards and rescue Commissioner Gordon from Harley.
MEDICAL FACILITY — RIDDLER TROPHY #6

(Experimental Chamber)
You can’t miss this one. It’s on the roof of the room holding Harley and Gordon… just grab it before crashing in and triggering the cutscene.
MEDICAL FACILITY — RIDDLER TROPHY #7
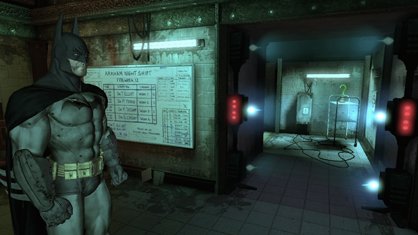
TOOL NEEDED: Cryptographic Sequencer
(Surgery Room)
This is the area in which you unstrapped the doctor from an operating chair… and also the location of the Hush Riddle (#3). When you were here earlier in the game, you will have noticed an electrified security door. Now you can simply hack the panel and walk upstairs for the trophy.
MEDICAL FACILITY — RIDDLER TROPHY #8
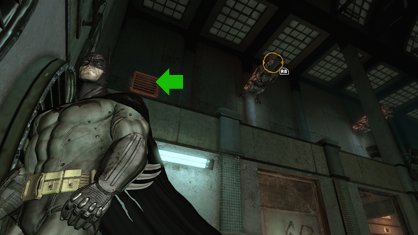
TOOL NEEDED: Ultra Batclaw
(Sanatorium)
On the eastern wall of this room, high up with the gargoyles, is a wall grate. Pull it down with the Ultra Batclaw and enter to nab a trophy.
MEDICAL FACILITY — RIDDLER TROPHY #9
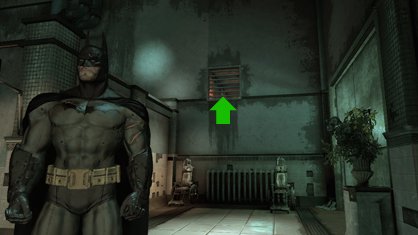
TOOL NEEDED: Ultra Batclaw
(Patient Observation)
Immediately upon entering the main room, the one in which you saved Aaron Cash and the doctor from Joker toxin, look at the wall to your right. See the grate? Use the Ultra Batclaw to pull it down and crawl through for a trophy.
MEDICAL FACILITY — JOKER’S TEETH #1-3
(Sanatorium)
On the lowest floor, at the southern end, are three sets of teeth. They’re a little spread out, but you should see them all without trouble.
MEDICAL FACILITY — JOKER’S TEETH #4-6
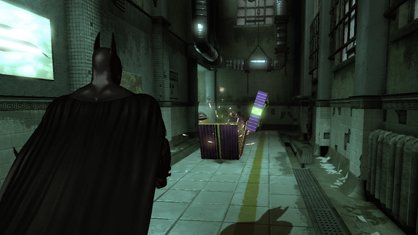
(Upper Corridor)
After saving Dr. Young in the X-Ray room, exit and you will find a purple gift box waiting for you in the hall. Approach and it’ll explode, revealing the three sets of teeth.
MEDICAL FACILITY — JOKER’S TEETH #7-9
(Patient Observation)
This is the room in which you had to Batarang three control panels to clear the Joker’s toxin and save Aaron Cash. There are three sets of teeth in here, on the mid-level catwalks surrounding the middle of the room. Watch the video for their exact locations.
MEDICAL FACILITY — JOKER’S TEETH #10-12
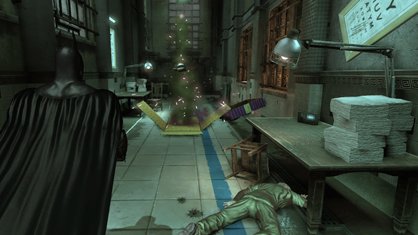
(Upper Corridor)
After saving Aaron Cash and the doctor in Patient Observation, you’ll find another purple gift box in the outside hallway. It contains another three sets of teeth.
MEDICAL FACILITY — JOKER’S TEETH #13-15
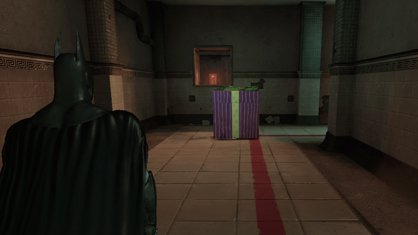
(Upper Corridor)
After saving Dr. Chen in the Surgery Room, you’ll find the third purple gift box waiting for you. Watch out! This one — or whichever one you find last — includes an angry inmate with a knife as well.
MEDICAL FACILITY — JOKER’S TEETH #16-17
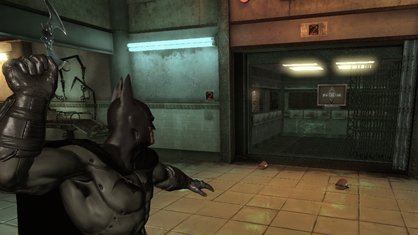
(Sanatorium)
Before boarding the elevator to the Morgue, take the time to smash the two sets of Joker teeth right in front of it.
MEDICAL FACILITY — JOKER’S TEETH #18-20
(Lower Corridor)
After escaping Scarecrow and the morgue, but before encountering Harley and Bane, you’ll follow green arrows through a couple of hallways and up some short stairs. Three sets of teeth are on or right next to those stairs.
(Extreme Incarceration)
After locking away Harley Quinn, simply walk into the control tower she formerly occupied. The map is on a desk on the ground level, right past the main door.
PENITENTIARY
PENITENTIARY — RIDDLE SOLUTIONS VIDEO
PENITENTIARY — RIDDLE SOLUTION #1
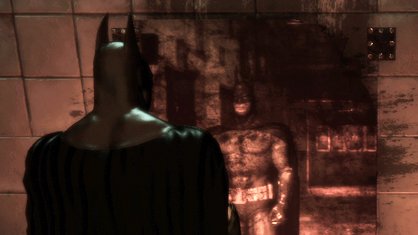
(Cells Access)
«How do you reflect on your successes and failures, Batman?»
There’s a restroom to the west of the Penitentiary’s reception area. Go to the Women’s side and scan Batman’s reflection in the grimy mirror.
PENITENTIARY — RIDDLE SOLUTION #2
(Main Cell Block)
«Two people, one voice, no gun?»
Ignore all the crazy people in this room — if they haven’t already been released — and grapple to the raised area above their cages. Look north and you’ll see a catwalk that leads to a separate room. The wall is inscribed with Latin and there is a display case with Ventriloquist’s machine gun inside. Scan it to solve the riddle.
PENITENTIARY — RIDDLE SOLUTION #3
(Security Control Room)
«A case of mistaken identity?»
At the back of this room is a holding cell with handprints smeared all over the glass. There’s a sign warning that the prisoner within can impersonate other people. He might be Aaron Cash, Warden Sharp or Commissioner Gordon when you see him… but in reality, it’s Clayface. Scan him to solve the riddle.
PENITENTIARY — RIDDLE SOLUTION #4
TOOL NEEDED: Cryptographic Sequencer
(Main Cell Block)
«This room is the end of days for even the most celebrated killer.»
While chasing Harley and fighting off escaped lunatics, look for a small cell covered in calendar pages. Scan the room for the solution and more info on the villain Calendar Man.
PENITENTIARY — RIDDLE SOLUTION #5
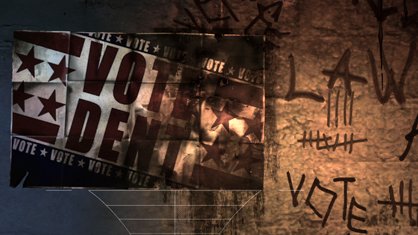
(Controlled Access)
«What has four walls, two sides, and one ex-DA?»
Why, that must be Harvey Dent, aka Two-Face! You can’t miss his cell — it’s the one with the big «Vote Dent» poster on the wall and the «Vote Dent» button next to the toilet. Scan the poster to solve the riddle.
PENITENTIARY — RIDDLE SOLUTION #6
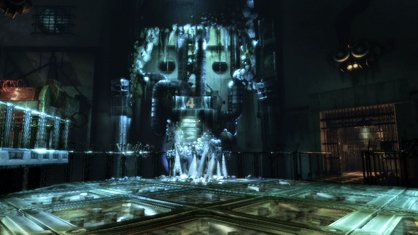
(Extreme Incarceration)
«All alone in your cell? Why don’t you break the ice with the most dangerous prisoners?»
Clearly, this riddle is referring to Mr. Freeze. You’ll find his rather large and rather frozen prison cell in the area where you locked up Harley Quinn. Scan the whole thing.
PENITENTIARY — RIDDLE SOLUTION #7
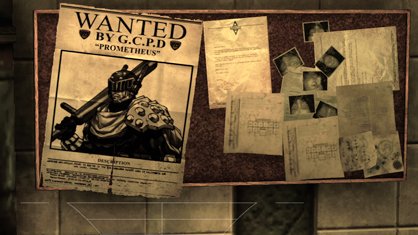
TOOL NEEDED: Ultra Batclaw
(Guard Room)
«Prometheus, Arkham guards’ most wanted and most hated.»
To gain access to the solution, you’ll need to get rid of the green Joker toxin in this room first. Grapple to the vents above the two guards and tear down the destructible wall there. Then, look across the gas-filled room to see another destructible panel — you’ll need the Ultra Batclaw for this one. Once that’s destroyed, simply throw a Batarang at the control box to clear the toxin. Now you’re free to drop down and locate the locker area, which holds a poster of the cop-hating villain Prometheus.
PENITENTIARY — RIDDLE SOLUTION #8
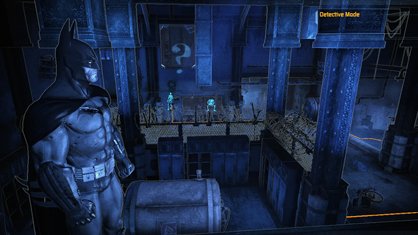
TOOLS NEEDED: Ultra Batclaw, Detective Mode
(Guard Room)
«When is something right in front of you but still hidden from view?»
This is a question mark alignment puzzle. To get the right view, you need to clear the Guard Room of green toxin first. Check the Prometheus Riddle above to see how. Next, go across to the room that held the toxin switch box and look back to the vent area above the guards’ control room… where you just were. The symbol should be lined up perfectly.
PENITENTIARY — PATIENT INTERVIEW #1
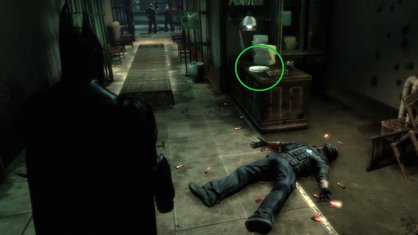
(Cells Access)
Immediately upon entering the Penitentiary through the front door, you should see this interview tape waiting for you on a desk to the right side.
PENITENTIARY — PATIENT INTERVIEW #2
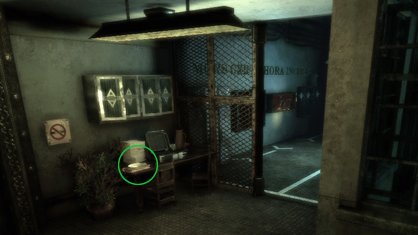
(Main Cell Block)
This is one of the offices that is accessible by catwalk from the raised area above all the crazy people’s cages. It’s to the left if you’re facing Ventriloquist’s gun display case. The tape is on a desk.
PENITENTIARY — PATIENT INTERVIEW #3

(Guard Room)
Rescue the two guards from Harley — the ones hanging above the electrified water — and follow them into the room with the green fogged windows. The interview tape is easy to spot on the cluttered desk in here.
PENITENTIARY — PATIENT INTERVIEW #4
TOOL NEEDED: Batclaw
(Controlled Access)
In this room, you need to pull down a ceiling grate and grapple up to an office in order to turn off the electrified gate below. While up here using your cryptographic sequencer, make sure to pick up the interview tape sitting nearby.
PENITENTIARY — PATIENT INTERVIEW #5
(Extreme Incarceration)
After throwing Harley into the prison cell, head inside the control tower she formerly occupied. At the top level, right outside the area with the numbered security panels, is a desk with the tape.
PENITENTIARY- CHRONICLE #1
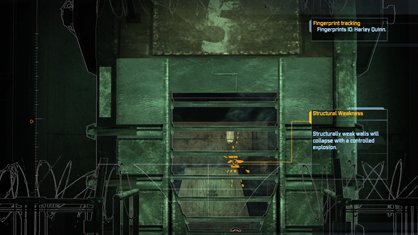
TOOLS NEEDED: Cryptographic Sequencer, Explosive Gel
(Extreme Incarceration)
In the room where you lock up Harley, check out cell #5 on the upper right side. Inside is a trophy… and beyond that, an Arkham chronicle. To get inside, you’ll need to head back to the main control tower and go upstairs to the numbered security panels. Use your sequencer to hack into panel #5 and the door below will open. Nab the trophy, then destroy the cell’s back wall with gel. The chronicle symbol is revealed! To escape afterwards, just grapple up.
PENITENTIARY — CHRONICLE #2
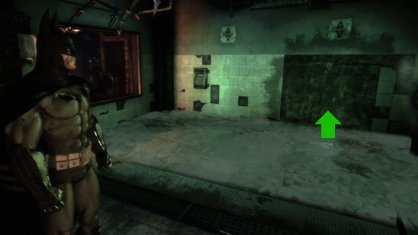
TOOL NEEDED: Ultra Batclaw
(Guard Room)
To gain access to this chronicle, you’ll need to get rid of the Joker toxin in the Guard Room first. See the Prometheus Riddle for how to do so. Once the area’s cleared, check the southern wall for a destructible panel, and beyond it, the beetle symbol.
PENITENTIARY — CHRONICLE #3
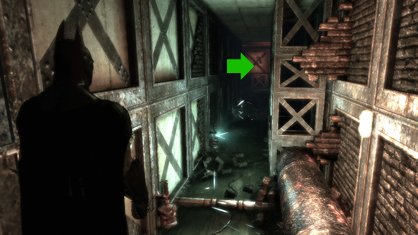
TOOLS NEEDED: Explosive Gel, Line Launcher
(Main Cell Block)
In the short hall that leads from the Main Cell Block to The Green Mile, watch the left wall for a destructible patch. Beyond is a long stretch of electrified water. To get across and scan the chronicle, you’ll need the Line Launcher.
PENITENTIARY — RIDDLER TROPHY #1
(Cells Access)
There’s a restroom to the west of the Penitentiary’s reception area. Go to the Men’s side and look for the trophy in the last stall.
PENITENTIARY — RIDDLER TROPHY #2
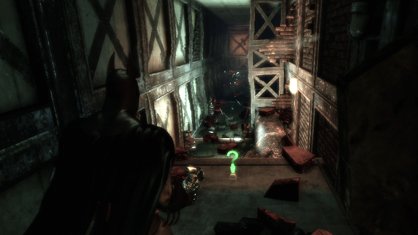
(Main Cell Block)
In the short hall that leads from the Main Cell Block to The Green Mile, watch the left wall for a destructible patch. Blow it up and you’ll find a trophy, as well as a bunch of electrified water.
PENITENTIARY — RIDDLER TROPHY #3
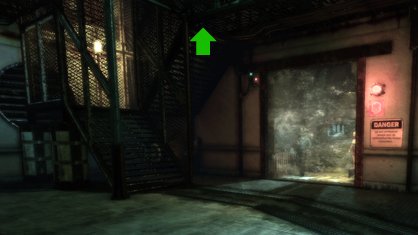
(Security Control Room)
At the back of this room, to the left of Clayface’s hand-smeared glass cell, is a metal staircase. Follow it up and explode the small bit of destructible wall you find. A trophy is in the area behind.
PENITENTIARY — RIDDLER TROPHY #4
(The Green Mile)
This is the room that holds — or held — Poison Ivy. In fact, you won’t find the trophy until after she and all the other prisoners in the area have been released. Then it’s just sitting in one of the cells on the western side.
PENITENTIARY — RIDDLER TROPHY #5
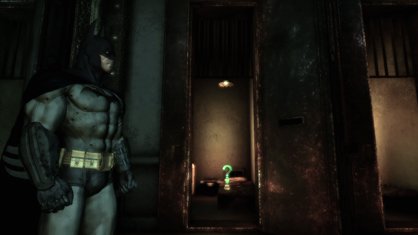
(Main Cell Block)
This is the room with Calendar Man’s paper-plastered cell. Along the southern wall of the room is another cell with a trophy sitting on its bed.
PENITENTIARY — RIDDLER TROPHY #6
(Main Cell Block)
As you’re walking up the stairs between the western Main Cell Block and the Guard Room section, look up. Through the ceiling pattern, you should spot a trophy. To get it, head into the Guard Room, hang a left and pull down the grate you see high above you on the left wall. Grapple up and follow the air ducts until you arrive in the desired area.
PENITENTIARY — RIDDLER TROPHY #7

(Controlled Access)
When you’re walking through this row of cells, you might notice a trophy — behind bars — on the northern side of the room. To get it, you must head upstairs, bomb the destructible walls and drop down into the cell from above.
PENITENTIARY — RIDDLER TROPHY #8
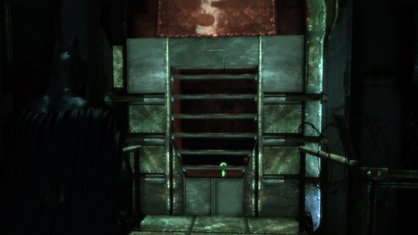
TOOLS NEEDED: Cryptographic Sequencer, Explosive Gel
(Extreme Incarceration)
In the room where you lock up Harley, check out cell #5 on the upper right side. A trophy! To get inside, though, you’ll need to head back to the main control tower and go upstairs to the numbered security panels. Use your sequencer to hack into panel #5 and the door below will open. Voila — the trophy is yours! Harley will trap you in here, but one of the walls is destructible. Blast and grapple your way out, nabbing an Amadeus Arkham symbol along the way.
PENITENTIARY — RIDDLER TROPHY #9
TOOL NEEDED: Cryptographic Sequencer
(Security Control Room)
Once you have the sequencer, go back to the room where you found Warden Sharp and the impersonator Clayface. Climb the stairs at the northern end, where there are two cells at the top. One contains a super creepy inmate with one arm; the other contains the trophy. Just hack the panel to get in.
PENITENTIARY — RIDDLER TROPHY #10
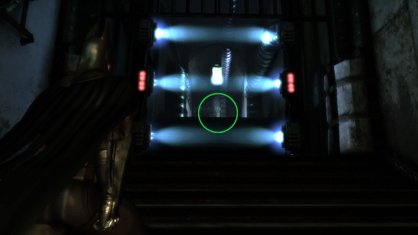
TOOL NEEDED: Ultra Batclaw
(Guard Room)
To grab this trophy, you’ll need to clear the Guard Room of Joker toxin first. See the Prometheus Riddle above to see how. Once done, simply grapple to the area that held the toxin switch box and walk through the door. The trophy is on the other side, no longer separated from you by an electrified gate.
PENITENTIARY — JOKER’S TEETH #1-3
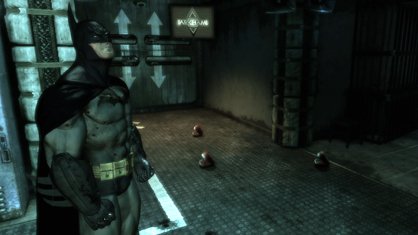
(Cells Access)
Before leaving the first area of the Penitentiary, you’ll come across three sets of teeth in front of the door to the Main Cell Block.
PENITENTIARY — JOKER’S TEETH #4-6
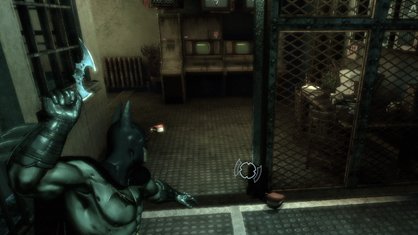
(Main Cell Block)
Grapple to the raised area above all the crazy people’s cages. Turn north and cross the catwalk into the room with the Ventriloquist’s gun. Turn left and you’ll see the teeth chattering around a side office.
PENITENTIARY — JOKER’S TEETH #7-9
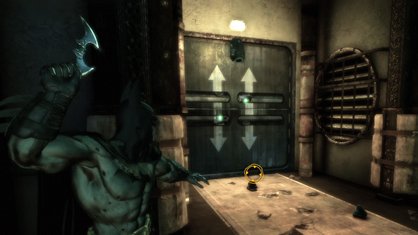
(Guard Room)
After rescuing the two guards from Harley — the ones hanging above the electrified water — the teeth will be impossible to miss. They’re in front of the door leading back to the Main Cell Block.
PENITENTIARY — JOKER’S TEETH #10-15
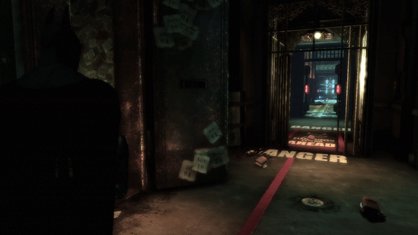
(Main Cell Block)
These will be directly in your path as you chase after Harley. The first three are right outside the Calendar Man’s paper-covered cell. The next three are near the exit of the Main Cell Block as you enter Controlled Access and the boss fight.
PENITENTIARY — JOKER’S TEETH #16-17
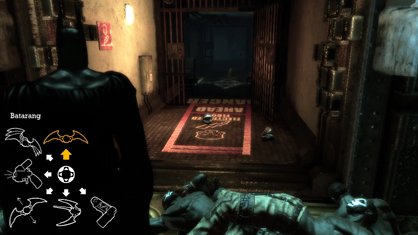
(Extreme Incarceration)
Lock away Harley Quinn, then walk through the door at the bottom of her control tower. Two sets of teeth are right inside.
PENITENTIARY — JOKER’S TEETH #18-20
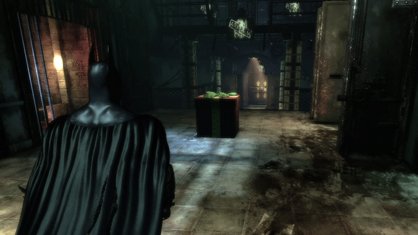
(Controlled Access)
After locking away Harley, exit Extreme Incarceration and you’ll find a purple gift box waiting for you in Controlled Access. Just approach to release the three sets of teeth.
![]()


Выглядит она так:
С боку ставим галочку возле интересующего объекта, и на карте в тех местах где эти объекты находятся, появятся метки.
Клацнувши на нужную вам метку, появиться некая инфа по месту расположения данного объекта и в миниатюре скриншоты (при нажатии на них , откроются в нормальном размере).
Кликнувши на здания «Тюремный блок», вы откроете его карту, тоже самое произойдет и с «Медблоком», «Ботаническими садами», и тд.
* Также в карте указана секретная комната, и способ в нее попасть.
* Прохождение прилагается.
* Все на русском.
—————————————
Установка:
1) распаковать архив.
2) запустить autorun.exe
================================================
P.S. Если вы заметите какие-то ошибки, пишите, исправлю.
================================================