В представлении «Комнаты чатов» можно искать комнаты чатов в главном окне Lync и находить комнаты, в которых вы состоите или на которые подписаны.
Примечание: Комнаты, в которых вы состоите, — это комнаты, в работе которых вы можете принимать участие (публиковать сообщения, просматривать участников и историю разговоров), так как владелец комнаты добавил вас в число ее участников. Комнаты, на которые вы подписаны, — это комнаты, новые действия в которых вы хотите отслеживать. Отслеживать события в закрытой комнате могут только ее участники.
Поиск комнаты чата
Выполнив поиск в Lync, можно найти:
-
комнату, в которой вы состоите или на которую подписаны;
-
комнату, к которой хотите присоединиться или на которую хотите подписаться;
-
все открытые и закрытые комнаты, связанные с интересующей вас темой.
-
В главном окне Lync щелкните значок Комнаты чата.
-
В поле поиска введите название комнаты или ключевые слова. По мере ввода в разделе Комнаты чатов будут отображаться комнаты, соответствующие запросу.
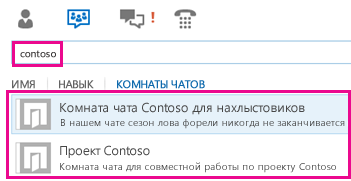
Примечание: В результатах поиска отображаются все комнаты, соответствующие запросу: как открытые, так и закрытые, которые доступны только для участников. Сведения о том, как стать участником закрытой комнаты, см. в разделе Присоединение к комнате чата в Lync. (Кроме того, в Lync есть секретные комнаты, которые не обнаруживаются при поиске.)
Поиск комнаты чата, участником которой вы являетесь или на которую подписаны
Чтобы найти комнату, в которой вы состоите, в которую были приглашены или которую отслеживаете, выполните указанные ниже действия.
-
В главном окне Lync щелкните значок Комнаты чатов
 .
. -
Выполните одно из указанных ниже действий:
-
Чтобы найти комнату, на которую вы подписаны, просмотрите список комнат на вкладке Подписки.
-
Чтобы найти комнату, в которой вы состоите и еще ни разу не участвовали, откройте вкладку Новые.
-
 .
.Открытие комнаты чата
Можно быстро открыть найденную комнату, выполнив одно из указанных ниже действий.
-
Дважды щелкните в списке комнат чата.
-
Наведите указатель мыши на значок Комната чата
и щелкните значок Открыть .
 и щелкните значок Открыть
  .
.К началу страницы
Нужна дополнительная помощь?
Нужны дополнительные параметры?
Изучите преимущества подписки, просмотрите учебные курсы, узнайте, как защитить свое устройство и т. д.
В сообществах можно задавать вопросы и отвечать на них, отправлять отзывы и консультироваться с экспертами разных профилей.

Это руководство поможет Вам с основным старым способом присоединиться к друзьям или что, будучи, в Ваш первый раз присоединяясь к ним или если социальные серверы понижаются и у Вас нет никакого другого способа найти их.
Шаг № 1: Обнаружение, что сервер они находятся в

Скажите, что Ваш друг находится в карте, у них нет подсказки, что имя и все, что они могут сделать, описывают то, на что оно похоже, первая вещь, которую Вы скажете им делать, состоит в том, чтобы выдвинуть «esc», чем говорят им нажимать на «миры», которые просят у них имя и номер, например, № 25.
Шаг № 2: Нахождение их сервера
Теперь, когда они дали Вам информацию, Вы собираетесь найти название карты, которое они сказали или в поиске или в счетах, например, популярный, активный, как только Вы сочли карту Вашей попыткой хотеть считать буксировку различными центрами налево, также ища число они сказали, например, № 25.

Все закончились и готовый пойти
Вы теперь нашли сервер и должны быть хорошими, чтобы пойти, если сервер будет полон, то Вы должны будете создать новый случай, чем нажимают на общественность (дополнительный, если они уже находятся в Ваших друзьях список), и повторите шаги выше снова после того, как они присоединились к своей новой комнате сервера.
Я надеюсь, что это руководство было большой помощью и дало Вам вторичный способ присоединиться к друзьям, любить заводить новых друзей в vrchat!

После того, как Google Chat заменил Hangouts, появился новый пользовательский интерфейс со многими функциями, которые раньше были недоступны. «Поиск» в чате Google также является одним из них, которого не было в Hangouts. Хотя существовал обходной путь, который люди использовали, но он больше не нужен, так как функция поиска была официально представлена.
Теперь, когда в Google Chat доступна функция поиска, неудивительно, что она имеет свои особенности. Технический гигант сделал все возможное с опцией поиска, и она нисколько не терпит неудач. Если вы здесь, чтобы узнать, как вести поиск в чате Google, или хотите точно знать, насколько многофункциональна эта опция.
Это могло быть одной из причин для них обоих, и мы рады, что эта функция теперь доступна, и более чем рады рассказать вам все об этом!
Что ж, это не ракетостроение, так что не волнуйтесь. Просто прочтите, и вы будете знать, что делать.
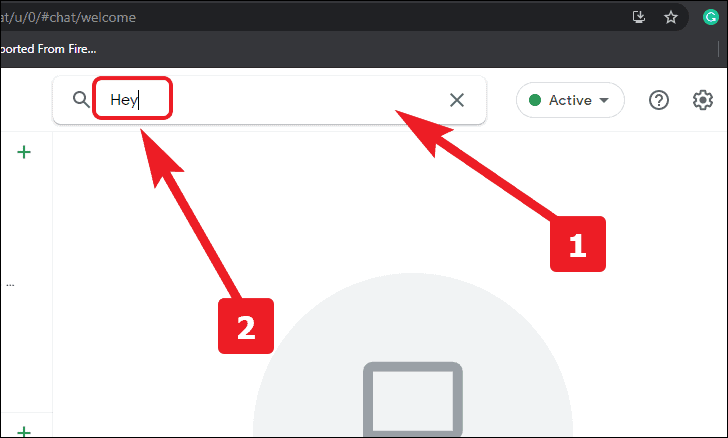
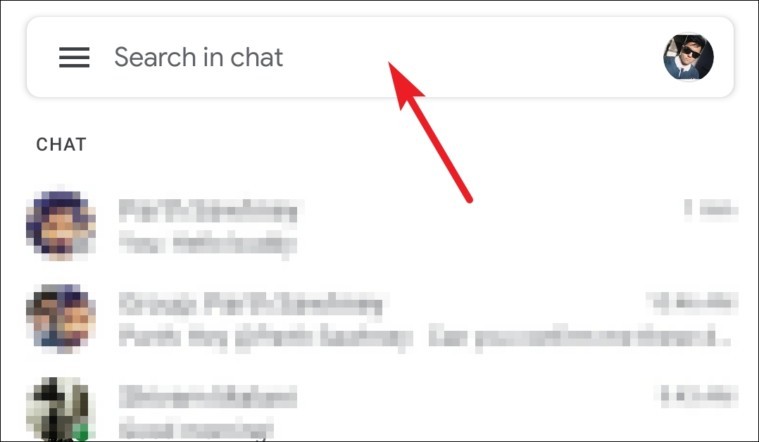
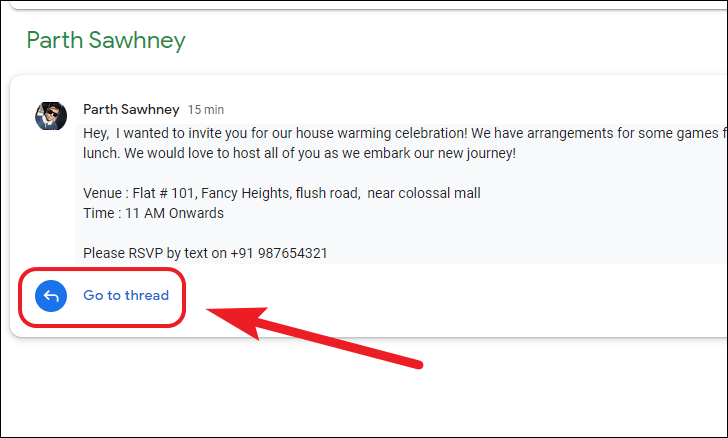
Перейдите на chat.google.com и войдите в свою учетную запись. Теперь щелкните поле поиска в верхней части экрана. Затем введите ключевое слово, которое хотите найти, и нажмите Enter .
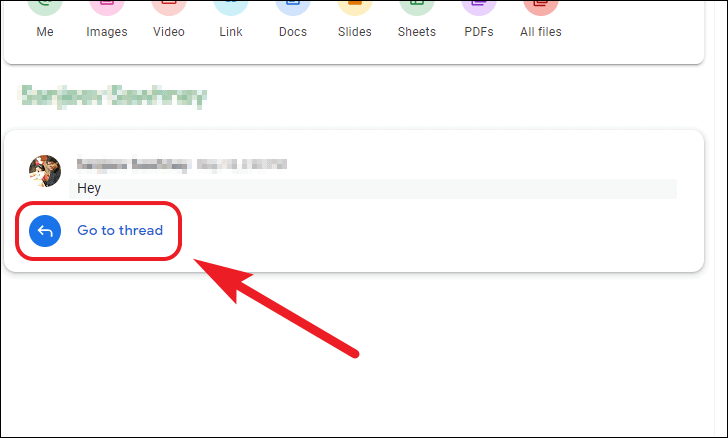
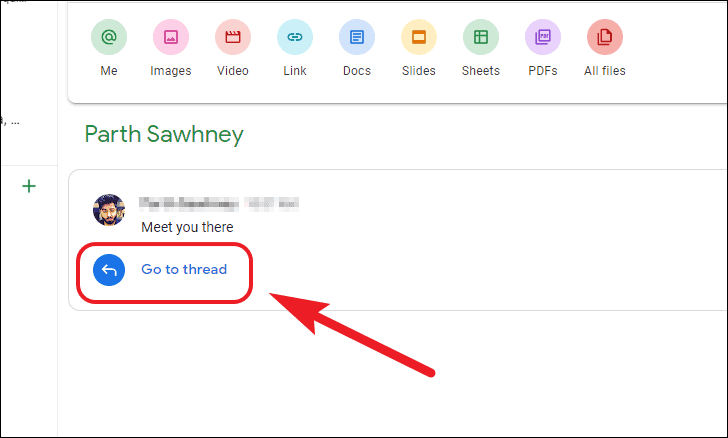
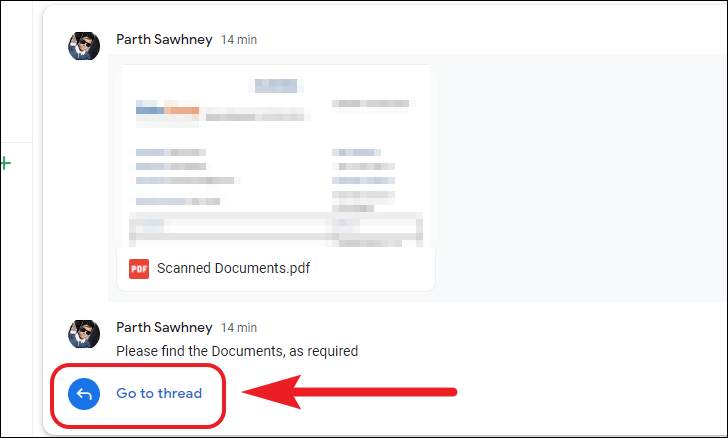
После того, как результаты поиска будут заполнены и вы сможете найти искомое сообщение, нажмите на опцию «Перейти к цепочке» в нижнем левом углу панели результатов чата.
Поиск в приложении Google Chat на мобильных устройствах
Выполнить поиск в Google Chat на мобильном устройстве так же просто, как и на компьютере.
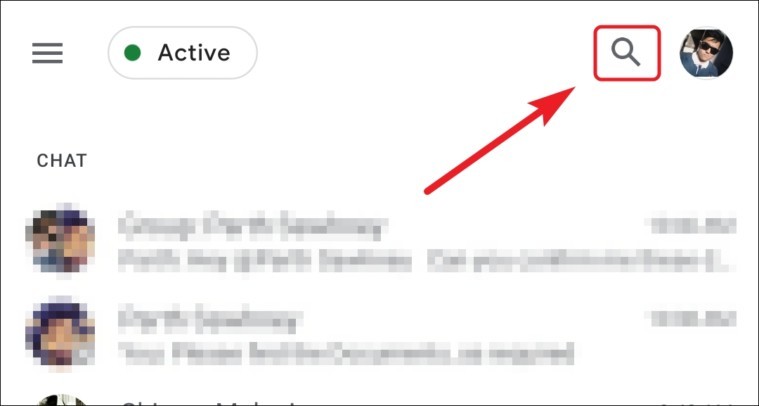
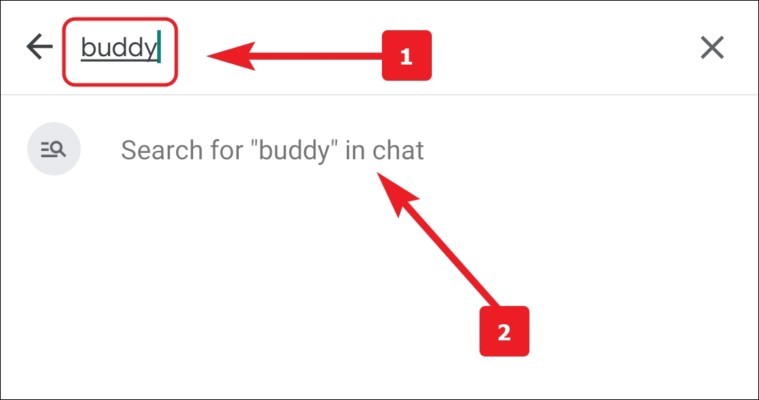
Откройте приложение Google Chat на своем телефоне, а затем нажмите значок поиска в верхнем левом углу экрана.
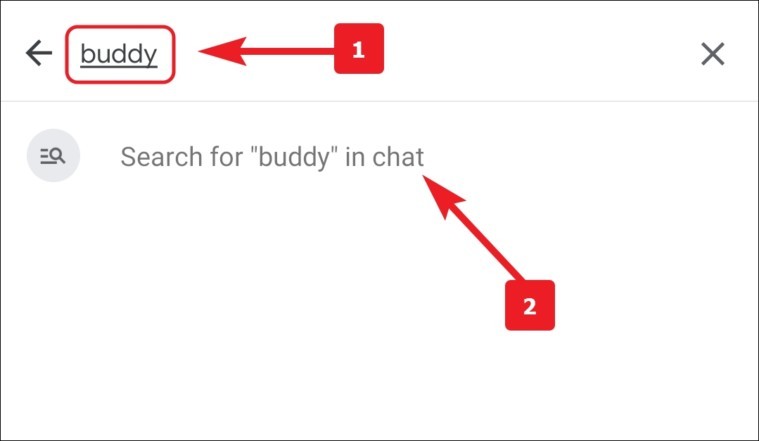
Теперь введите ключевое слово, которое вы хотите найти, и нажмите на опцию «Искать», расположенную прямо под полем поиска на экране.
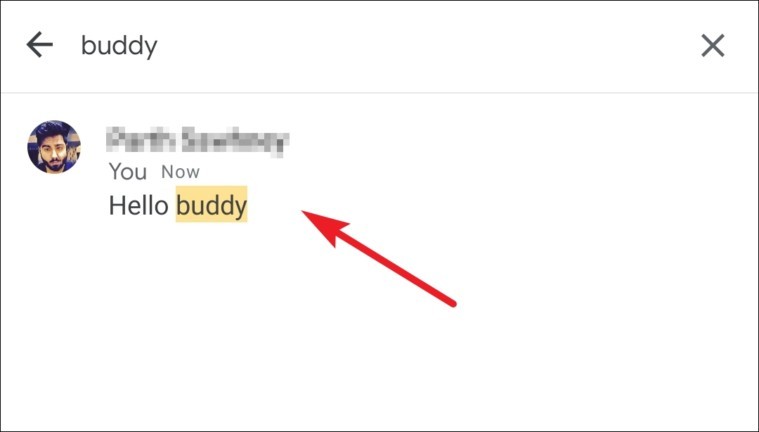
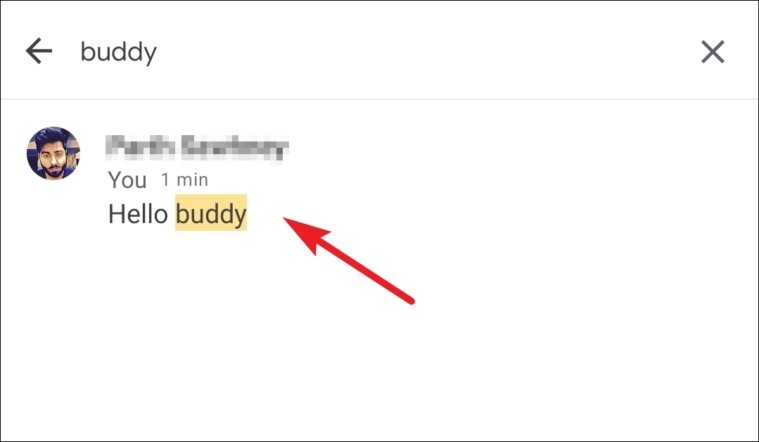
После этого, обнаружив искомое сообщение, нажмите на само сообщение, чтобы открыть всю цепочку.
Поиск в чате Google из Gmail на компьютере
Что ж, вам не нужно слишком много беспокоиться о навигации по веб-сайту, если за его разработку стоит Google.
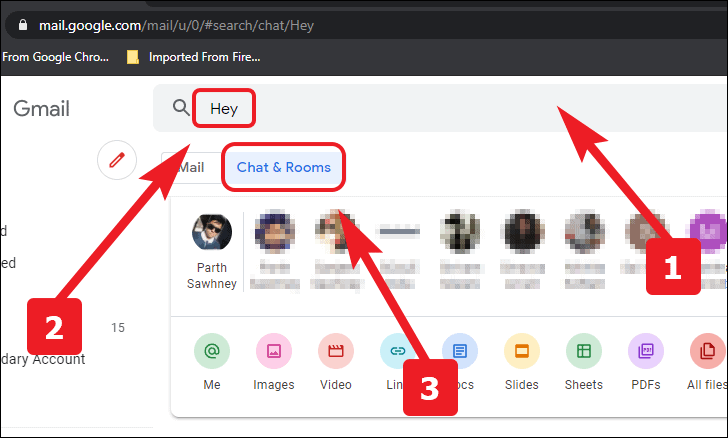
Перейдите на сайт, mail.google.com и войдите в свою учетную запись. После этого нажмите на панель поиска в верхней части страницы. Затем введите ключевое слово, которое хотите найти, и нажмите Enter . Теперь, чтобы видеть результаты поиска только из чатов и комнат, перейдите на вкладку «Чат и комнаты».
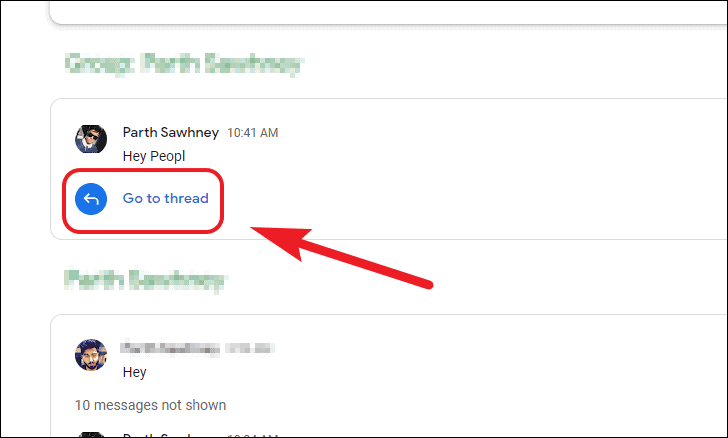
После того, как результаты поиска будут заполнены и вы сможете найти искомое сообщение, нажмите «Перейти к цепочке» в нижнем левом углу панели результатов чата.
Поиск в чате Google из приложения Gmail на мобильном устройстве
Gmail для мобильных устройств уже предлагал довольно хороший пакет, а теперь, благодаря потрясающей интеграции Google Chat, он предлагает больше, чем когда-либо.
Откройте приложение Gmail на мобильном устройстве и нажмите вкладку «Чат» на нижней панели.

Затем нажмите на поле поиска в верхней части экрана.
Теперь введите ключевое слово, которое вы хотите найти, и нажмите на опцию «Искать», расположенную прямо под полем поиска на экране.
Теперь либо нажмите на само сообщение (если вы используете устройство Android), либо нажмите на опцию «Перейти к сообщению» (если вы используете устройство iOS).
Как эффективно использовать функции поиска в чате Google
Что ж, давайте сразу же узнаем, что нового появилось.
Найти сообщение
Это очень простая и очень необходимая функция. Поскольку это в значительной степени говорит само за себя о том, что он делает. Давайте посмотрим, как это происходит.
Найти сообщение от конкретного контакта
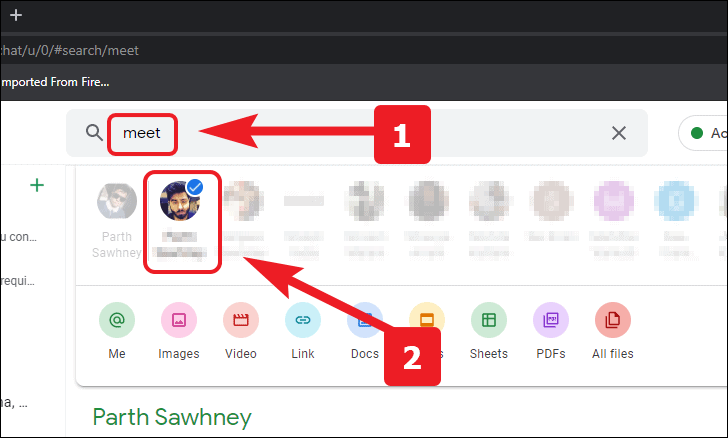
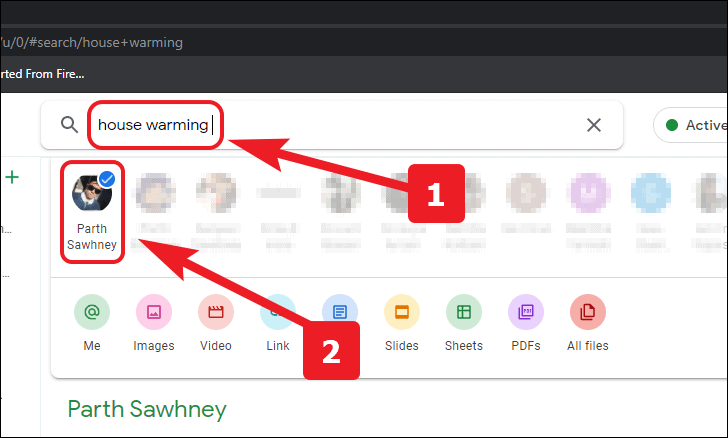
Введите ключевое слово в строке поиска, которое вы хотите найти, и нажмите Enter . После этого выберите определенный контакт для поиска в чате введенного ключевого слова.
После того, как вы нашли сообщение, которое вы нашли. Нажмите на опцию «Перейти к цепочке» в результатах поиска, чтобы просмотреть всю цепочку, содержащую это сообщение.
Найдите отправленное вами сообщение
Бывают ситуации, когда вы хотите найти конкретное сообщение, отправленное вами, поскольку оно может содержать часть важной информации, или же вы хотите отправить то же сообщение другому человеку. Будь то два из вышеперечисленных, Google Chat всегда на вашей стороне.
Введите ключевое слово в строке поиска, которое вы хотите найти, и нажмите Enter . После этого вы найдете значок своей учетной записи в крайнем левом углу списка контактов. Щелкните значок, чтобы выбрать, и появятся результаты поиска, содержащие указанное ключевое слово.
После того, как вы нашли сообщение, которое вы нашли. Нажмите на опцию «Перейти к цепочке» в результатах поиска, чтобы просмотреть всю цепочку, содержащую это сообщение.
Найти файл
С тех пор, как на Земле разразилась пандемия, почти все работают из дома. Это означает, что файлы, которые раньше не оцифровывались, теперь оцифровываются. Эта внезапная и массовая оцифровка вещей и процессов может создать положение, при котором два файла имеют одинаковое имя, а единственным отличительным фактором является тип.
Что ж, Google тоже об этом подумал. Вы можете явно искать определенный тип файла, которым вы поделились, хотя вы помните имя файла или, по крайней мере, его часть.
Введите имя или часть имени файла в строке поиска, которую вы хотите найти. Затем нажмите на тип файла, который вы ищете, из доступных опций, чтобы сузить результаты поиска.
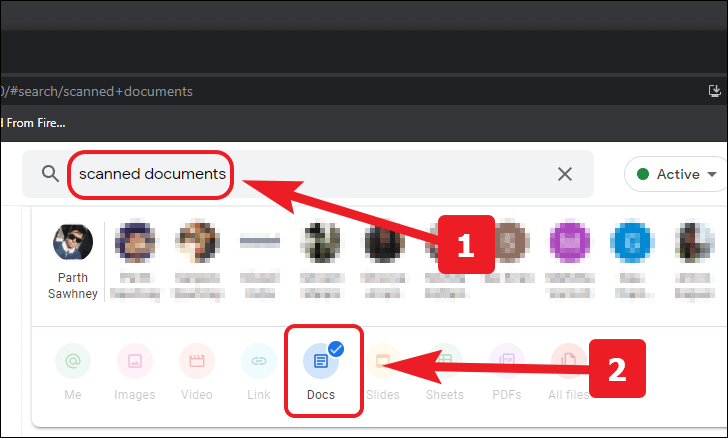
После того, как вы нашли файл, который искали. Нажмите на опцию «Перейти к цепочке» в результатах поиска, чтобы увидеть полную цепочку, содержащую этот файл.
Найдите свои упоминания
Эта функция имеет очень уникальный вариант использования и может значительно облегчить вашу жизнь. Представьте, что у вас есть чат-группа, куда приходят сотни сообщений только из-за огромного количества участников, а характер этих сообщений имеет решающее значение.
Кто-то попросил вас выполнить задание до конца дня, упомянув вас в сообщении, и вы обратили на это внимание, поскольку в данный момент были немного заняты. Теперь, в конце концов, вы не помните, в чем заключалась эта задача. Что ж, Google Chat не отменяет никаких действий, когда дело доходит до решения ваших проблем.
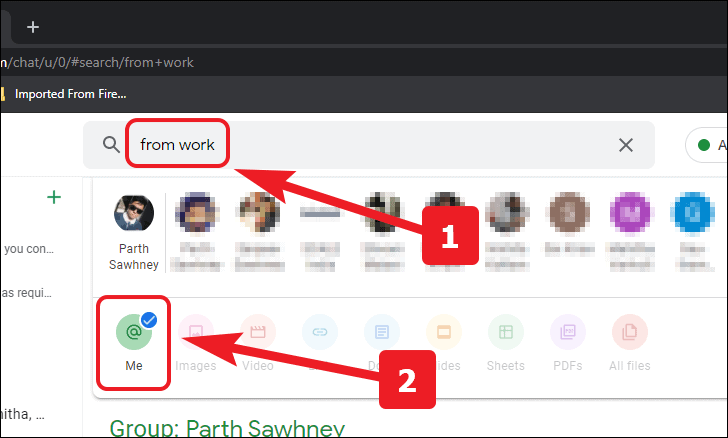
Введите ключевое слово в строке поиска, которое вы хотите найти, и нажмите Enter . После этого в крайнем левом углу строки типового файла вы найдете параметр «Я» со значком «@». Щелкните значок, чтобы выбрать, и появятся результаты поиска, содержащие указанное ключевое слово.
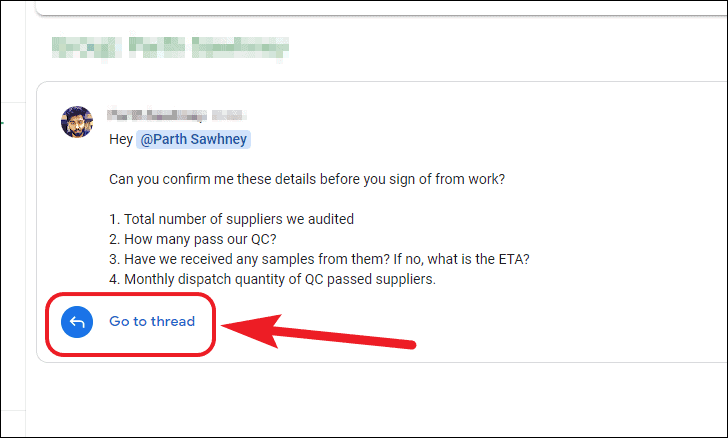
Как только вы нашли найденное вами упоминание. Нажмите на опцию «Перейти к цепочке» в результатах поиска, чтобы просмотреть всю цепочку, содержащую это упоминание.
| title | TOCTitle | ms:assetid | ms:mtpsurl | ms:contentKeyID | ms.date | mtps_version | dev_langs |
|---|---|---|---|---|---|---|---|
|
How to: Find a chat room |
How to: Find a chat room |
5cfc6e70-e254-457f-aae7-42b781224c4f |
https://msdn.microsoft.com/en-us/library/JJ937327(v=office.15) |
50877162 |
07/24/2014 |
v=office.15 |
csharp |
How to: Find a chat room
Learn how to query for a Microsoft Lync 2013 Persistent Chat room by using methods in Microsoft Lync 2013 SDK.
Applies to: Lync 2013 | Lync Server 2013
Prerequisites
The prerequisites for finding a Persistent Chat room are as follows:
-
Microsoft Lync 2013 must be installed and running on the development computer.
-
You must have sign-in credentials for Microsoft Lync Server 2013.
-
Microsoft Lync 2013 SDK must be installed on the development computer.
Core concepts to know
Understanding the following concept is essential to adding Persistent Chat to an application.
|
Topic |
Description |
|---|---|
|
Room manager |
Describes the role of the room manager object in querying for Persistent Chat rooms and getting a user’s followed chat rooms. |
Initial application state
Before you start the procedures in this topic, you must declare and initialize an instance of Microsoft.Lync.Model.LyncClient for the application and the client must be signed in. For more information, see How to: Sign a user in to Lync.
In addition to the Microsoft.Lync.Model.LyncClient instance, your application must declare a button, a text box, and a list. The text box accepts the title of the Persistent Chat room to query, the button starts the room query, and the list displays the results.
Code example
The following example references the namespaces that are used in the following Windows Forms examples.
using System;
using System.Collections.Generic;
using System.Windows.Forms;
using Microsoft.Lync.Model;
using Microsoft.Lync.Model.Room;
using System.Collections;
The following example declares the class fields that are referenced later in this topic.
        /// <summary>
        /// The LyncClient class instance that encapsulates the Lync client platform
        /// </summary>
        private LyncClient _client=null;

        /// <summary>
        /// The Room instance that a user joins from the list of rooms that are queried, searched for, or gotten from the followed rooms list
        /// </summary>
        private Room _room = null;

        /// <summary>
        /// The Uri of the local user who can post a message to a chat room
        /// </summary>
        private string _senderUri = "";

        /// <summary>
        /// A Dictionary of Room instances that represent the chat rooms which a user is following.
        /// </summary>
        private Dictionary<string, Room> _followedRoomsList = new Dictionary<string, Room>();

        /// <summary>
        /// A dictionary of all Room instances that are returned from a query for rooms whose title matches (or partially matches)
        /// a query string provided by the user.
        /// </summary>
        private Dictionary<string, Room> _roomQueryResults = new Dictionary<string, Room>();
Get the room manager
The Microsoft.Lync.Model.Room.RoomManager class lets you query or search for a chat room and get the collection of rooms that a user is following. You get a RoomManager instance and register for events on it before you can do any of the following tasks.
To get the room manager
-
Read the Client.RoomManager property of the Microsoft.Lync.Model.LyncClient instance.
-
Register for the Client.StateChanged event.
-
Register for the LyncClient.ClientDisconnected event.
-
Register for the RoomManager.RoomManagerStateChanged event.
-
Register for the RoomManager.FollowedRoomAdded event.
-
Register for the RoomManager.FollowedRoomRemoved event.
If the Client.State property returns the ClientState.SignedIn enumerator, then it calls the method described in the next section of this topic.
Code example
The following example gets the Microsoft.Lync.Model.LyncClient instance and registers for events on the LyncClient and the RoomManager.
.gif "Note") Note Note |
|---|
|
The code in this example assumes that a user has signed in to Microsoft Lync 2013. For more information, see How to: Sign a user in to Lync. |
        /// <summary>
        /// Gets the LyncClient instance that encapsulates the Lync client platform and registers
        /// for events on both LyncClient and the RoomManager.
        /// </summary>
        /// <param name="sender"></param>
        /// <param name="e"></param>
        private void btnGetLyncClient_Click(object sender, EventArgs e)
        {
            try
            {
                _client = LyncClient.GetClient();
                _client.StateChanged += new EventHandler<ClientStateChangedEventArgs>(client_StateChanged);
                _client.ClientDisconnected += new EventHandler(client_ClientDisconnected);
                _client.RoomManager.FollowedRoomAdded += new EventHandler<FollowedRoomsChangedEventArgs>(roomManager_FollowedRoomAdded);
                _client.RoomManager.FollowedRoomRemoved += new EventHandler<FollowedRoomsChangedEventArgs>(roomManager_FollowedRoomRemoved);
                _client.RoomManager.RoomManagerStateChanged += new EventHandler<RoomManagerStateChangedEventArgs>(roomManager_RoomManagerStateChanged);
                if (_client.State == ClientState.SignedIn)
                {
                    LoadInitialFollowedRoomList();
                }

            }
            catch(Exception ex)
            {
                MessageBox.Show(ex.Message);
            }
        }
Get the chat rooms in a user’s contact list
To get the chat rooms that a user has added to the local contact list, you must make sure that the Lync 2013 client is signed in and the room manager is enabled. If these two conditions are met, read the RoomManager.FollowedRooms property that returns a list of the rooms that the user is following.
To get the user’s contact list chat rooms
-
Check the state of the room manager. Proceed if the room manager is enabled.
-
Check to see whether the RoomManager.FollowedRooms property is null. If it is not null, proceed to the next step.
-
Run a foreach loop over the collection of Microsoft.Lync.Model.Room.Room objects returned by the FollowedRooms property.
-
Read the Room.Properties property enumerated by RoomProperty.Title.
-
Add each room title string to the UI list so that a user can select a followed room to join.
-
Add each room title and room to a dictionary where the room title is a key and the room is a value.
TipYou can skip this step if you intend to iterate over the whole list of rooms returned by RoomManager.FollowedRooms to find a room whose title matches the title that a user selects from the UI list. The number of followed rooms in the list can be large, depending on how many rooms a user has added to his or her contact list.
.gif "Important note") Important Important |
|---|
|
The user is automatically joined to any chat room that is in the contact list at the time that the user signs in to Lync 2013. This means that if the user is a room member, the user can catch chat room message sending events as soon as the Client.State property returns ClientState.SignedIn and you have registered for the Room.MessagesReceived event on each followed room for which the user wants to receive a message notification. |
Handle followed room collection events
When the initial list of followed rooms is filled, you must handle two events on the room manager to keep the followed room list in synchronization with the user’s contact list. When the user adds a Persistent Chat room to the contact list, the RoomManager.FollowedRoomAdded event is raised. When the user removes a room from the contact list, the RoomManager.FollowedRoomRemoved event is raised. To handle either event, call a helper method that clears the followed room list and then refills the list from the current collection of followed rooms.
Code example
The following example updates the application UI by using the current state of the client, gets the user’s URI, checks the state of the room manager, and adds the title of every room in the followed room collection to a list in the chat room UI.
        /// <summary>
        /// Loads a UI list box with the room title strings of all Persistent Chat rooms that
        /// the user has "followed"... added to the contact list.
        /// These followed rooms are locally cached by the Lync client platform.
        /// </summary>
        private void LoadInitialFollowedRoomList()
        {
            try
            {

                //Check the state of the room manager. If the room manager is not enabled, then the Lync client is not signed in.
                //Room manager is enabled by the platform after the Lync client has signed in
                if (_client.RoomManager.State == RoomManagerState.Enabled &&  _client.RoomManager.FollowedRooms != null)
                {

                    //Iterate on the collection of Room instances that are followed by the user
                    foreach (Room followedRoom in _client.RoomManager.FollowedRooms)
                    {
                        //Add a room to the Dictionary<string,Microsoft.Lync.Model.Room.Room>()
                        //Dictionary entry key is room title and value is room instance
                        _followedRoomsList.Add(followedRoom.Properties[RoomProperty.Title].ToString(), followedRoom);

                        //Add a followed room title to the UI list box of followed room titles.
                        //User selects a room title from the list box and the corresponding Room instance is obtained
                        //from the _followedRoomsList dictionary.
                        FollowedRooms_listbox.Items.Add(followedRoom.Properties[RoomProperty.Title].ToString());

                    }
                }

            }
            catch (Exception ex)
            {
                MessageBox.Show(ex.Message);
            }

        }
The following examples handle the RoomManager.FollowedRoomAdded and RoomManager.FollowedRoomRemoved events.
        /// <summary>
        /// Handles the event raised when a user adds a chat room to the contact list
        /// </summary>
        /// <param name="sender"></param>
        /// <param name="e"></param>
        public void roomManager_FollowedRoomAdded(object sender, FollowedRoomsChangedEventArgs e)
        {
            Room room=  e.Room;

            //Invoke a delegate on the UI thread to re-fill the followed rooms list
            FollowedRooms_listbox.Invoke(new UpdatedFollowedRoomListCallback(this.UpdateFollowedRoomList), room);
        }
        /// <summary>
        /// Handles the event raised when a user removes a chat room from the contact list
        /// </summary>
        /// <param name="sender"></param>
        /// <param name="e"></param>
        public void roomManager_FollowedRoomRemoved(object sender, FollowedRoomsChangedEventArgs e)
        {
            Room room = e.Room;

            FollowedRooms_listbox.Invoke(new UpdatedFollowedRoomListCallback(this.UpdateFollowedRoomList), room);
        }
The following example adds a room title to the followed room list or removes the title, depending on which of the two previous event handlers invoked it.
        //Delegate that is invoked by the Room Manager followed room collection events
        private delegate void UpdatedFollowedRoomListCallback(Room followedRoom);

        /// <summary>
        /// Updates the followed room list.
        /// This helper method is called when a room is added to the contact list or when a room is removed
        /// from the contact list.
        ///
        /// If called on FollowedRoomAdded event, then the room is not in the list box and must
        /// be added to the list box.
        ///
        /// If called on FollowedRoomRemoved event, then the room is in the list box and must be
        /// removed from the list box
        /// </summary>
        /// <param name="followedRoom"></param>
        private void UpdateFollowedRoomList(Room followedRoom)
        {
            if (_client.State == ClientState.SignedIn)
            {
                //If the followed room list box DOES NOT contain the title of the room in param 1 then
                if (!FollowedRooms_listbox.Items.Contains(followedRoom.Properties[RoomProperty.Title].ToString()))
                {
                    //Add the room to the list box
                    FollowedRooms_listbox.Items.Add(followedRoom.Properties[RoomProperty.Title].ToString());

                    //Add the room title/room to the dictionary as key/value
                    _followedRoomsList.Add(followedRoom.Properties[RoomProperty.Title].ToString(), followedRoom);
                }

                 //The followed room IS IN the list box already
                else
                {
                    //Remove the room from the list box
                    FollowedRooms_listbox.Items.Remove(followedRoom.Properties[RoomProperty.Title].ToString());

                    //Remove the room from the dictionary
                    _followedRoomsList.Remove(followedRoom.Properties[RoomProperty.Title].ToString());
                }
            }
            else
            {
                //Client is signed out and the contact list is empty. Therefore, clear the followed room list
                FollowedRooms_listbox.Items.Clear();
            }

        }
Query for a chat room
The next procedure assumes that a user wants to participate in a chat room that is not being followed. To get such a room, query for the desired room by a name or partial name provided by the user.
To query for a chat room
-
Clear the query results list from previous query results.
-
Call the RoomManager.BeginQueryRooms method and pass a full or partial room title to query for, the search mode, and a method to be called when the query is completed.
NoteThe regular search mode searches room titles while the extended search mode searches among room titles and room descriptions.
-
Get the query results by calling the RoomManager.EndQueryRooms method.
A list of rooms is returned from this method call.
-
Iterate on the room list and add the title of each room to the list that you added to your UI.
-
Add the title of a room and a reference to the room as a key/value pair to an IDictionary<string, Microsoft.Lync.Model.Room.Room> class field.
When a user selects a room title from the list, you get the room out of the dictionary by getting the value by the title key string.
Code example
The following example starts an asynchronous query for a chat room based on a name supplied by a user.
        /// <summary>
        /// Query for a chat room based on a partial or full room title.
        /// </summary>
        /// <param name="sender"></param>
        /// <param name="e"></param>
        private void btnSearchRoom_Click(object sender, EventArgs e)
        {
            //Clear the UI query results text box of the results for the previous query.
            QueryResults_Listbox.Items.Clear();
            try
            {

                //Start asynchronous room query with the string supplied by the user in the UI text entry field.
                _client.RoomManager.BeginQueryRooms(txtSearchRoom.Text, RoomSearchModeType.Regular, QueryRoomsCallback, null);


            }
            catch (Exception ex)
            {
                MessageBox.Show(ex.Message);
            }

        }
The following example declares private delegates that are invoked on the UI thread by platform thread callback methods.
        private delegate void UpdateRoomUri_Textbox(string roomUri);
        public delegate void UpdateSearchRoomsResultCallback(string roomName);
The following example is called by the platform when the chat room query operation is finished.
       /// <summary>
        /// Handles the asynchronous callback from the Lync API platform when the room query operation is completed
        /// </summary>
        /// <param name="ar"></param>
        private void QueryRoomsCallback(IAsyncResult ar)
        {
            try
            {
                //Get the room list that is the result of the query.
                IList<Room> searchResult = _client.RoomManager.EndQueryRooms(ar);

                //Display the room title of the first room in the results list.
                //QueryRoomsCallback is invoked on the platform thread which does not own the room Uri text box. The room Uri text box invokes a
                //delegate on the UI thread.
                roomUri_Textbox.Invoke(new UpdateRoomUri_Textbox(roomUri_TextboxUpdate), searchResult[0].Properties[RoomProperty.Uri].ToString());

                //Iterate on the list of chat rooms returned by the query and add each room title to a query results list box on the UI
                foreach (Room room in searchResult)
                {

                    //Invoke a delegate on the UI thread that updates a list box with the title of a chat room.
                    QueryResults_Listbox.Invoke(new UpdateSearchRoomsResultCallback(this.UpdateSearchRoomResults), room.Properties[RoomProperty.Title].ToString());

                    //Add the title of a room as dictionary key and the room itself as a dictionary value.
                    _roomQueryResults.Add(room.Properties[RoomProperty.Title].ToString(), room);
                }
            }

            //An exception is raised if the chat room query did not return any rooms. No rooms are returned when the query string does
            //not match any chat room created on Persistent Chat server.
            catch (Exception ex)
            {
                //Display the exception message.
                MessageBox.Show("Exception on EndQueryRooms " + ex.Message);
            }
        }
The following examples comply with the delegate signatures in the previous delegate declarations. The example methods are invoked by the previous example and update UI controls to display the results of a room query.
        /// <summary>
        /// Invoked to update a UI label text property with the Uri of a chat room to be joined.
        /// </summary>
        /// <param name="uri"></param>
        private void roomUri_TextboxUpdate(string uri)
        {
            roomUri_Textbox.Text = uri;
        }
        /// <summary>
        /// Invoked to update a UI list box with the title of a room
        /// </summary>
        /// <param name="roomTitle"></param>
        private void UpdateSearchRoomResults(string roomTitle)
        {
            QueryResults_Listbox.Items.Add(roomTitle);
        }
Application state after completing all tasks
The user has joined a chat room and can start to read messages posted to the chat room, post messages to the chat room, and see a roster of participants in the room. You can verify this state by reading the Room.JoinedState and Room.Participants properties on the room obtained from the appropriate example dictionary. If the joined state is RoomJoinState.Success and the Participants property returns a collection of Microsoft.Lync.Model.Room.RoomUser instances, the user can participate in the room. You should now receive the events that you registered to receive for all chat rooms.
-
For information about displaying a chat room roster, see How to: View chat room participants.
-
For information about obtaining messages that are posted to the chat room, see How to: Read messages sent to a chat room.
-
For information about posting messages to a chat room, see How to: Send a message to a chat room.
-
For information about filtering and formatting messages that are pending a post to a chat room, see How to: Filter an outgoing message from a local user to a chat room.
Code examples: Persistent chat room query utility
The following example declares a Windows Form that accepts a string as a partial room name and returns a list of Persistent Chat rooms whose title contains the search string.
namespace RoomQuery
{
    partial class RoomQuery
    {
        /// <summary>
        /// Required designer variable.
        /// </summary>
        private System.ComponentModel.IContainer components = null;

        /// <summary>
        /// Clean up any resources being used.
        /// </summary>
        /// <param name="disposing">true if managed resources should be disposed; otherwise, false.</param>
        protected override void Dispose(bool disposing)
        {
            if (disposing && (components != null))
            {
                components.Dispose();
            }
            base.Dispose(disposing);
        }

        #region Windows Form Designer generated code

        /// <summary>
        /// Required method for Designer support - do not modify
        /// the contents of this method with the code editor.
        /// </summary>
        private void InitializeComponent()
        {
            this.panel1 = new System.Windows.Forms.Panel();
            this.LyncClientState_Label = new System.Windows.Forms.Label();
            this.label1 = new System.Windows.Forms.Label();
            this.QueriedRooms_ListBox = new System.Windows.Forms.ListBox();
            this.RoomQueryString_TextBox = new System.Windows.Forms.TextBox();
            this.label2 = new System.Windows.Forms.Label();
            this.StartQuery_Button = new System.Windows.Forms.Button();
            this.panel1.SuspendLayout();
            this.SuspendLayout();
            //
            // panel1
            //
            this.panel1.Controls.Add(this.LyncClientState_Label);
            this.panel1.Controls.Add(this.label1);
            this.panel1.Location = new System.Drawing.Point(21, 3);
            this.panel1.Name = "panel1";
            this.panel1.Size = new System.Drawing.Size(276, 23);
            this.panel1.TabIndex = 1;
            //
            // lblLyncClient
            //
            this.LyncClientState_Label.AutoSize = true;
            this.LyncClientState_Label.Location = new System.Drawing.Point(111, 4);
            this.LyncClientState_Label.Name = "lblLyncClient";
            this.LyncClientState_Label.Size = new System.Drawing.Size(25, 13);
            this.LyncClientState_Label.TabIndex = 1;
            this.LyncClientState_Label.Text = "Null";
            //
            // label1
            //
            this.label1.AutoSize = true;
            this.label1.Location = new System.Drawing.Point(3, 5);
            this.label1.Name = "label1";
            this.label1.Size = new System.Drawing.Size(87, 13);
            this.label1.TabIndex = 0;
            this.label1.Text = "Lync Client State";
            //
            // QueriedRooms_ListBox
            //
            this.QueriedRooms_ListBox.FormattingEnabled = true;
            this.QueriedRooms_ListBox.Location = new System.Drawing.Point(21, 80);
            this.QueriedRooms_ListBox.Name = "QueriedRooms_ListBox";
            this.QueriedRooms_ListBox.Size = new System.Drawing.Size(276, 186);
            this.QueriedRooms_ListBox.TabIndex = 53;
            //
            // RoomQueryString_TextBox
            //
            this.RoomQueryString_TextBox.Location = new System.Drawing.Point(103, 48);
            this.RoomQueryString_TextBox.Name = "RoomQueryString_TextBox";
            this.RoomQueryString_TextBox.Size = new System.Drawing.Size(100, 20);
            this.RoomQueryString_TextBox.TabIndex = 54;
            //
            // label2
            //
            this.label2.AutoSize = true;
            this.label2.Location = new System.Drawing.Point(18, 51);
            this.label2.Name = "label2";
            this.label2.Size = new System.Drawing.Size(76, 13);
            this.label2.TabIndex = 55;
            this.label2.Text = "Room to query";
            //
            // StartQuery_Button
            //
            this.StartQuery_Button.Location = new System.Drawing.Point(222, 48);
            this.StartQuery_Button.Name = "StartQuery_Button";
            this.StartQuery_Button.Size = new System.Drawing.Size(75, 23);
            this.StartQuery_Button.TabIndex = 56;
            this.StartQuery_Button.Text = "Go";
            this.StartQuery_Button.UseVisualStyleBackColor = true;
            this.StartQuery_Button.Click += new System.EventHandler(this.StartQuery_Button_Click);
            //
            // RoomQuery
            //
            this.AutoScaleDimensions = new System.Drawing.SizeF(6F, 13F);
            this.AutoScaleMode = System.Windows.Forms.AutoScaleMode.Font;
            this.ClientSize = new System.Drawing.Size(324, 292);
            this.Controls.Add(this.StartQuery_Button);
            this.Controls.Add(this.label2);
            this.Controls.Add(this.RoomQueryString_TextBox);
            this.Controls.Add(this.QueriedRooms_ListBox);
            this.Controls.Add(this.panel1);
            this.Name = "RoomQuery";
            this.Text = "Simple Group Chat";
            this.Load += new System.EventHandler(this.RoomQuery_Load);
            this.panel1.ResumeLayout(false);
            this.panel1.PerformLayout();
            this.ResumeLayout(false);
            this.PerformLayout();

        }

        #endregion

        private System.Windows.Forms.Panel panel1;
        private System.Windows.Forms.Label LyncClientState_Label;
        private System.Windows.Forms.Label label1;
        private System.Windows.Forms.ListBox QueriedRooms_ListBox;
        private System.Windows.Forms.TextBox RoomQueryString_TextBox;
        private System.Windows.Forms.Label label2;
        private System.Windows.Forms.Button StartQuery_Button;
    }
}
The following example is the interaction logic for the Form declared in the previous example.
using System;
using System.Collections.Generic;
using System.Windows.Forms;
using Microsoft.Lync.Model;
using Microsoft.Lync.Model.Room;
using System.Collections;

namespace RoomQuery
{
    public partial class RoomQuery : Form
    {

        /// <summary>
        /// The LyncClient class instance that encapsulates the Lync client platform
        /// </summary>
        private LyncClient _client=null;

        /// <summary>
        /// A dictionary of all Room instances that are returned from a query for rooms whose title matches (or partially matches)
        /// a query string provided by the user.
        /// </summary>
        private Dictionary<string, Room> _roomQueryResults = new Dictionary<string, Room>();

        /// <summary>
        /// Simple chat window constructor
        /// </summary>
        public RoomQuery()
        {
            InitializeComponent();
        }

        /// <summary>
        /// Form constructor
        /// </summary>
        /// <param name="sender"></param>
        /// <param name="e"></param>
        private void RoomQuery_Load(object sender, EventArgs e)
        {

            try
            {
                //Get the API entry point
                _client = LyncClient.GetClient();

                //Register for the state changed event on the lync client platform.
                _client.StateChanged += new EventHandler<ClientStateChangedEventArgs>(client_StateChanged);
                _client.ClientDisconnected += new EventHandler(client_ClientDisconnected);

                //Set the enable state of the query start button based on the state of the RoomManager.
                EnableDisableStartQueryButton();

                //Register for room manager state event. If room manager is disabled, disable the "Go" button on the UI so that
                //a user does not attempt to query the room manager for a room.
                if (_client.RoomManager.State == RoomManagerState.Disabled)
                {
                    MessageBox.Show("Persistent Chat Server is not reachable. Quitting");
                }
                _client.RoomManager.RoomManagerStateChanged += roomManager_RoomManagerStateChanged;

                //Display the current sign in state of the Lync client.
                RefreshClientStateLabel();
            }
            catch (Exception ex)
            {
                MessageBox.Show(ex.Message);
            }


        }

        /// <summary>
        /// Handles the event raised if the state of the RoomManager changes.
        /// Response to state change i
        /// </summary>
        /// <param name="sender"></param>
        /// <param name="e"></param>
        void roomManager_RoomManagerStateChanged(object sender, RoomManagerStateChangedEventArgs e)
        {
            //Invoke a delegate on UI thread to enable or disable room query start button
            StartQuery_Button.Invoke(new EnableDisableStartQueryButtonDelegate(EnableDisableStartQueryButton));
        }

        private delegate void EnableDisableStartQueryButtonDelegate();


        /// <summary>
        /// Enables or disables the room query button based on the current state of the RoomManager
        /// </summary>
        private void EnableDisableStartQueryButton()
        {
            if (_client.RoomManager.State == RoomManagerState.Enabled)
            {
                StartQuery_Button.Enabled = true;
            }
            else
            {
                StartQuery_Button.Enabled = false;
            }
        }

        /// <summary>
        /// Handles the client state change event
        /// Updates the client state label on the UI
        /// </summary>
        /// <param name="sender"></param>
        /// <param name="e"></param>
        public void client_StateChanged(object sender, ClientStateChangedEventArgs e)
        {
            //Invoke delegate on UI thread that updates client state label
            this.Invoke(new RefreshClientStateLabelDelegate(RefreshClientStateLabel));

            //Invoke a delegate on UI thread to enable or disable room query start button
            StartQuery_Button.Invoke(new EnableDisableStartQueryButtonDelegate(EnableDisableStartQueryButton));

        }

        public void client_ClientDisconnected(object sender, EventArgs e)
        {
            //Invoke delegate on UI thread that updates client state label
            this.Invoke(new RefreshClientStateLabelDelegate(RefreshClientStateLabel));
        }

        private delegate void RefreshClientStateLabelDelegate();
        /// <summary>
        /// Updates client state label based on current state of the client
        /// </summary>
        public void RefreshClientStateLabel()
        {
            if (_client == null)
            {
                LyncClientState_Label.Text = "Null";
            }
            else
            {
                LyncClientState_Label.Text = _client.State.ToString();

            }
        }

        /// <summary>
        /// Handles the click event on the StartRoomQuery button
        /// If the RoomManager.State is not RoomManagerState.Enbled, the application logic
        /// disables the StartRoomQuery button.
        /// </summary>
        /// <param name="sender"></param>
        /// <param name="e"></param>
        private void StartQuery_Button_Click(object sender, EventArgs e)
        {
            //Clear the current contents of the room listbox
             QueriedRooms_ListBox.Items.Clear();

            //Start asynchronous room query operation with the room name or partial room name
            //entered by the user.
             _client.RoomManager.BeginQueryRooms(RoomQueryString_TextBox.Text, RoomSearchModeType.Regular, RoomQueryCallback, null);
        }

        /// <summary>
        /// Invoked by the platform when the room query operation finishes.
        /// </summary>
        /// <param name="ar"></param>
        private void RoomQueryCallback(System.IAsyncResult ar)
        {
            //Get the results of the query.
           IList<Room> roomResults = _client.RoomManager.EndQueryRooms(ar);

            //Load the resulting room collection into the room list on the UI
           foreach (Room r in roomResults)
           {
               //If this room is not already in the results dictionary then add it to the dictionary.
               if (!_roomQueryResults.ContainsKey(r.Properties[RoomProperty.Title].ToString()))
               {
                   //Room title and room are key/value pair. Added to dictionary to be retrieved based on
                   //room title when user selects a room title from the UI list.
                   _roomQueryResults.Add(r.Properties[RoomProperty.Title].ToString(), r);

                   //Invoke a delegate on the UI thread to add a room to the room list on the UI
                   QueriedRooms_ListBox.Invoke(new AddToQueriedRoomsListDelegate(this.AddToQueriedRoomsList), r.Properties[RoomProperty.Title].ToString());
               }
           }
        }

        private delegate void AddToQueriedRoomsListDelegate(string roomTitle);

        /// <summary>
        /// Adds the title of a room to the room list on the UI
        /// </summary>
        /// <param name="roomTitle"></param>
        private void AddToQueriedRoomsList(string roomTitle)
        {
            QueriedRooms_ListBox.Items.Add(roomTitle);
        }
    }
}
Next steps
-
How to: Send a message to a chat room
-
How to: Read messages sent to a chat room
-
How to: View chat room participants
See also
-
What you can do with Persistent Chat
-
Code samples: Lync SDK
Пользователи могут загрузить VRChat совершенно бесплатно, а те, у кого есть VR-оборудование, найдут 3D-социальное приложение невероятно интересным. Приложение позволяет пользователям отображать себя с помощью аватаров и заводить друзей. Steam также популярен среди геймеров, так как позволяет им иметь доступ к обширной библиотеке в одном месте.
Если вас интересует, можно ли добавить друзей из Steam в VRChat, но, к сожалению, это невозможно. В настоящее время нет прямого способа добавления друзей на прежней платформе. Ознакомьтесь с некоторыми альтернативами.
Добавление друзей
VRChat есть в Steam как игра, но списки друзей в обоих случаях не взаимозаменяемы. Это означает, что вам нужно будет добавить людей, используя игровую систему или Steam.
Добавление друзей в VRChat
Чтобы добавить кого-то в VRChat, вам нужно&rsquo ;нужно выполнить следующие действия.
- В VRChat откройте Быстрое меню.
- Наведите лазер выбора на пользователя и нажмите на него.
- Выбрать “Отправить запрос на добавление в друзья”
- Подождите, пока человек принять.
- После этого вы сможете найти их в своей “Соцсети” меню.


Этот метод работает для пользователей в той же комнате, что и вы. Для тех, кто не находится рядом, есть другой процесс.
- Откройте быстрое меню в VRChat.
- Выберите “Social” меню.
- Найдите панель поиска в правом верхнем углу и выберите его.
- Введите имя пользователя.
- Нажмите “OK”
- Найдите человека, которого вы хотите, из списка результатов.
- Нажмите на него и выберите “Отправить запрос на добавление в друзья”
- Подождите, пока пользователь согласится.
- Теперь вы должны увидеть их в “Social” меню.


Оба описанных выше набора шагов будут работать независимо от того, используете ли вы гарнитуру виртуальной реальности или мышь и клавиатуру. Быстрое меню работает почти одинаково, независимо от вашего контроллера.
Находясь на веб-сайте VRChat Home, пользователи также могут отправлять другим URL-адреса своих страниц профиля. Им нужно только войти в систему, а затем нажать на значок своего аватара. URL-адрес позволяет другим пользователям веб-сайта добавлять их.
Чтобы принять запросы на добавление в друзья, вам необходимо пройти через Быстрое меню.
- После получения уведомления откройте Быстрое меню.
- Перейдите в раздел “Социальные сети” меню.
- Найдите запрос на добавление в друзья и примите его.
- После этого человек появится в вашем списке друзей.


Добавление друзей в Steam
Если вы также хотите добавить человека в Steam, вы можете воспользоваться одним из нескольких способов.
Первый способ включает в себя поиск друга с помощью настольного клиента или веб-версии.
- Откройте Steam на своем ПК.
- Наведите курсор на свое имя пользователя Steam.
- Выберите “Друзья” из списка.
- Выберите “Добавить друга”
- Нажмите “Начать поиск”
- Введите имя друга и нажмите «Добавить в друзья». ”
- Выберите “ОК”
< img src=»/wp-content/uploads/2022/05/a71cafe3471f8089b925efc837f070c5.png» /> - Подождите, пока другой пользователь примет ваш запрос на добавление в друзья.
- Выберите “Друзья” в приложении Steam на смартфоне.
- Нажмите “Добавить Друг.”
- Прокрутите вниз и выберите “Искать Друзья.”
- Выберите “Начать поиск”
- Введите имя пользователя, которое хотите добавить.
- Нажмите для соответствующего пользователя.
- Выберите “Добавить в друзья” и “ОК”
- Подождите, пока человек примет ваш запрос на добавление в друзья.
- Откройте Steam на своем компьютере.
- Наведите указатель мыши на свое имя пользователя.
- Выберите “Друзья”
- Выберите “Добавить друга .”
- Посмотрите на восьмизначный код.
- Расскажите об этом человеку через голосовой чат.
- Дождитесь запроса на добавление в друзья.


Сначала вам нужно будет спросить у человека его имя пользователя Steam. Вы можете попросить в VRChat сразу найти нужную учетную запись.
Добавление человека с помощью мобильного приложения Steam происходит следующим образом:


Отправить человеку свой код друга и наоборот тоже можно.


Добавление друзей в VRChat открывает новые способы наслаждаться виртуальным миром. Помимо информации об экземпляре и мире друга, вы также можете настроить частные комнаты для общения. У экземпляров есть множество вариантов присоединения, например только для друзей и только по приглашению.
Добавление одного человека может также привести к добавлению еще больше друзей. В некоторых экземплярах включены параметры присоединения «Друзья+» или «Пригласить+». Первый позволяет друзьям друзей входить и тусоваться.
Благодаря множеству миров, созданных сообществом, вы можете выбрать что-то, что соответствует настроению или увлечениям вашего круга друзей. Вот подборка популярных миров VRChat.
Комната летнего уединения
Это пентхаус, созданный LuciferMStar, с мягким освещением и темным небом. Это идеальное место, чтобы провести вечер и поговорить о последних событиях. Наличие дополнительной мебели в мире также является большим плюсом для погружения.
Sky Camp
Sky Camp уникален тем, что он сочетает в себе мультяшный художественный стиль с широко распространенным реализмом миров VRChat. Это виртуальный кемпинг с костром, так что вы можете сесть и поговорить с тем, кто находится в инстансе. Поскольку в нем меньшее количество игроков, он больше подходит для небольших групп.
The Great Pug
Любой, кто играл в VRChat какое-то время, знает о The Great Pug, известном своей эстетикой паба. Это классический паб с едой, напитками, баром и многим другим. Некоторым нравится отыгрывать роли в этом мире, другим нравится атмосфера и возможность пообщаться.
Zombie Tag
Zombie Tag – увлекательный мир для игр ярлык. Один человек начинает как “зомби” и должен заразить как можно больше игроков. Игра заканчивается, когда все становятся “этим”
Многим игрокам нравится Zombie Tag, поэтому вы можете легко найти некоторые экземпляры режима.
Пожирание
Если вы поклонник хоррор-игр, The Devouring поможет вам в этом. Это шестичасовая история, полная пугающих моментов, в которую вы можете играть в одиночку или с тремя друзьями.
Святилище огня
Поклонники Dark Souls узнают это место так как это место в популярной игре. Игроки, которым нравится франшиза Dark Souls, могут даже открыть множество секретов в мирах VRChat.
Например, падение на дно мира. Игроков встретит классическая игра “YOU DIED” text.
Дополнительные часто задаваемые вопросы
Будет ли реализовано добавление друзей Steam в VRChat?
По состоянию на 2022 год никаких изменений со стороны VRChat не произошло. Поэтому нам остается только ждать и смотреть, внесут ли разработчики подобное изменение.
Можно ли играть в VRChat на смартфоне?
Да, вы можете играть в VRChat на мобильном устройстве. Прежде чем играть в нее, вам нужно будет создать профиль.
Нужна ли вам гарнитура VR для игры в VRChat?
Нет, в игру можно играть, используя мышь, клавиатуру и монитор. Приложение будет нормально работать без гарнитуры VR, хотя при ее использовании эффект присутствия будет более захватывающим.
Погружение в новый мир
К сожалению, Разработчики VRChat могут запретить пользователям напрямую добавлять друзей в Steam. К счастью, вы по-прежнему можете добавлять людей в Steam стандартными методами, даже если это не так эффективно. Мы можем только надеяться, что эта функция когда-нибудь появится.
Добавляли ли вы друзей из VRChat в свой список друзей в Steam и наоборот? Должны ли разработчики сделать добавление друзей из Steam в VRChat приоритетом? Дайте нам знать в разделе комментариев ниже.
